THE BLOG

Giving Our Kitchen The Wow Factor
The Start
The kitchen is probably the biggest revamp you’ll ever have to do and the one that is the most permanent in the house. You can’t just paint over it if you decide you hate it. It’s staying with you for at least 10 years so it can be really daunting knowing where to start.
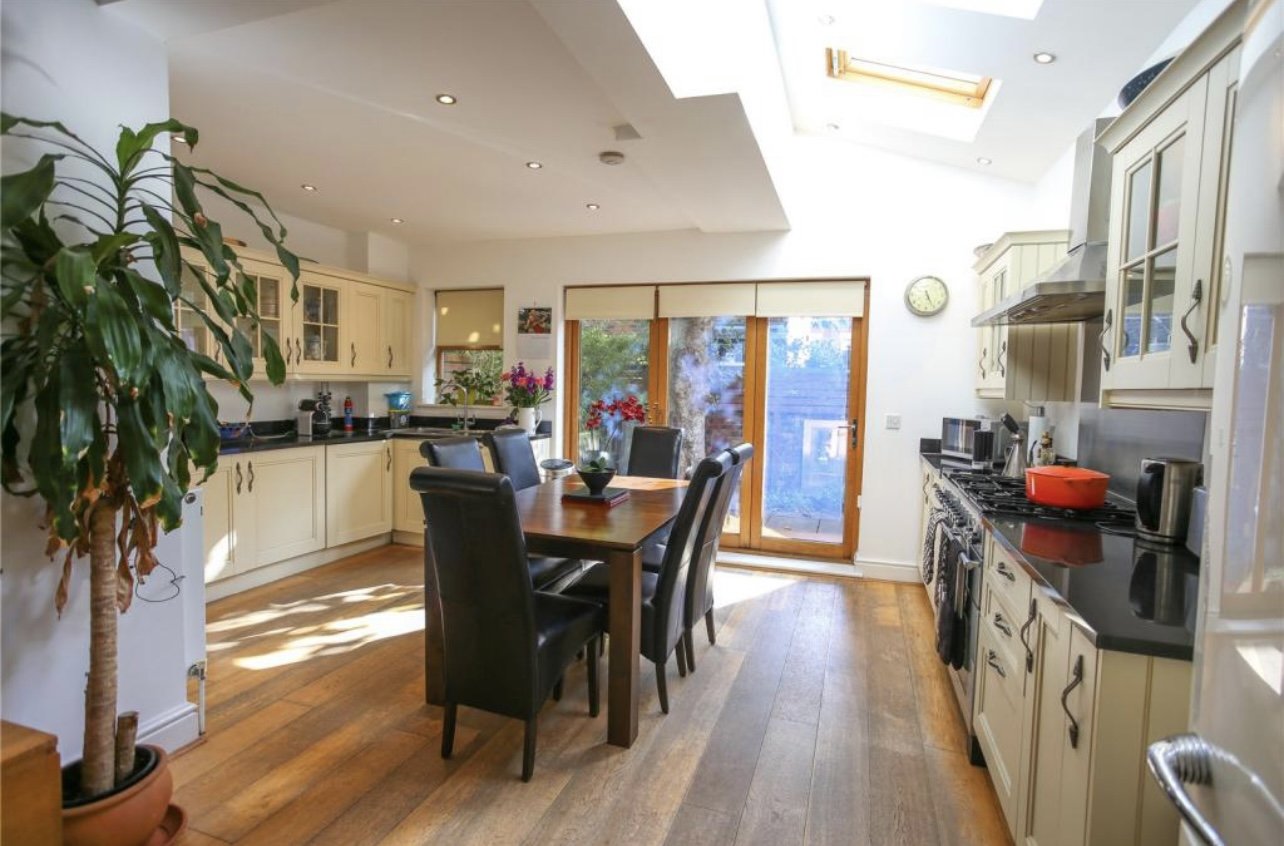
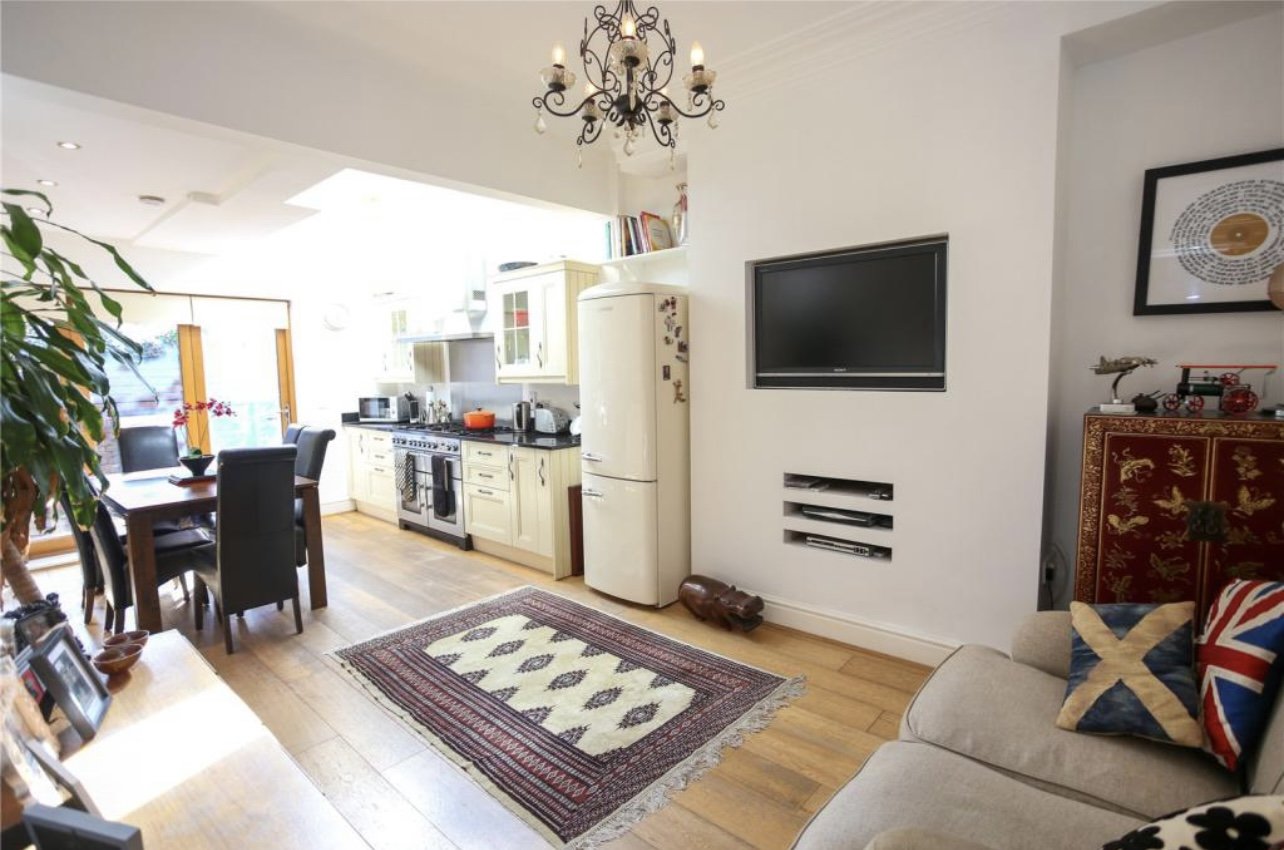
We moved into this house in March 2021 and decided to focus on some other smaller/easier rooms first. The quick fixes if you like. As you can see from the estate agent photos, the previous owners used this room as a kitchen/diner/living room all in one so the layout was suited to that purpose. If you followed me for a while, you’ll know that dining rooms/dinner parties and keeping living separate is my jam so we ended up with a huge “dancefloor” in the middle of the kitchen. This layout just wasn’t working for us.
I design kitchens for a living - albeit CGI kitchens - but I’ve learnt a lot along the way and three things I really, really wanted one were :
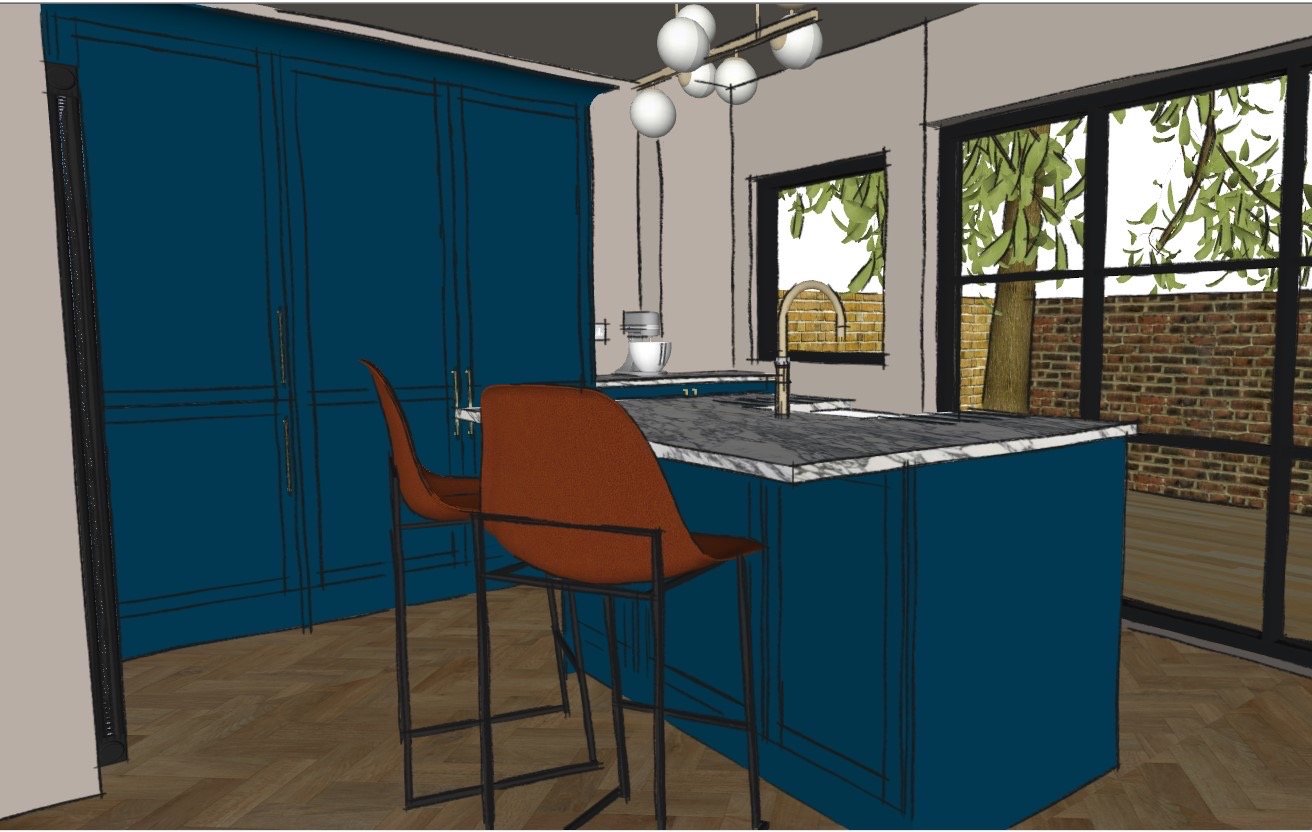
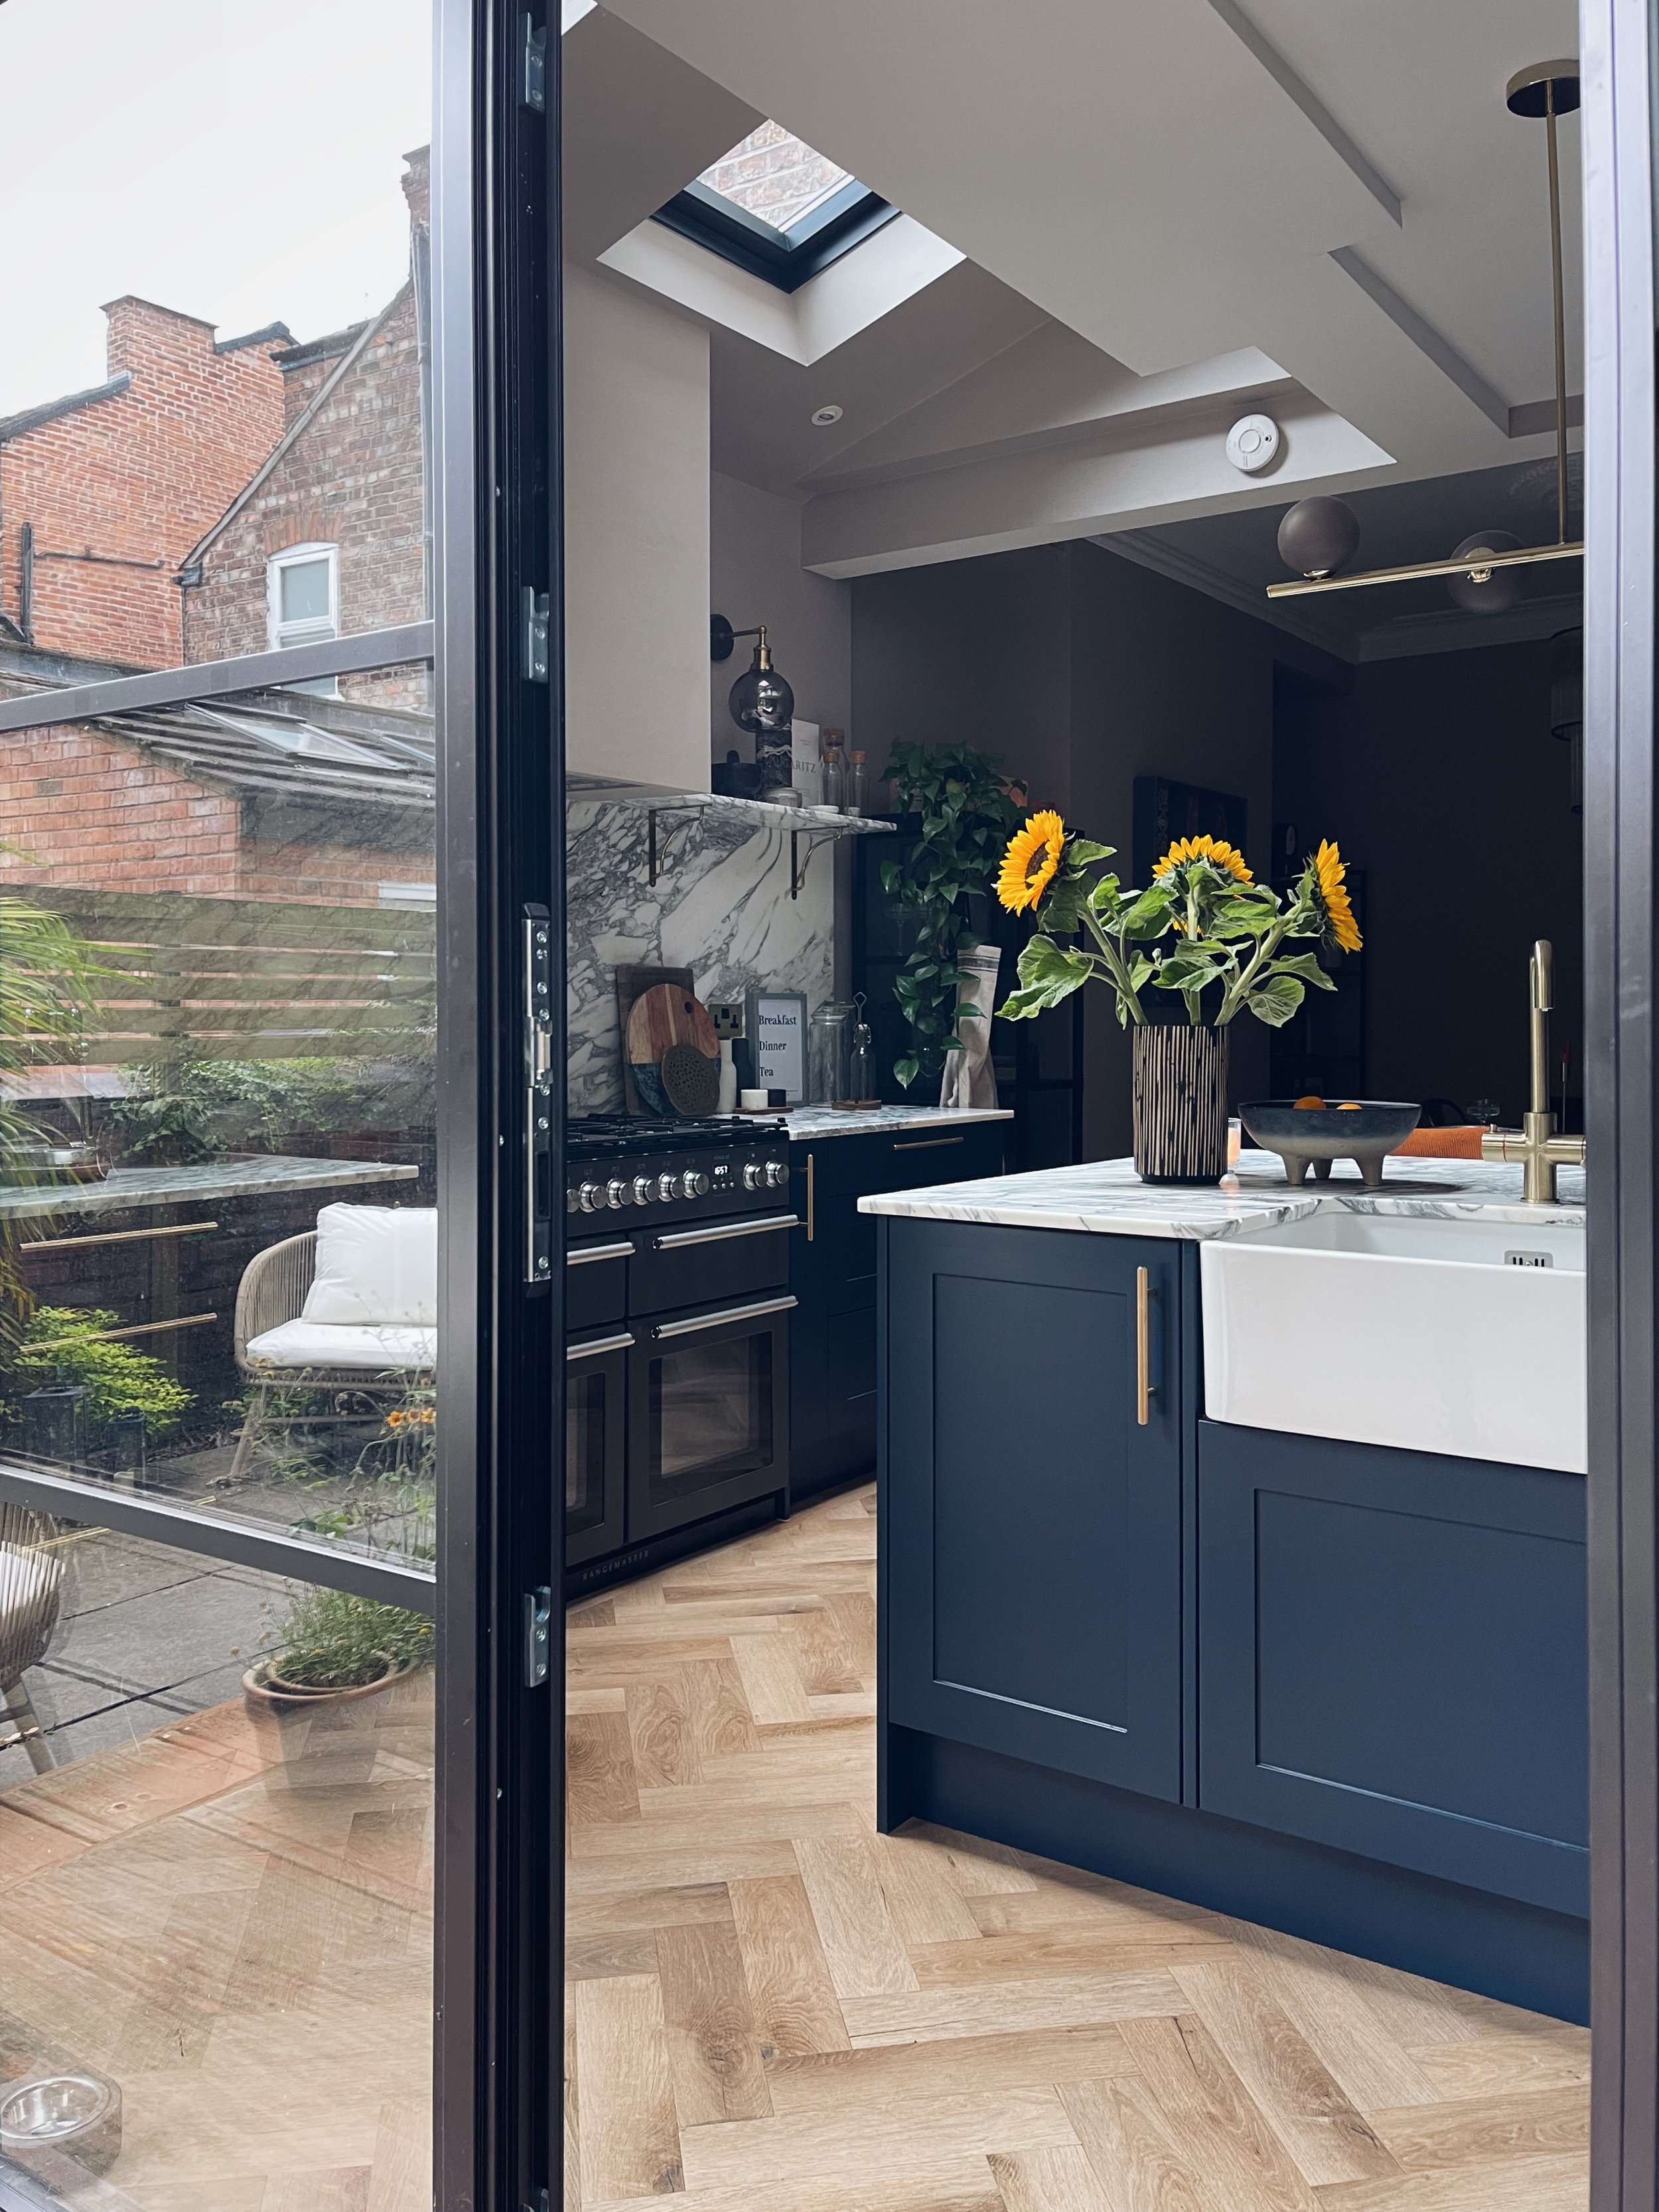
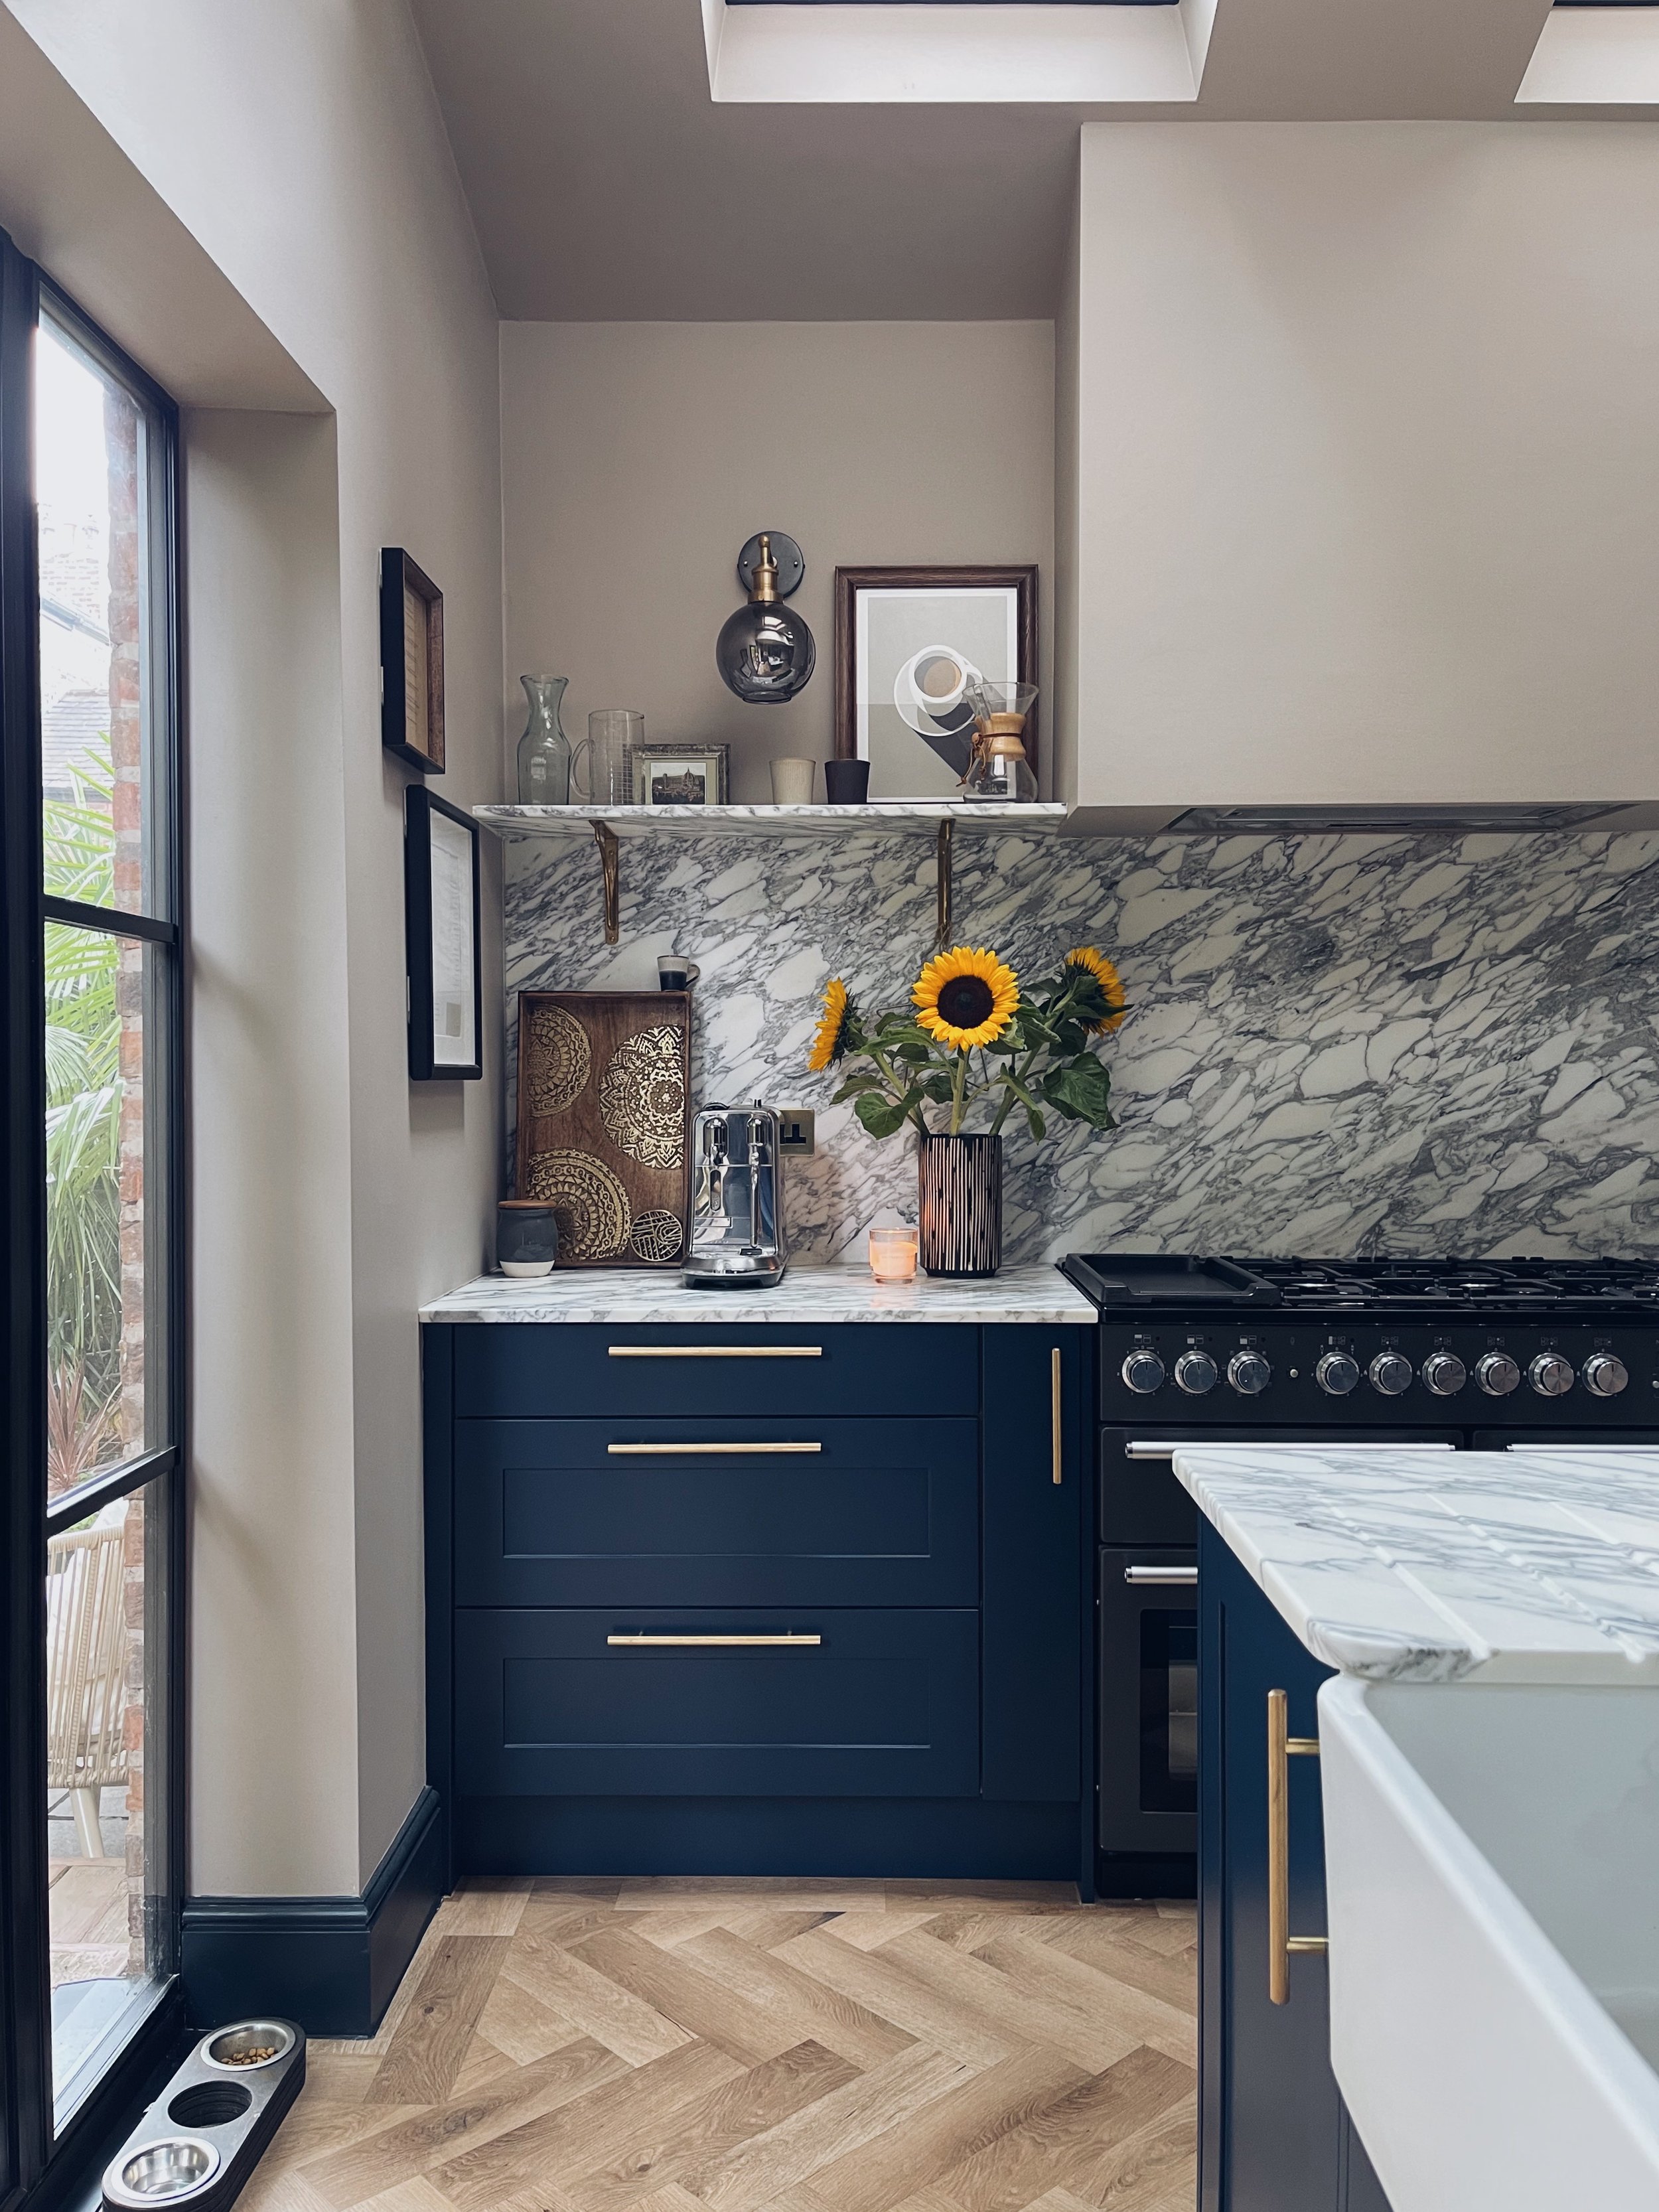
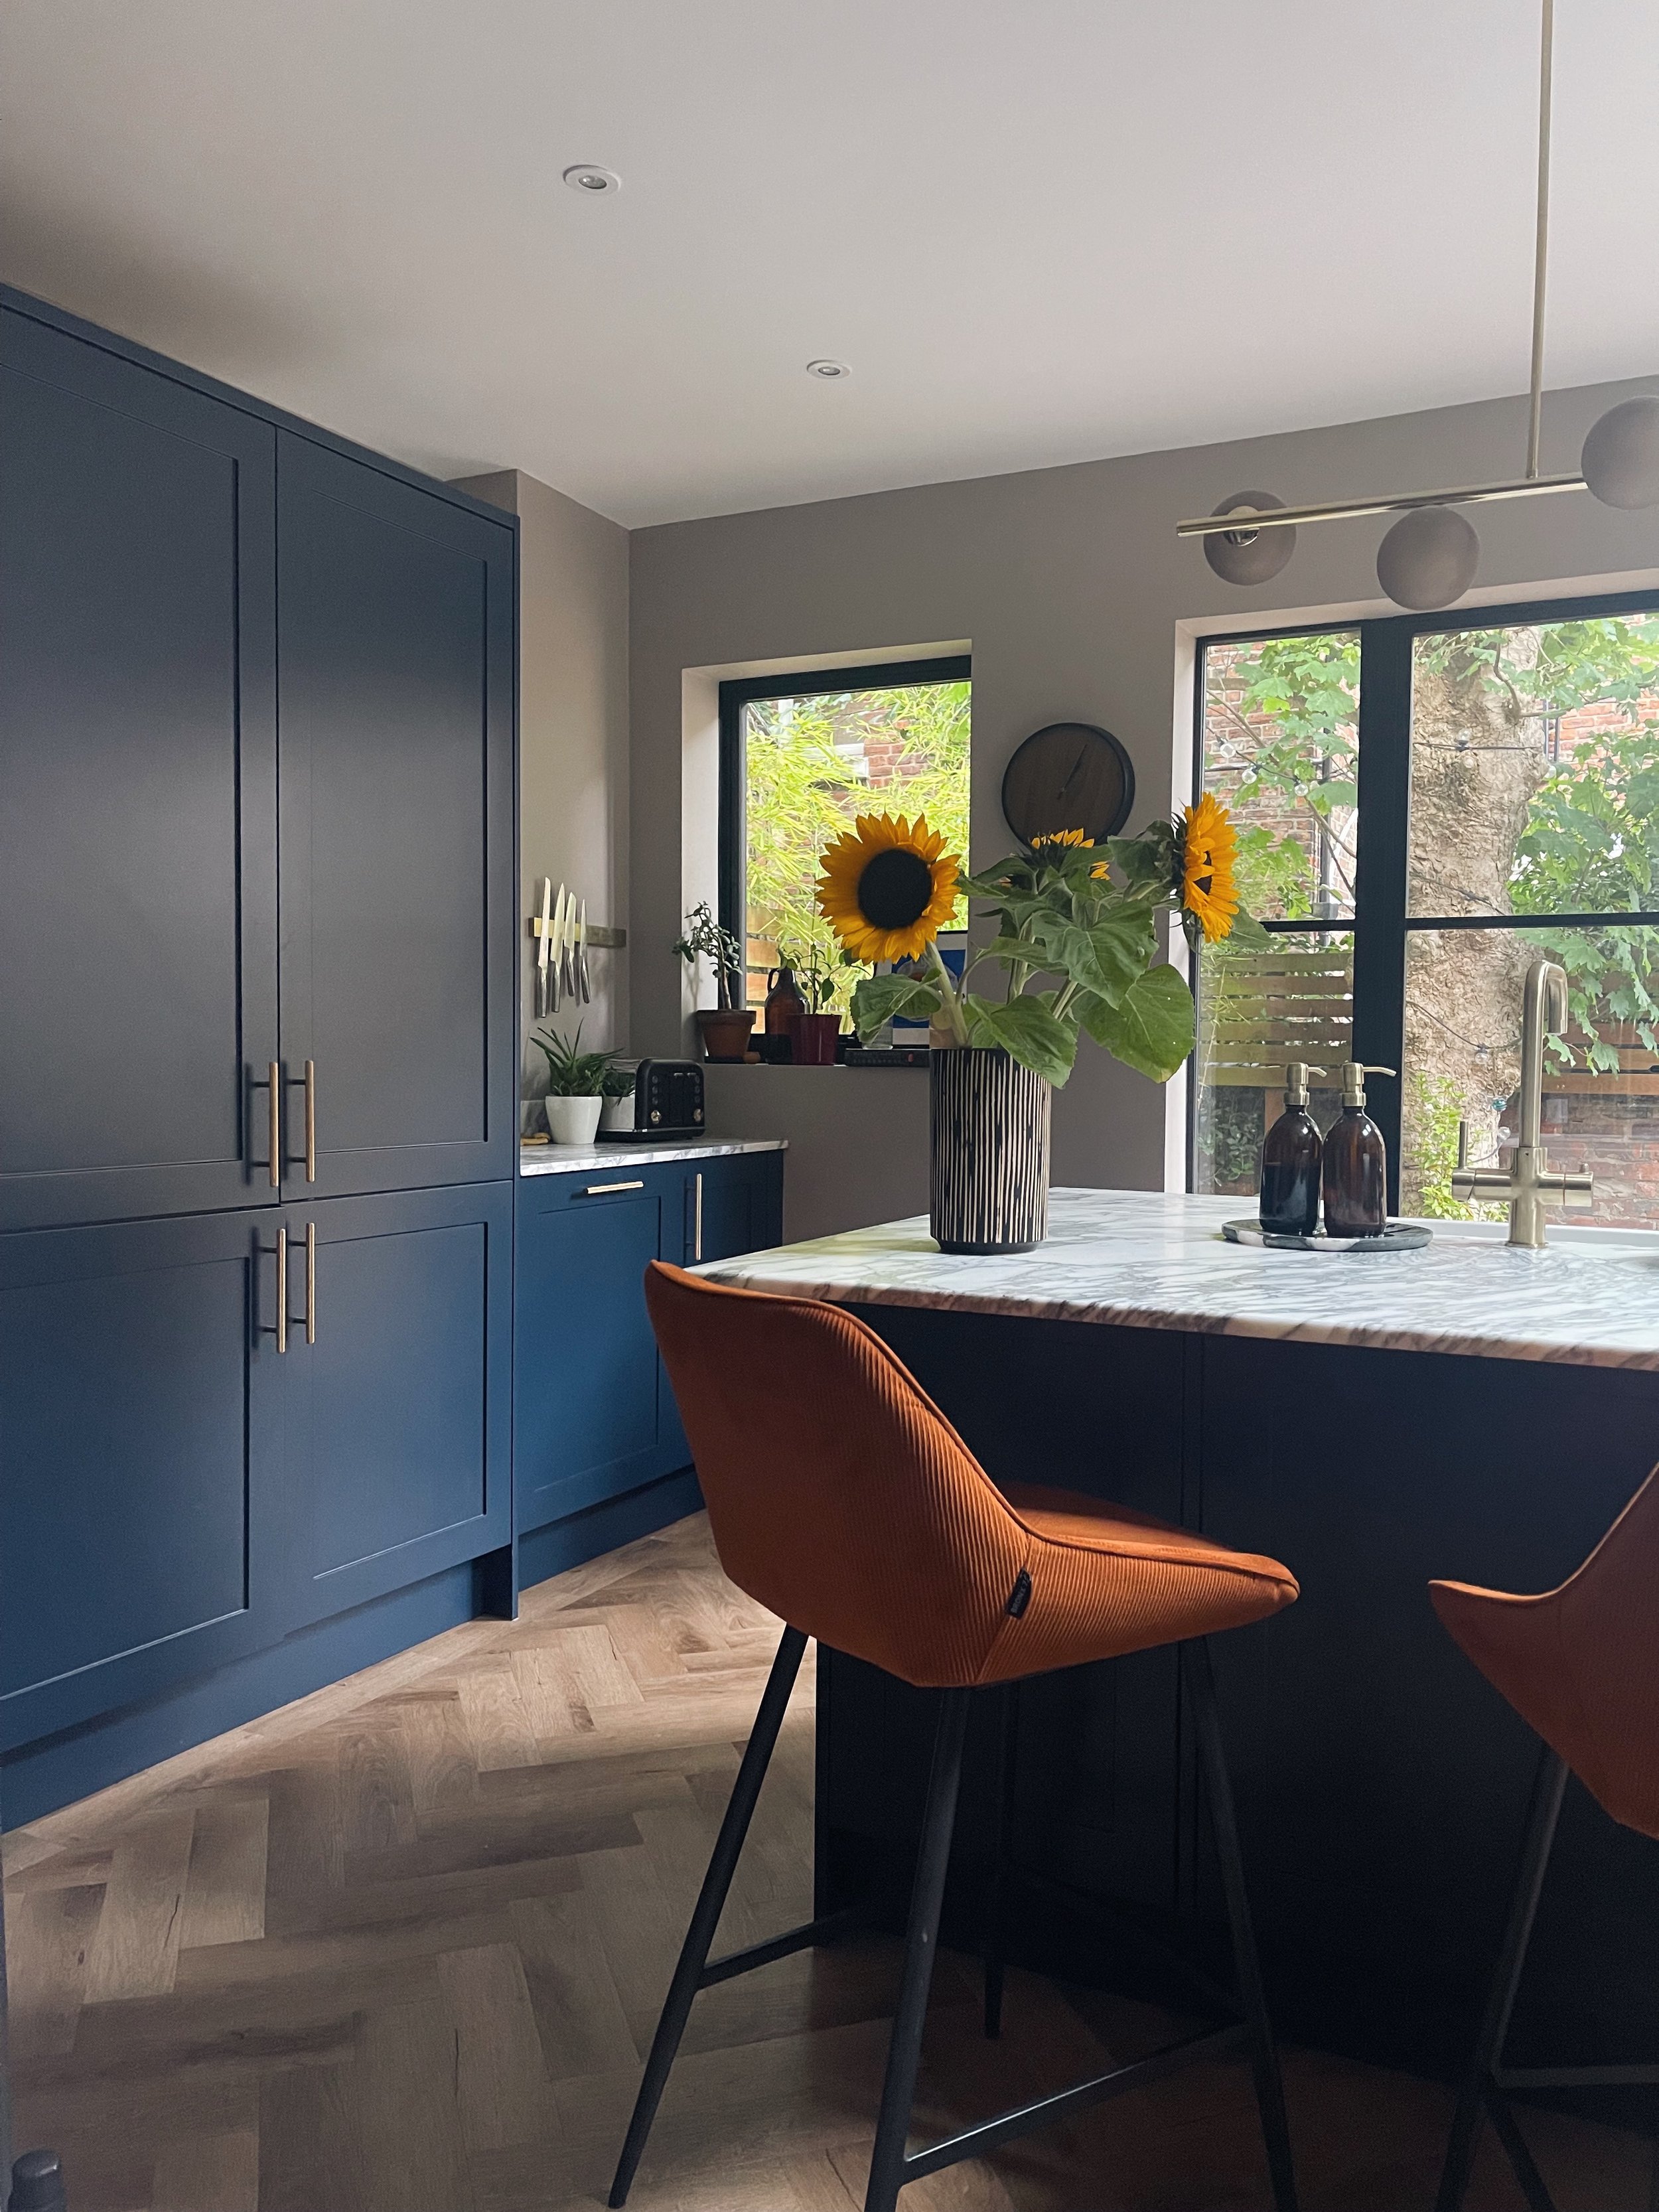
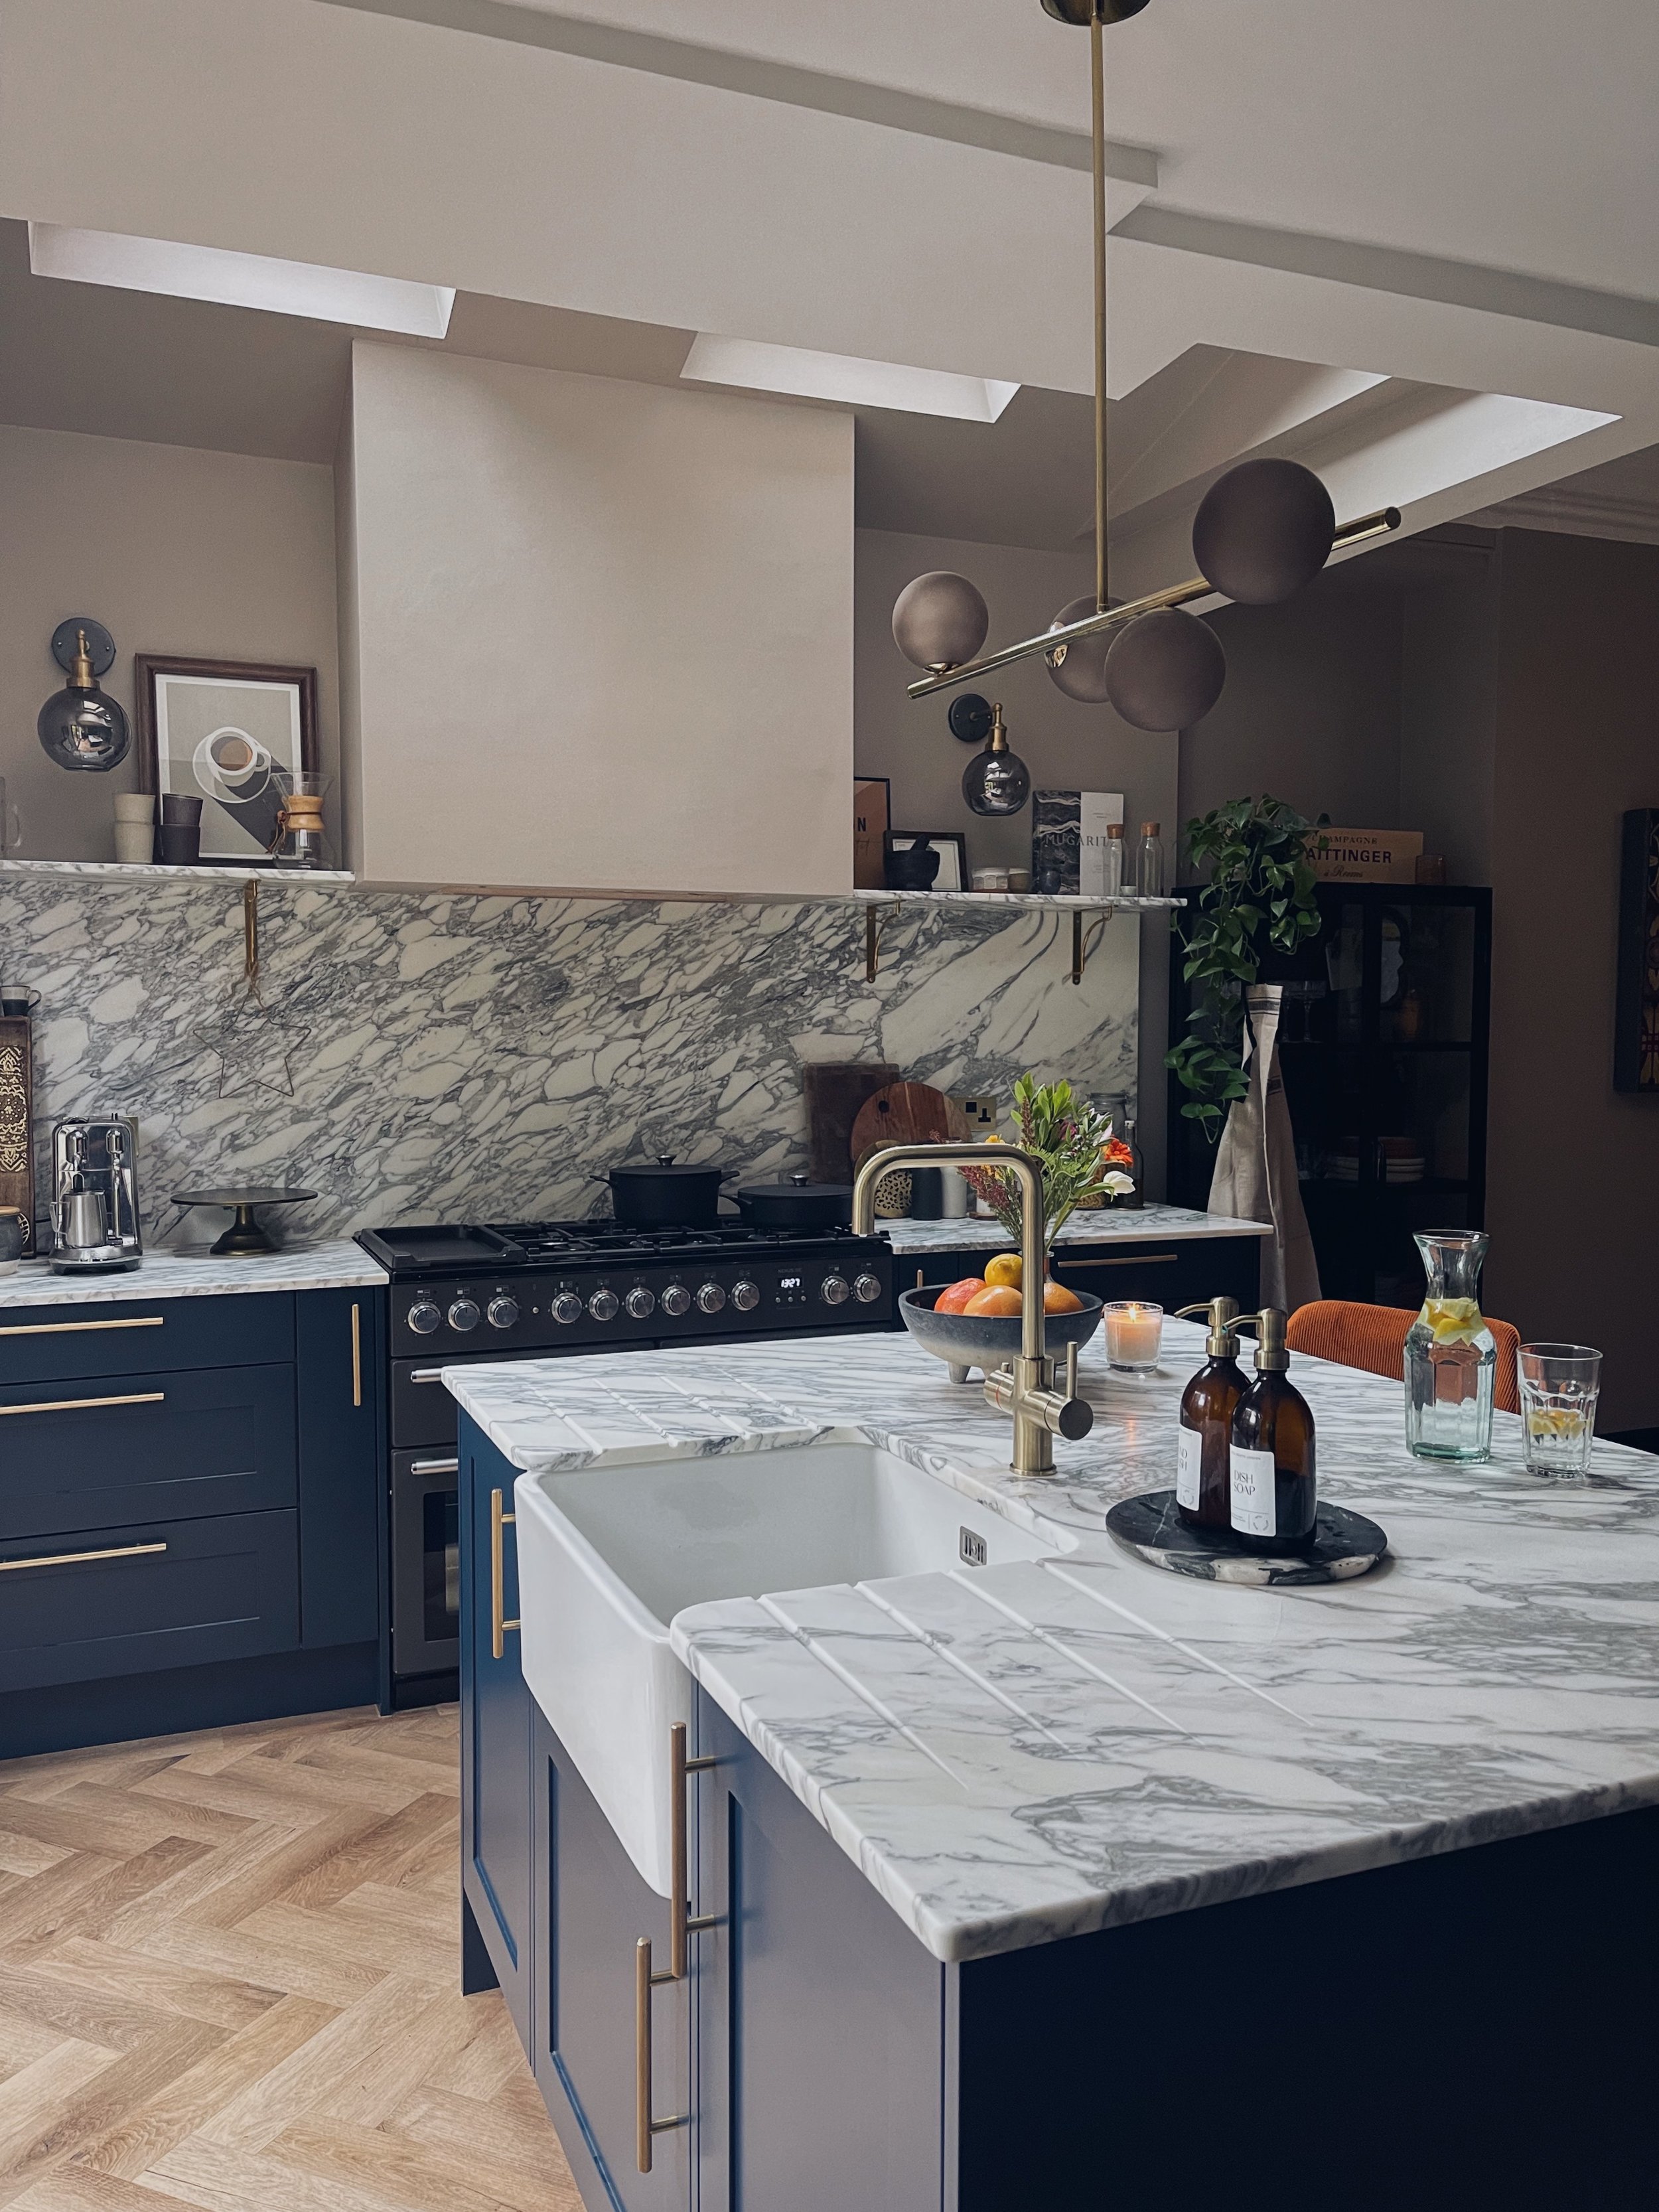
A kitchen island
Statement worktops
Crittall Doors
Another perk of the job is meeting the right people and when Luke from Nord Kitchens set up his business, I knew exactly who I needed to plan and measure the kitchen correctly. My strengths lie in making it look good, not how many mms you need to make it fit.
The space was structurally sound, bar a leak from the bathroom, as it was a “newish” extension. So we kept the bones as they were which worked in our favour for timelines.

Floor Plan
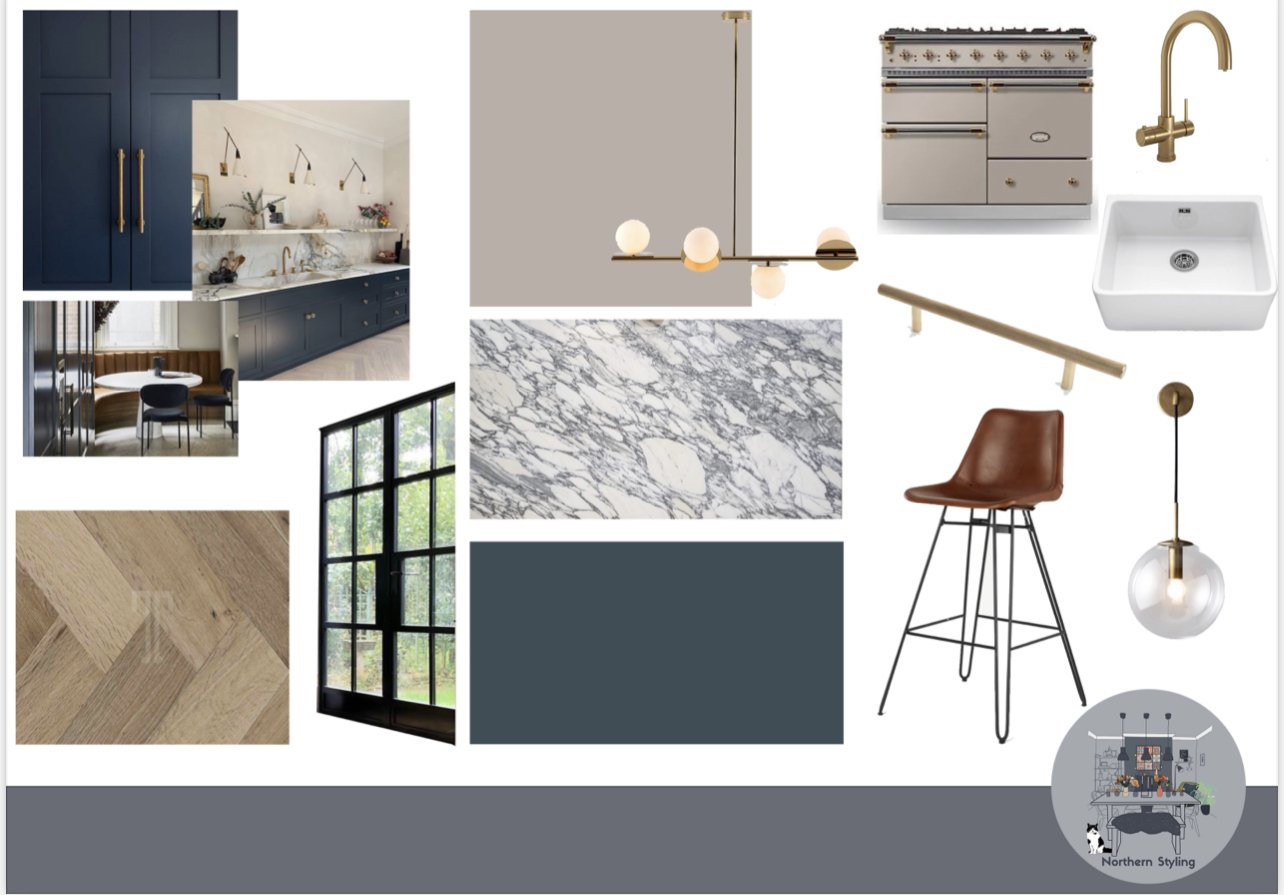
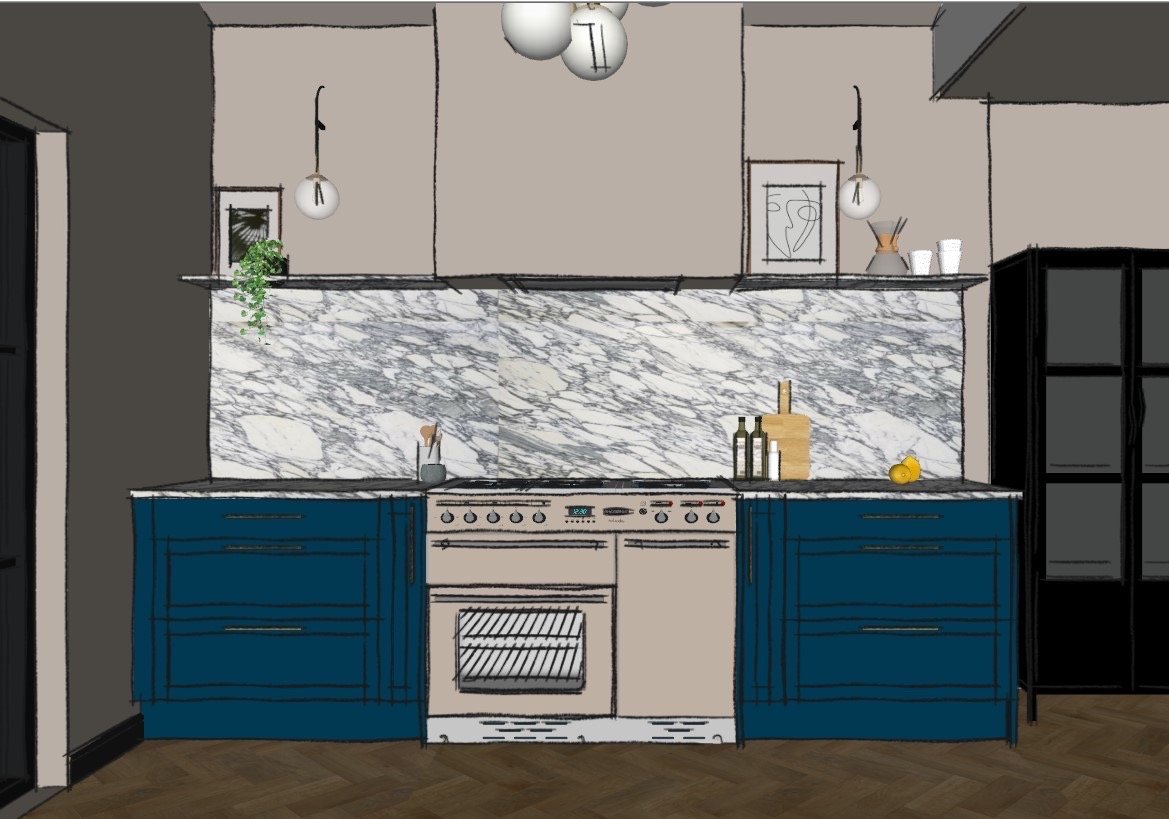
I gave Luke my moodboard (mainly pinterest /saved instagram images) and he measured up, working up a sketch render for us to look at. You would probably get a very basic version of this if you went to a mainstream kitchen showroom.
We discussed and measured, and remeasured, and then tweaked a few bits but all in all he nailed what I wanted. (Caveat - I did go into the sketchup and added some styling bits as that’s what I do day in, day out - I couldn’t resist.)
Then everything was set in motion and we made sure all the pieces of the puzzle aligned. One thing I would say is having Luke “project manage” the whole fit out was a God send for us. Making sure builders turned up on time, organising a kitchen fitter for the correct dates and giving us a clear timeline for the bits we needed to sort out like a floor fitter and decorator was invaluable.
The Middle
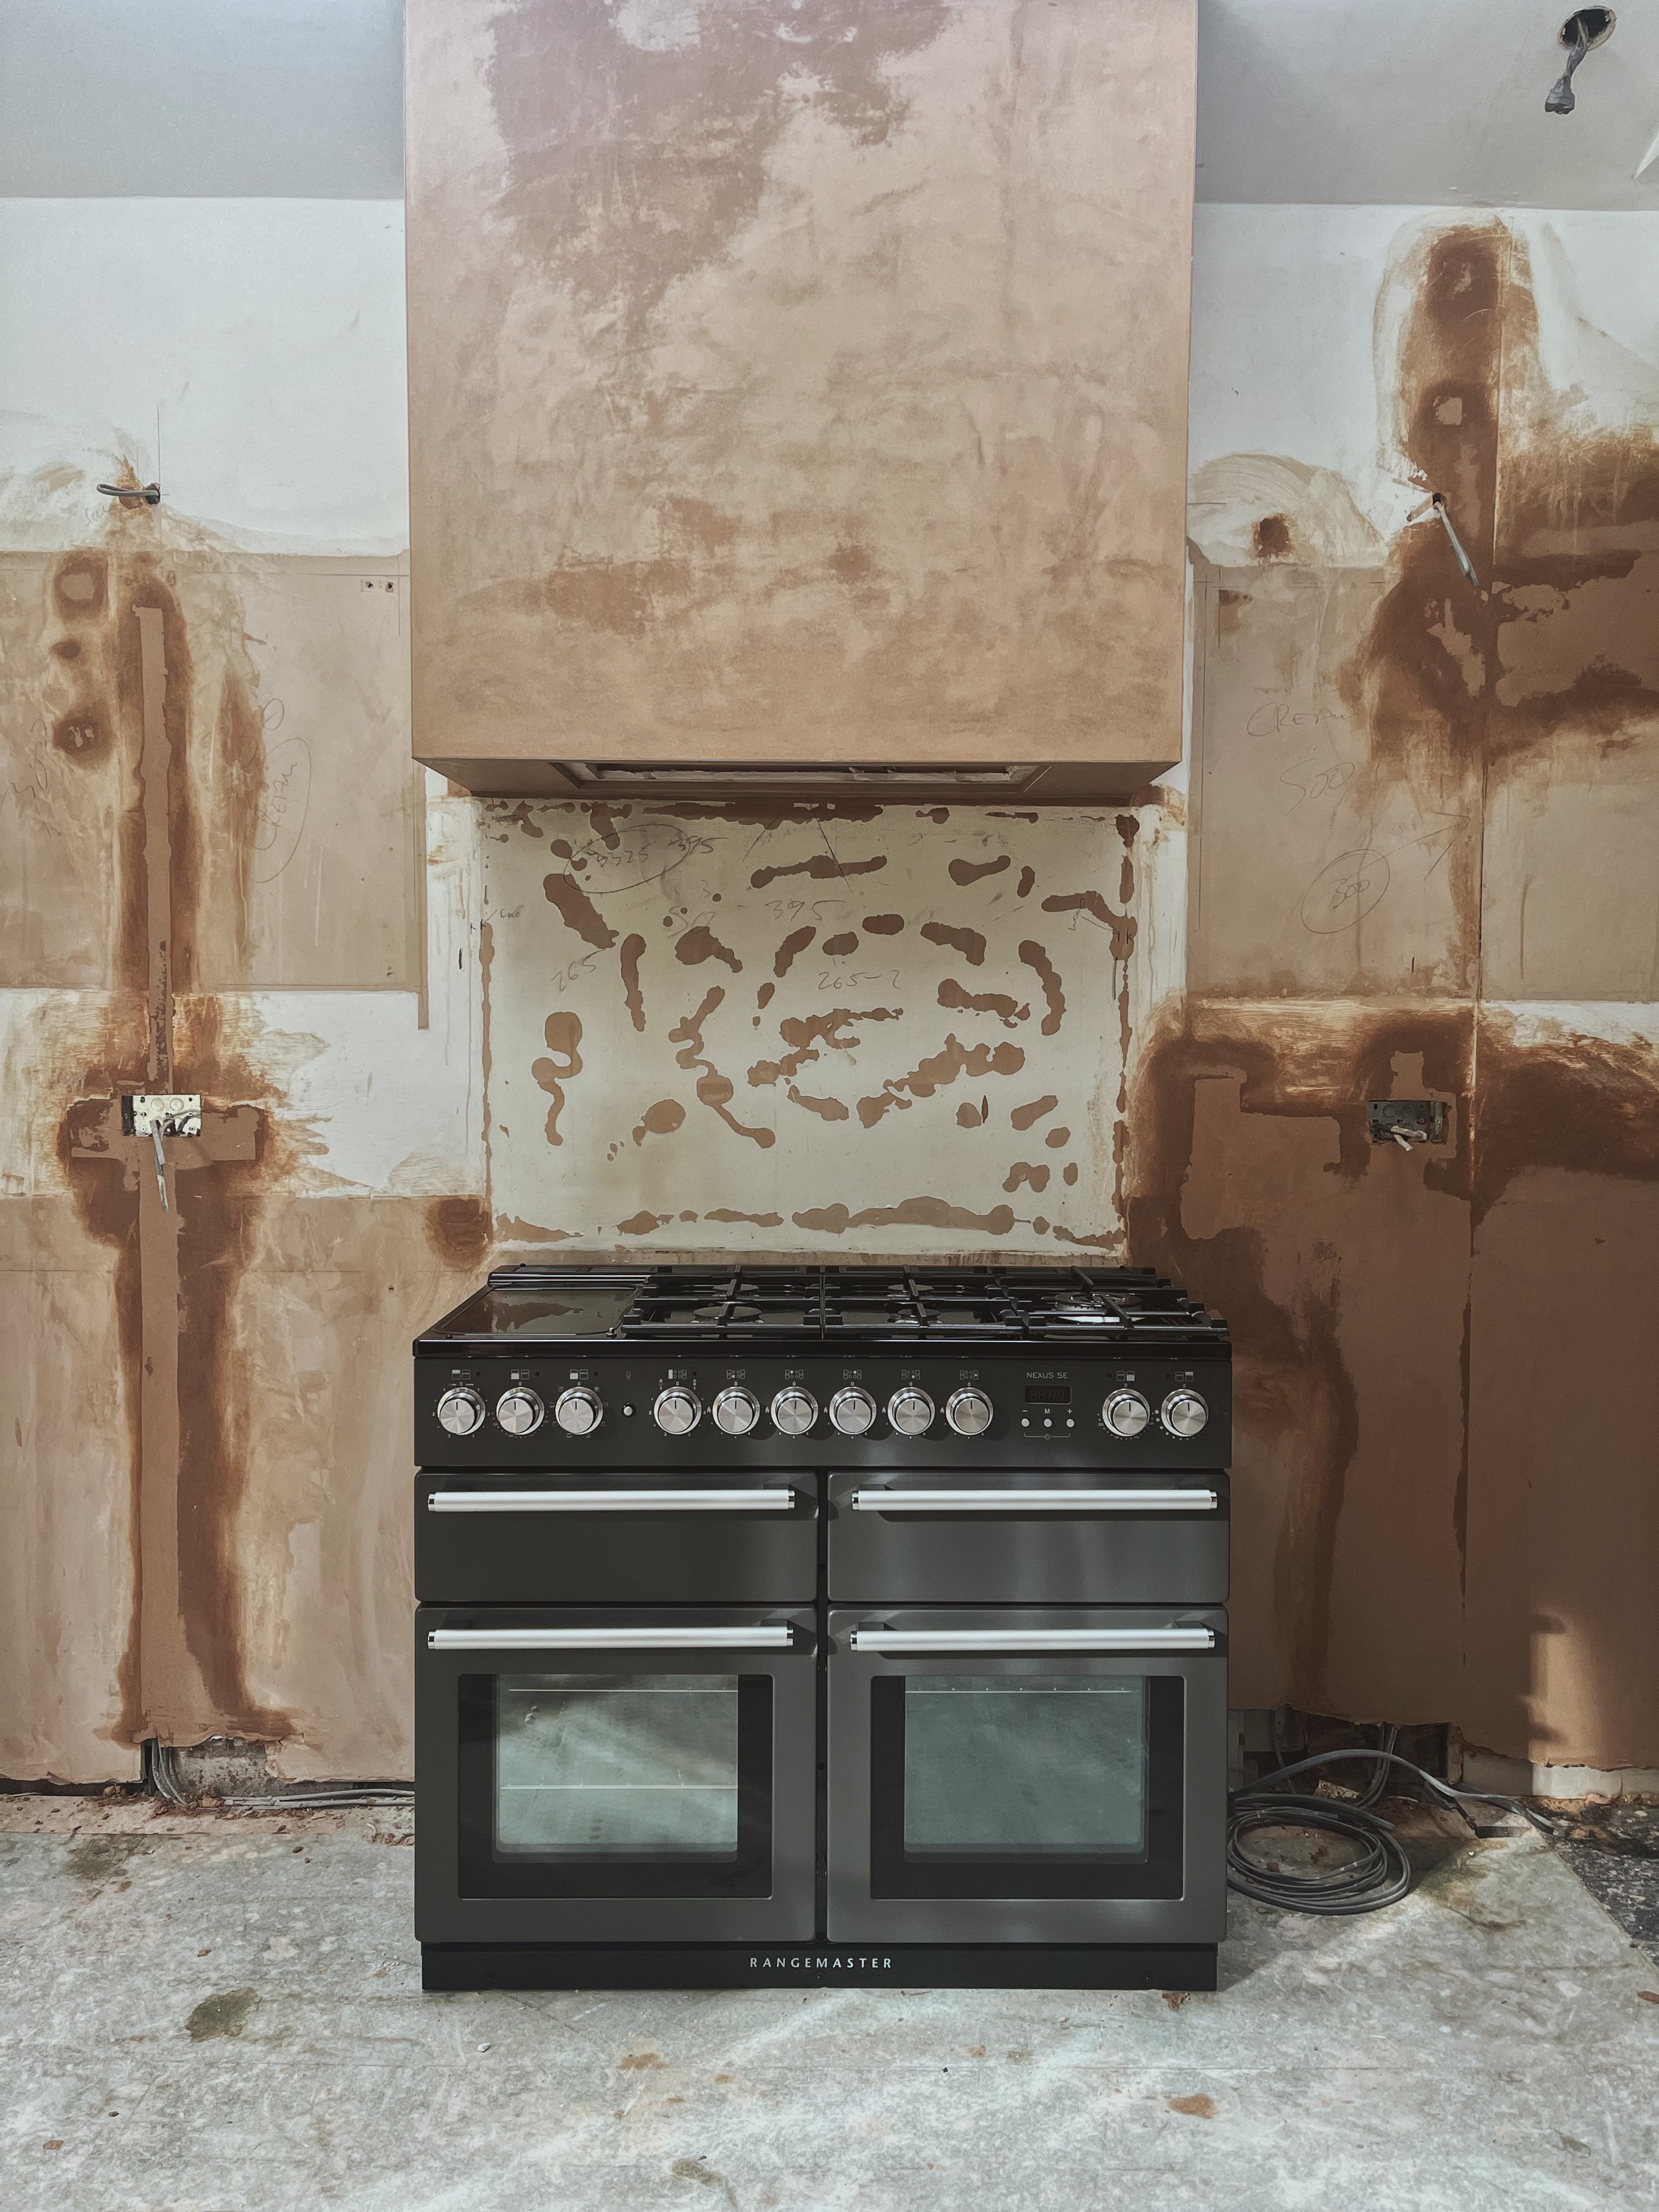
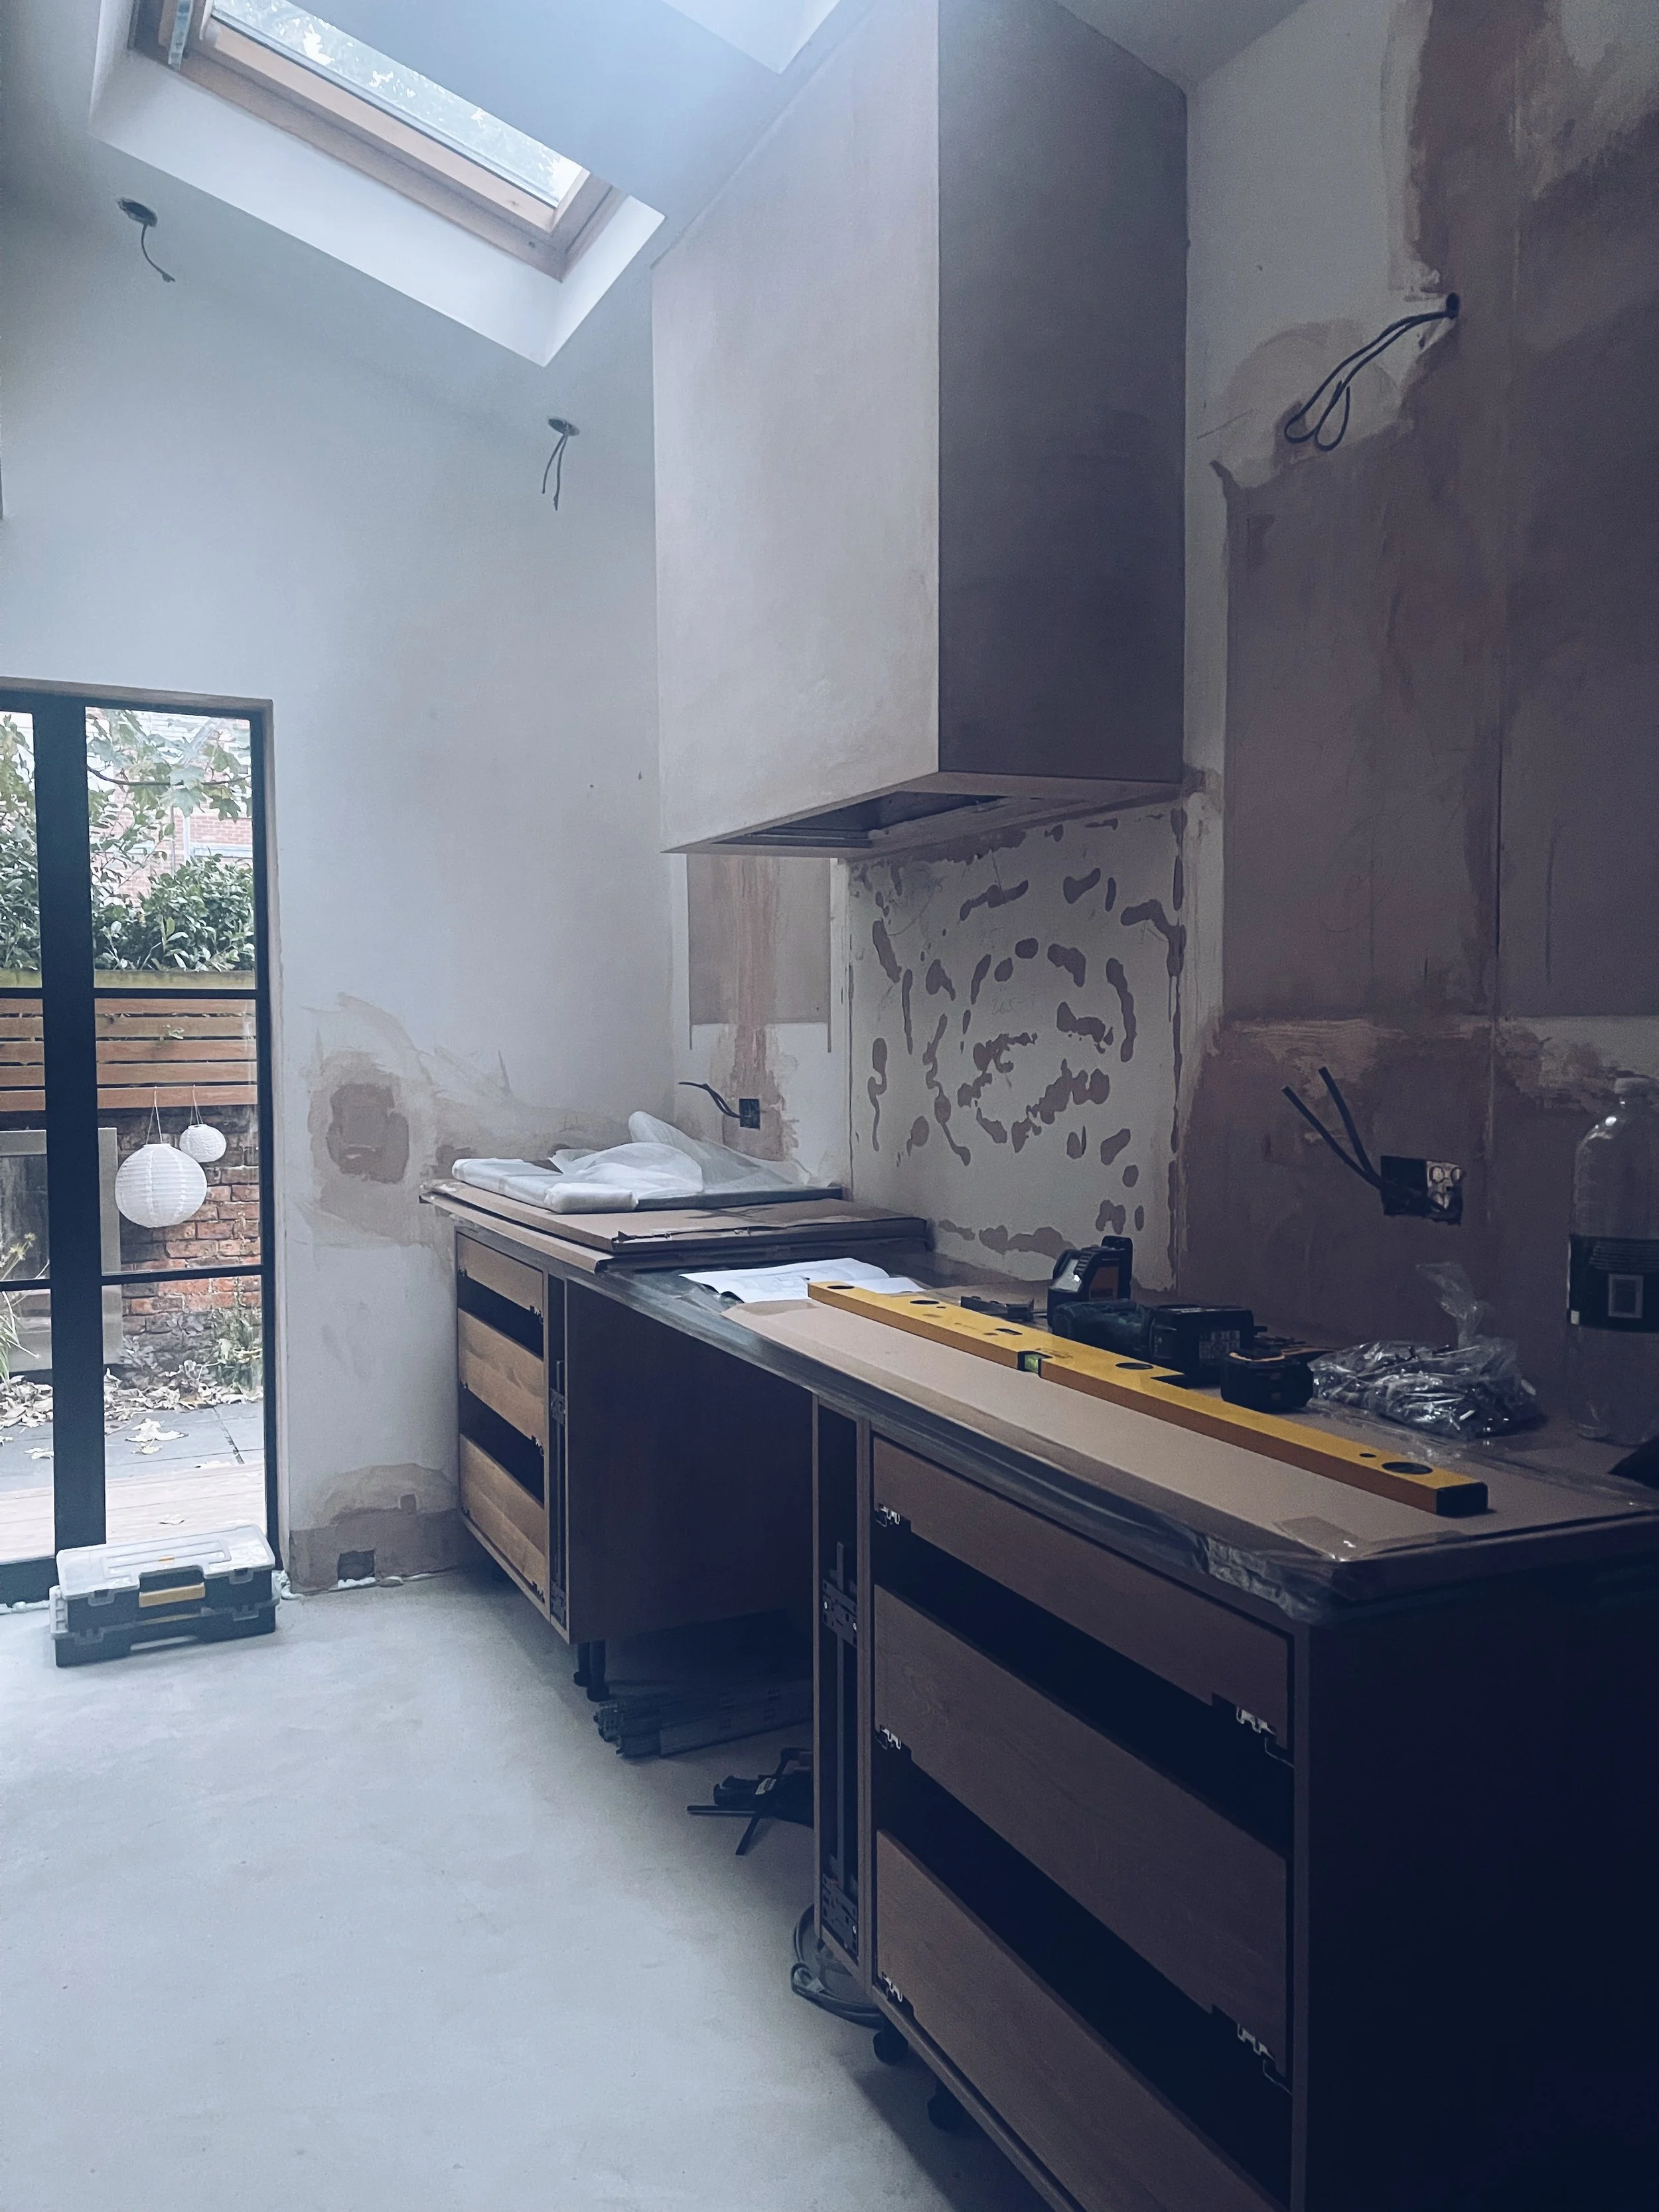
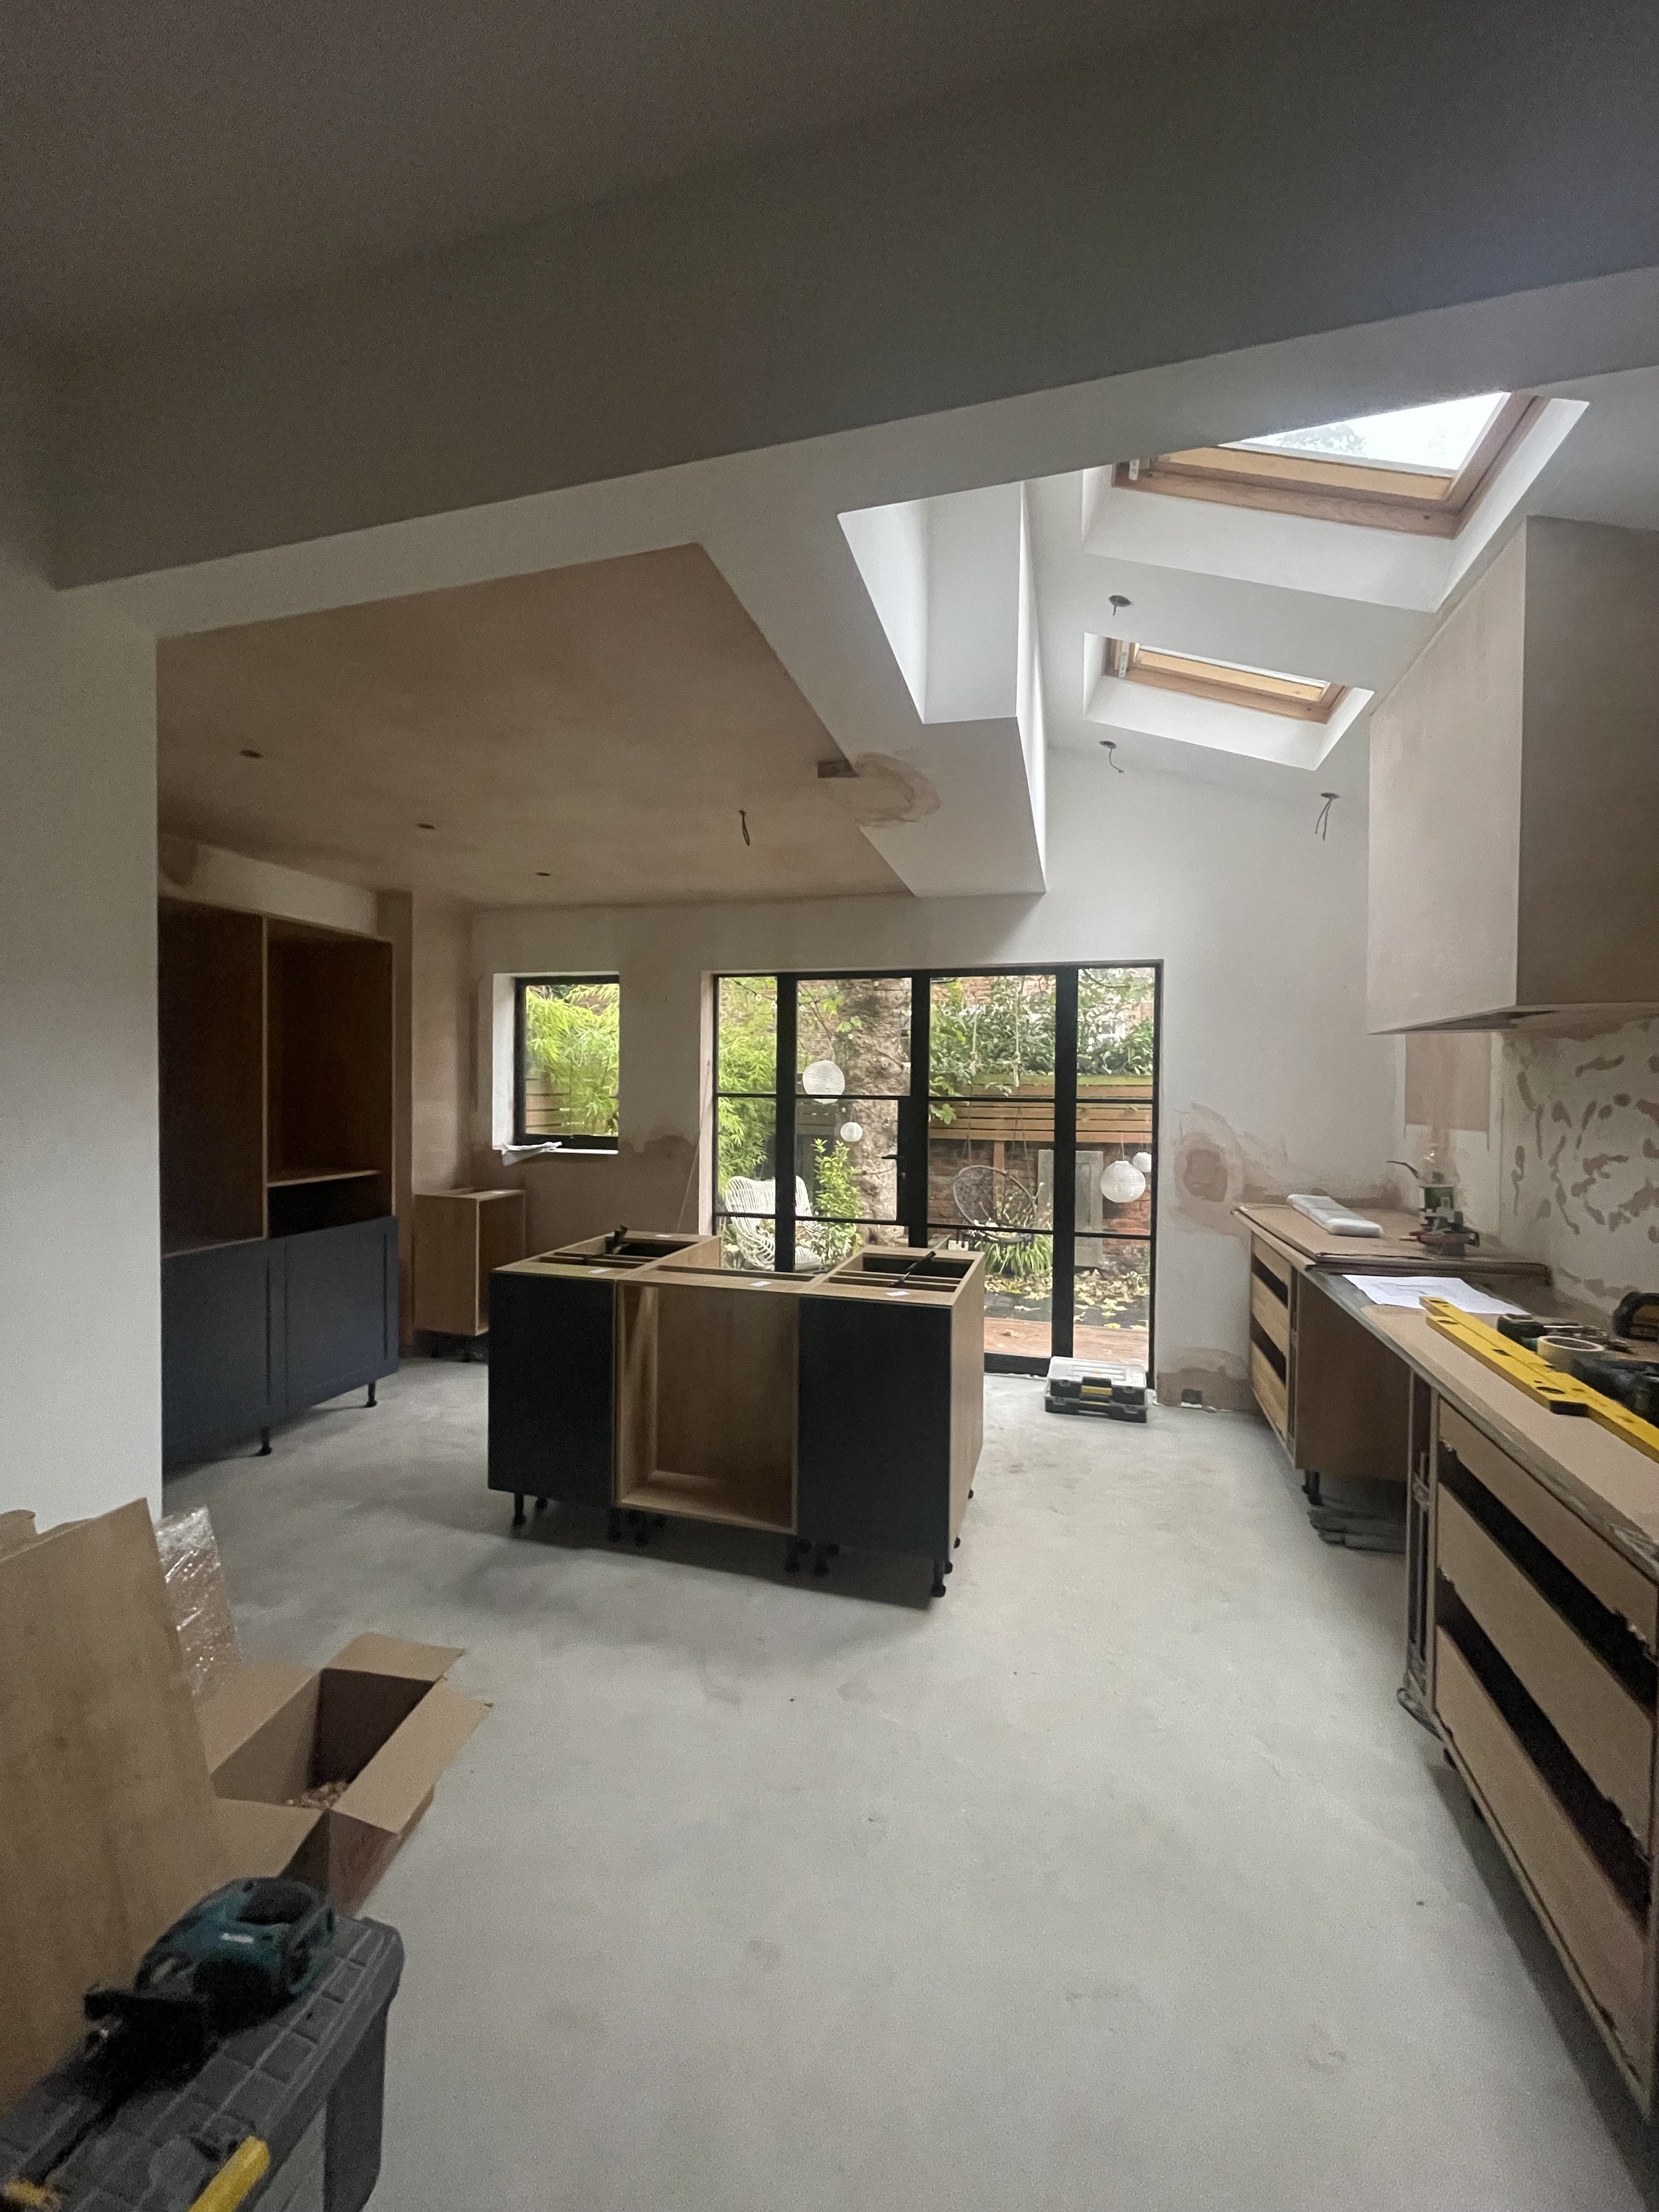
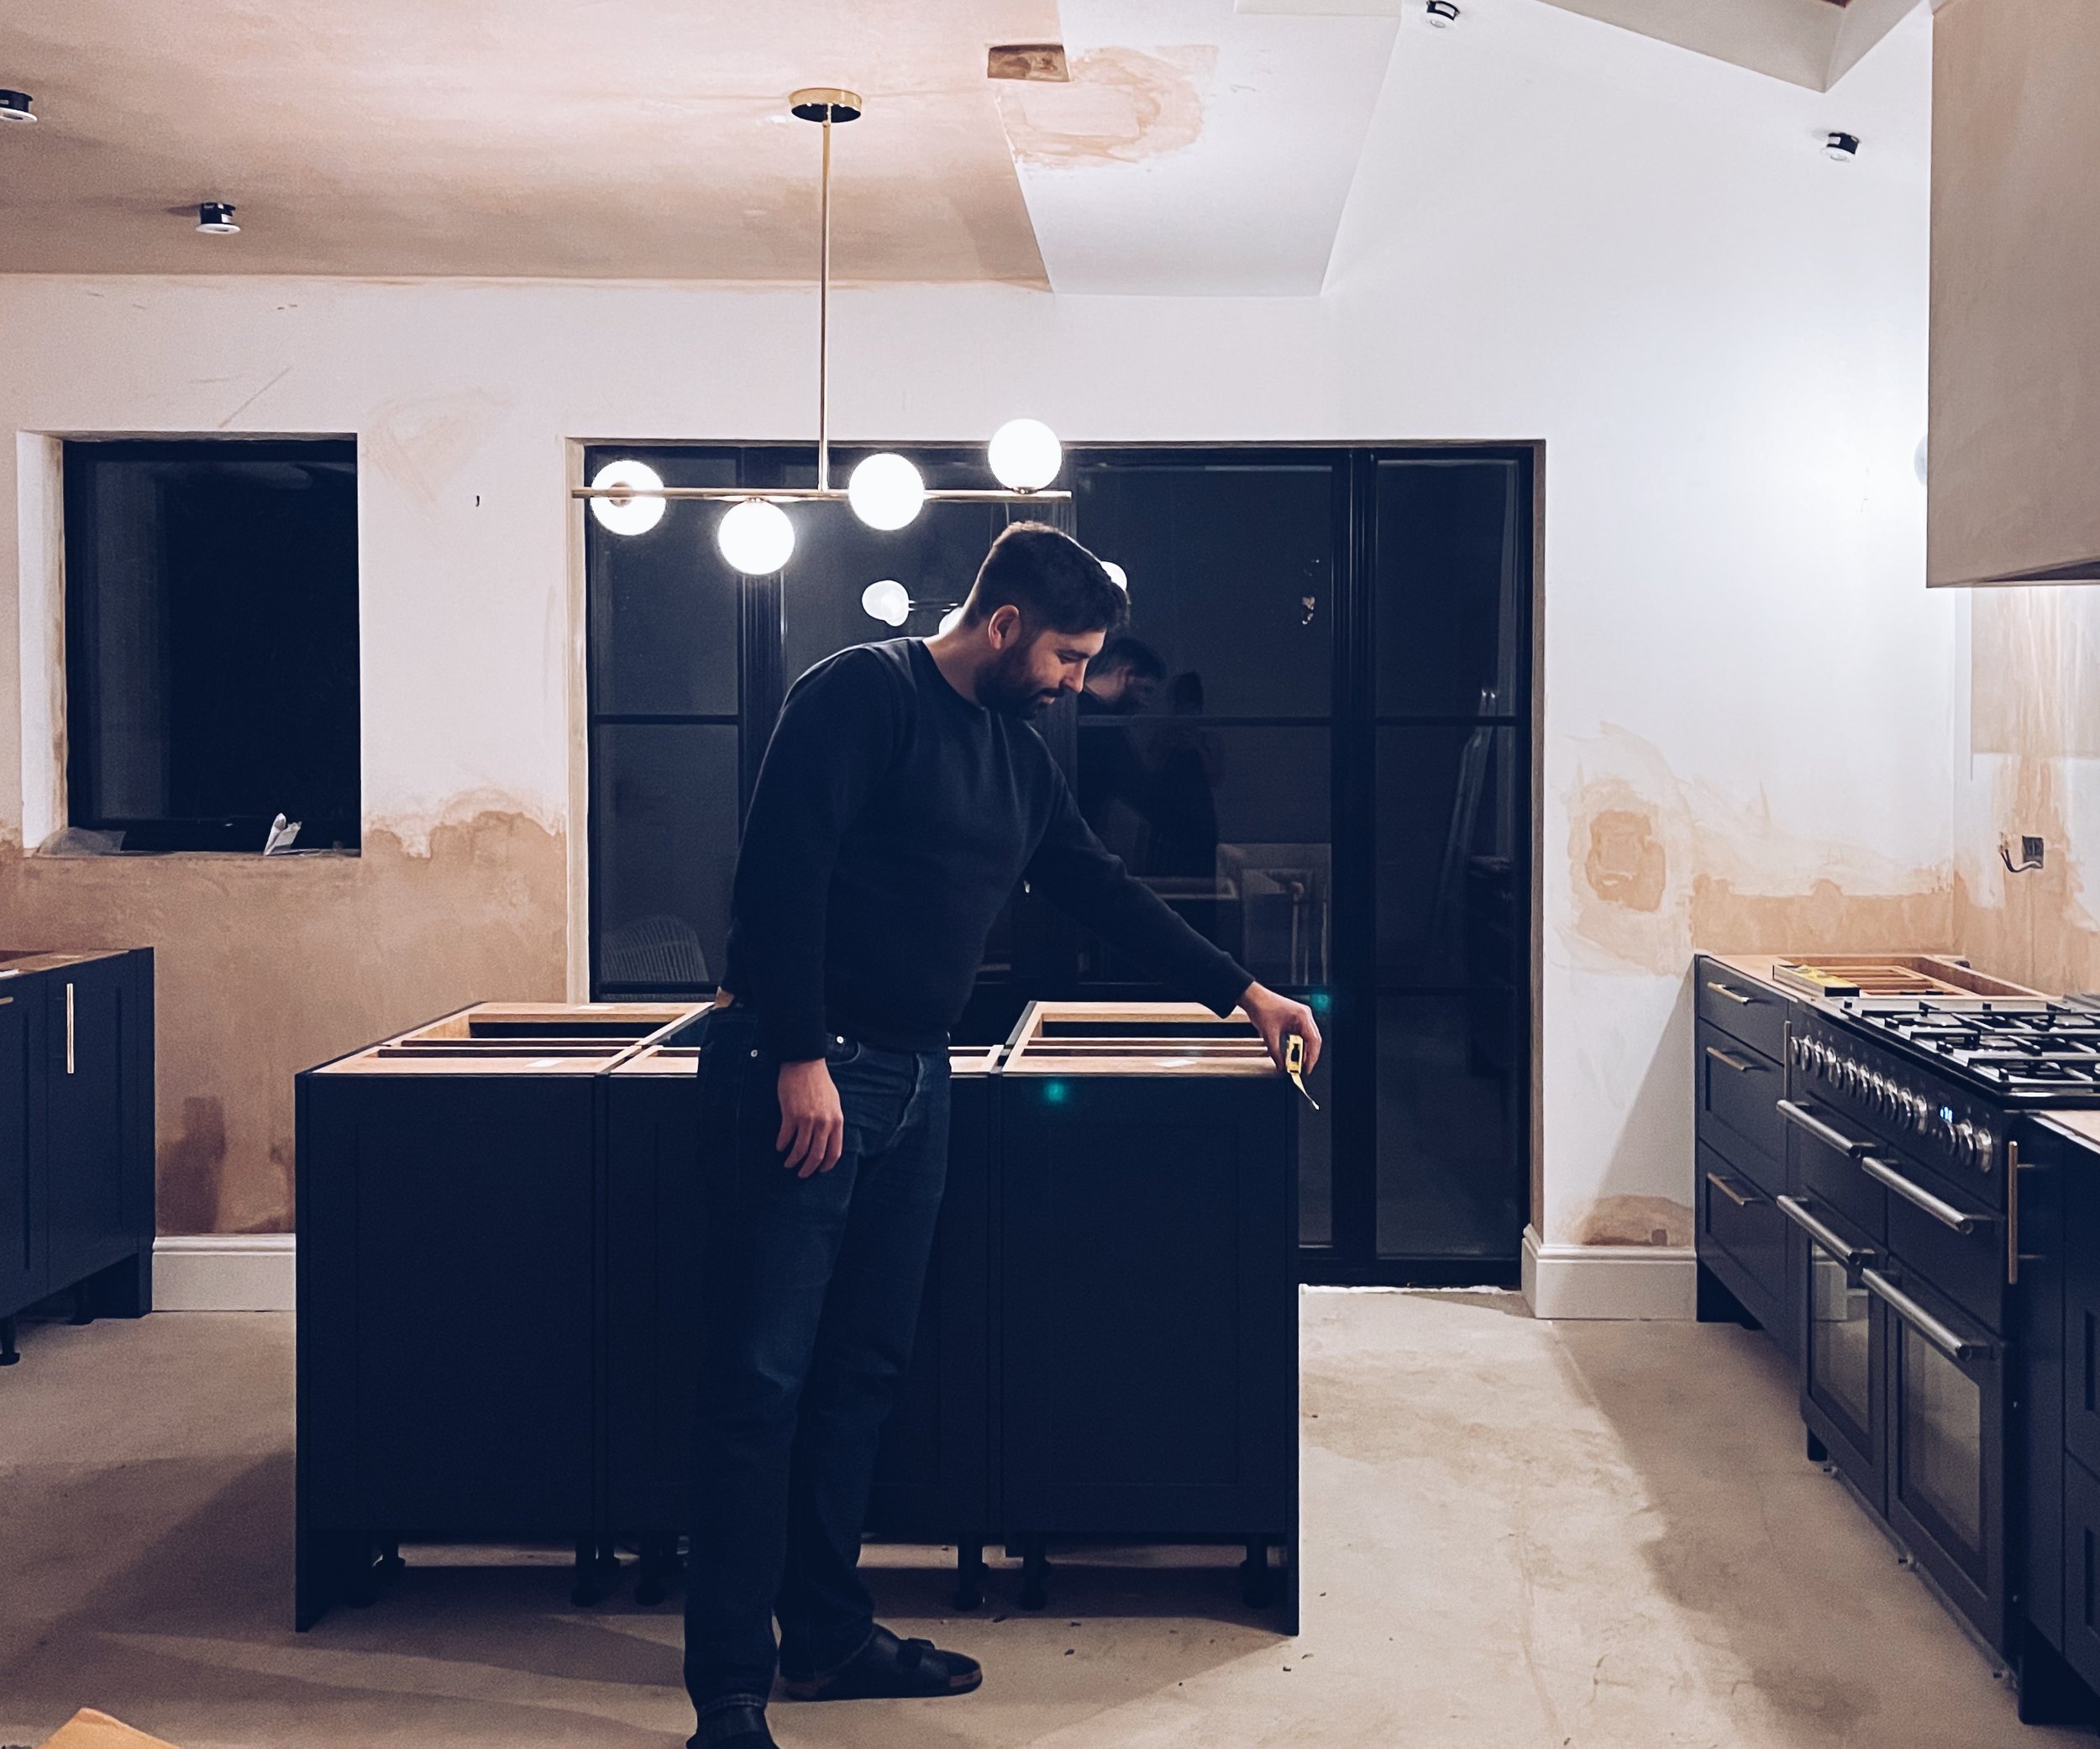
Everything was ripped out, the old kitchen, the floor, the skirting boards, the doors at the end of October 2021. We said goodbye to home cooked meals and hello to dust and takeaways. I was 7 months pregnant at the time and it was not ideal! But it was way better than the baby actually being here which I’ve now realised. Plus being pregnant meant no one wanted to p**s me off!

Marble on!
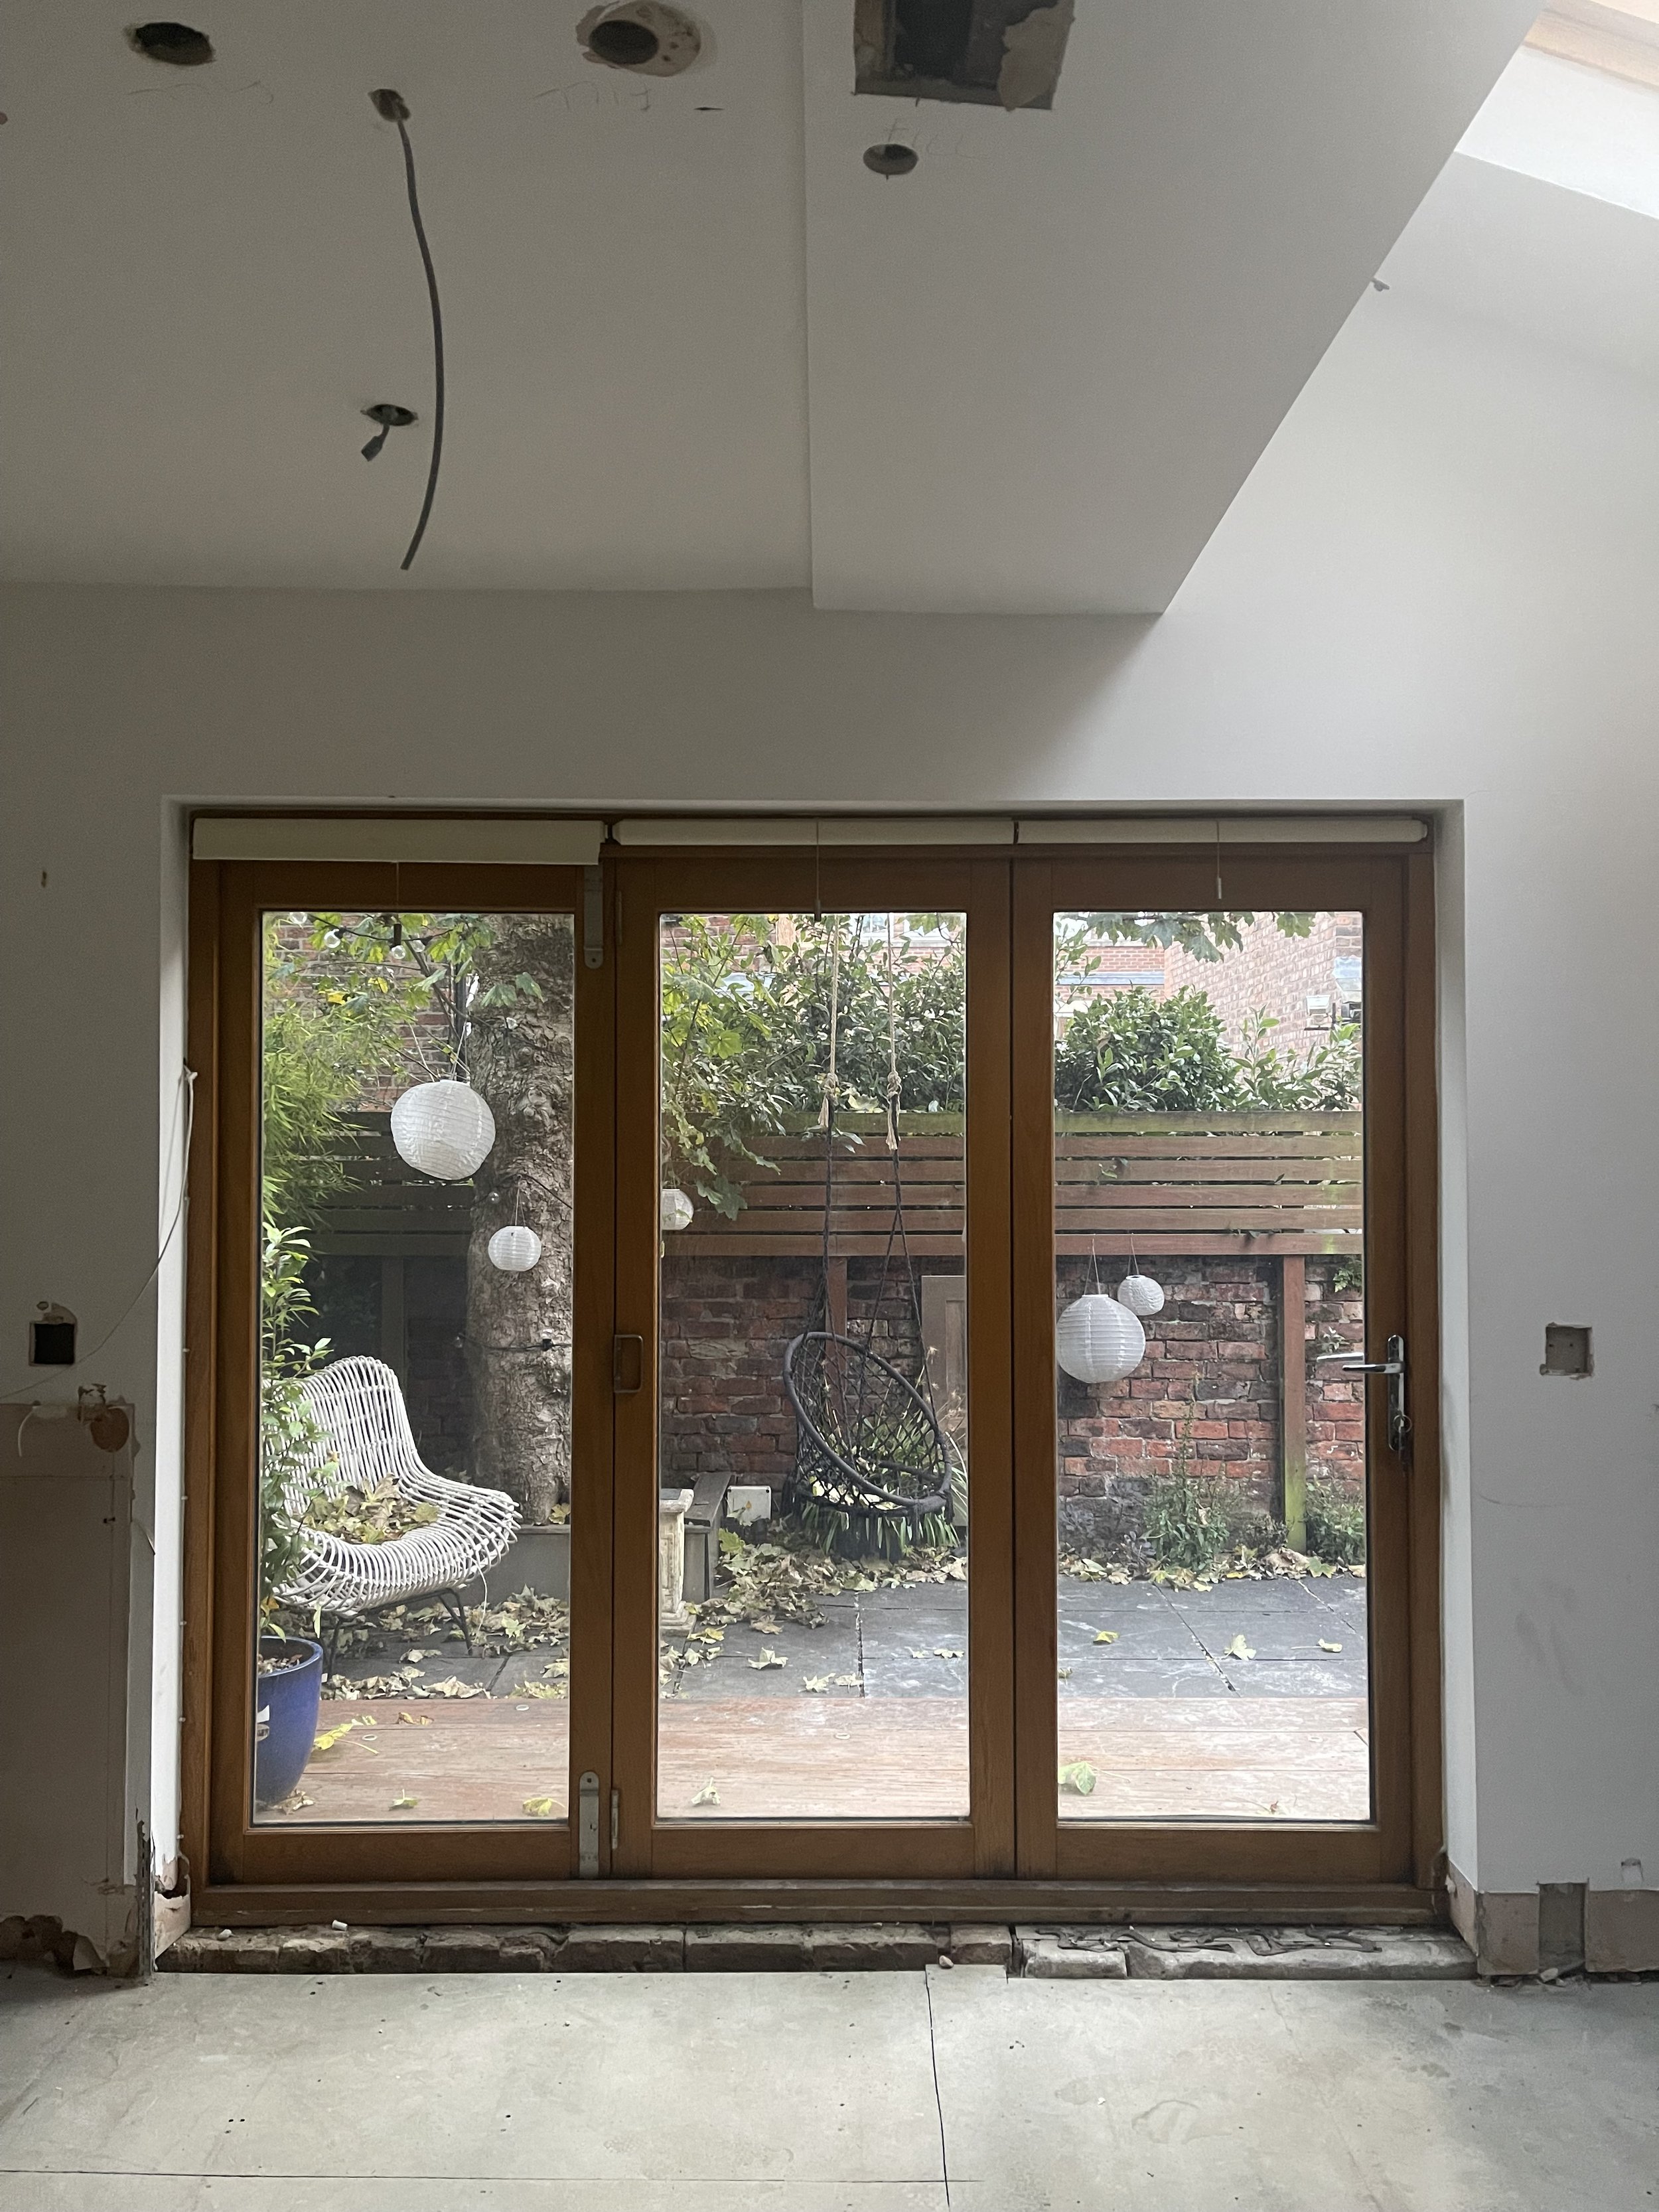
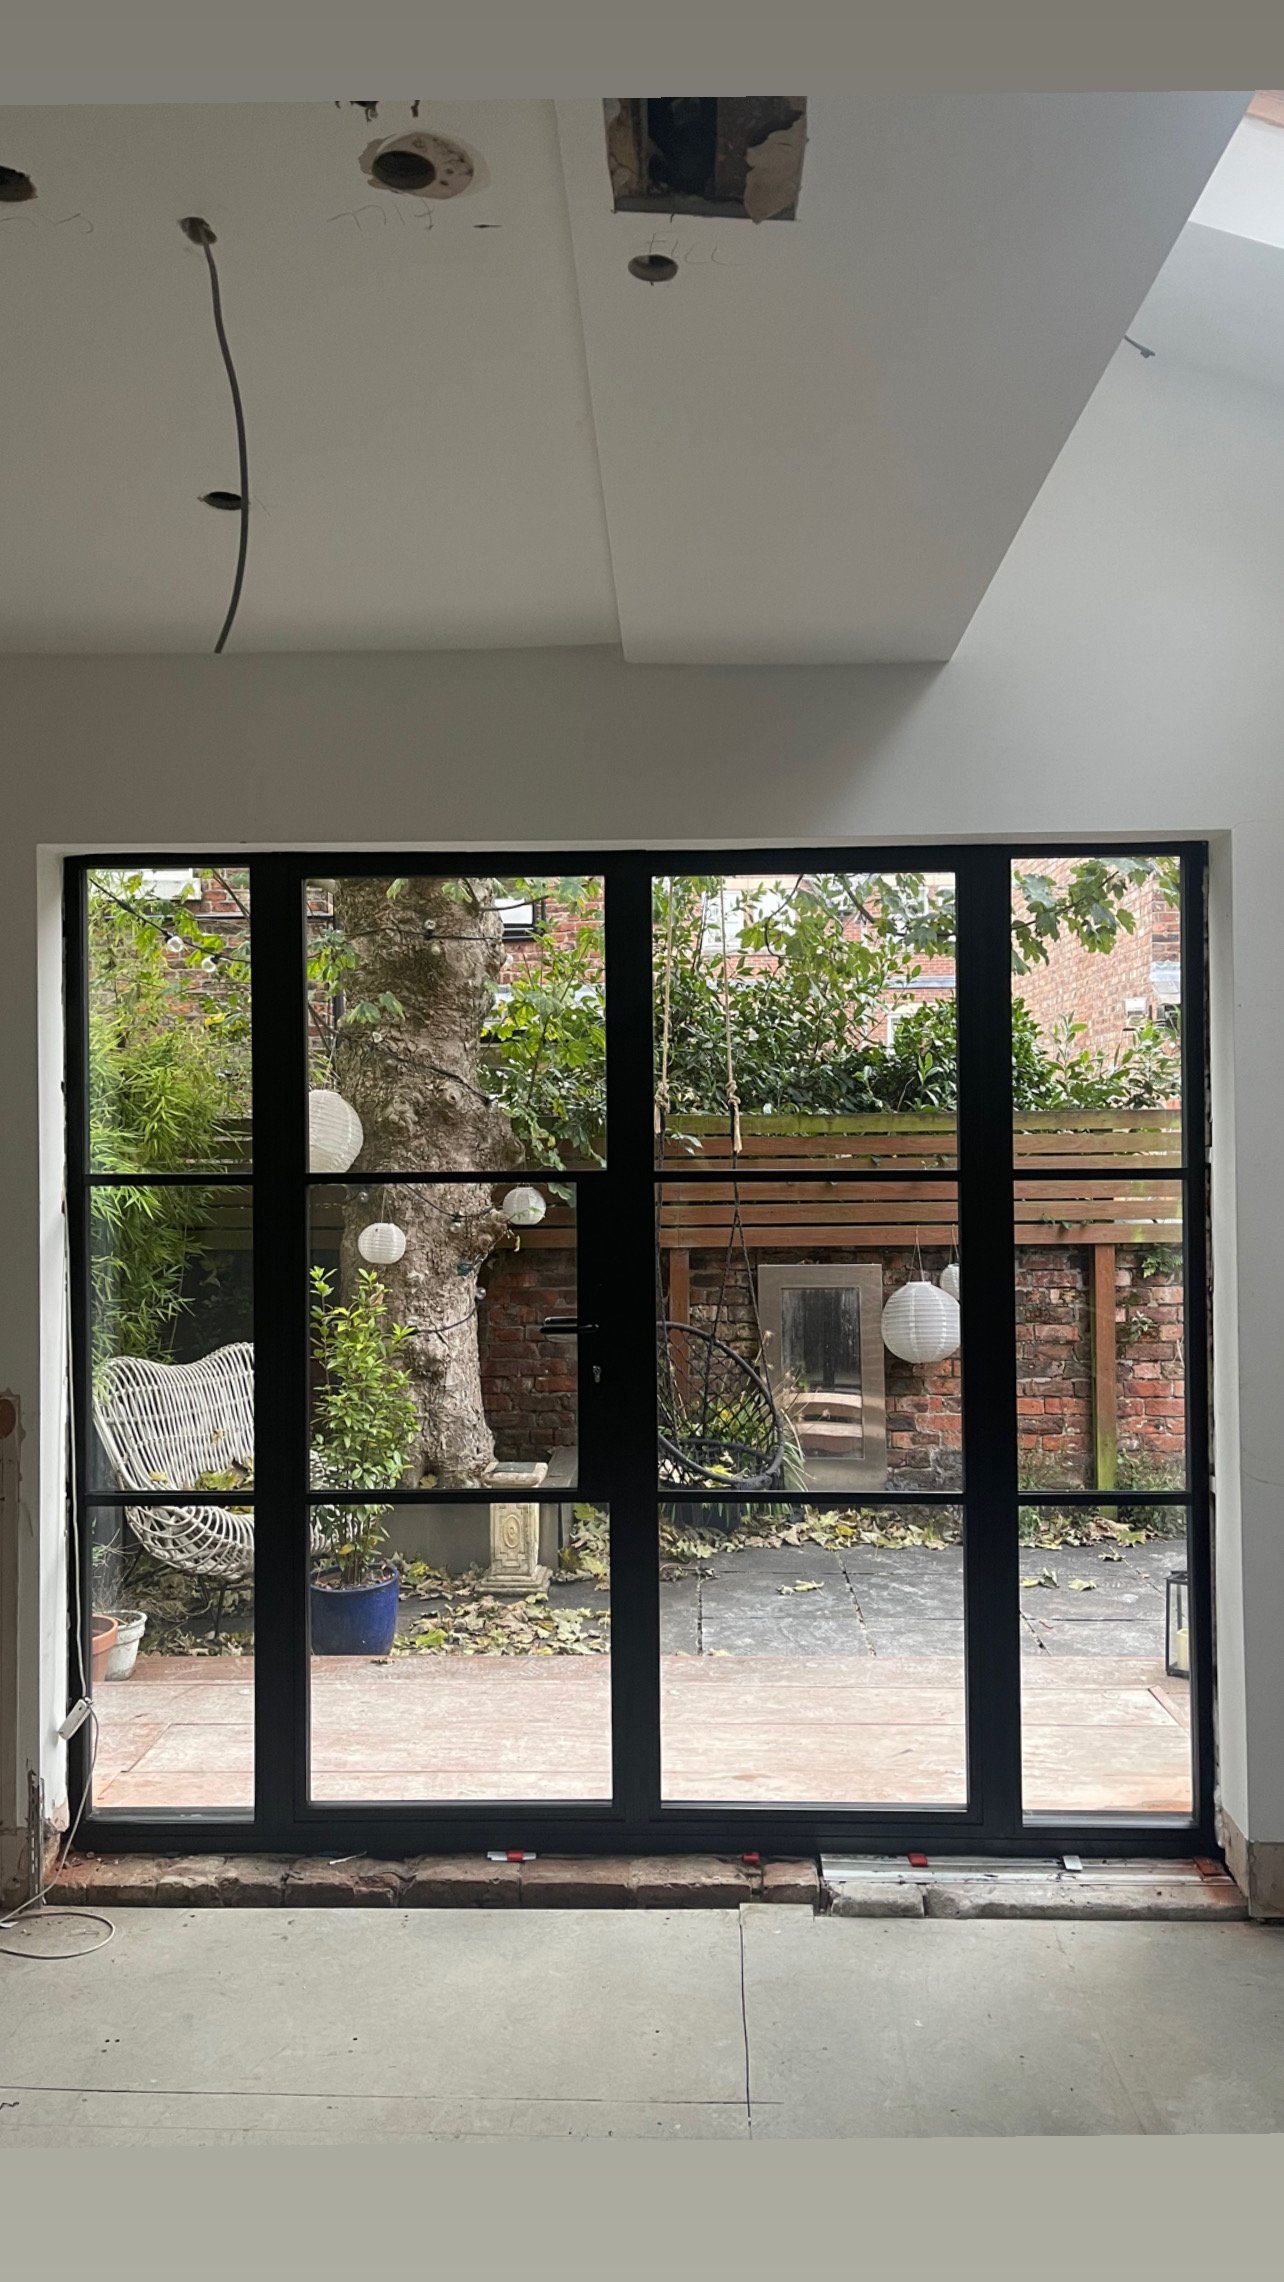
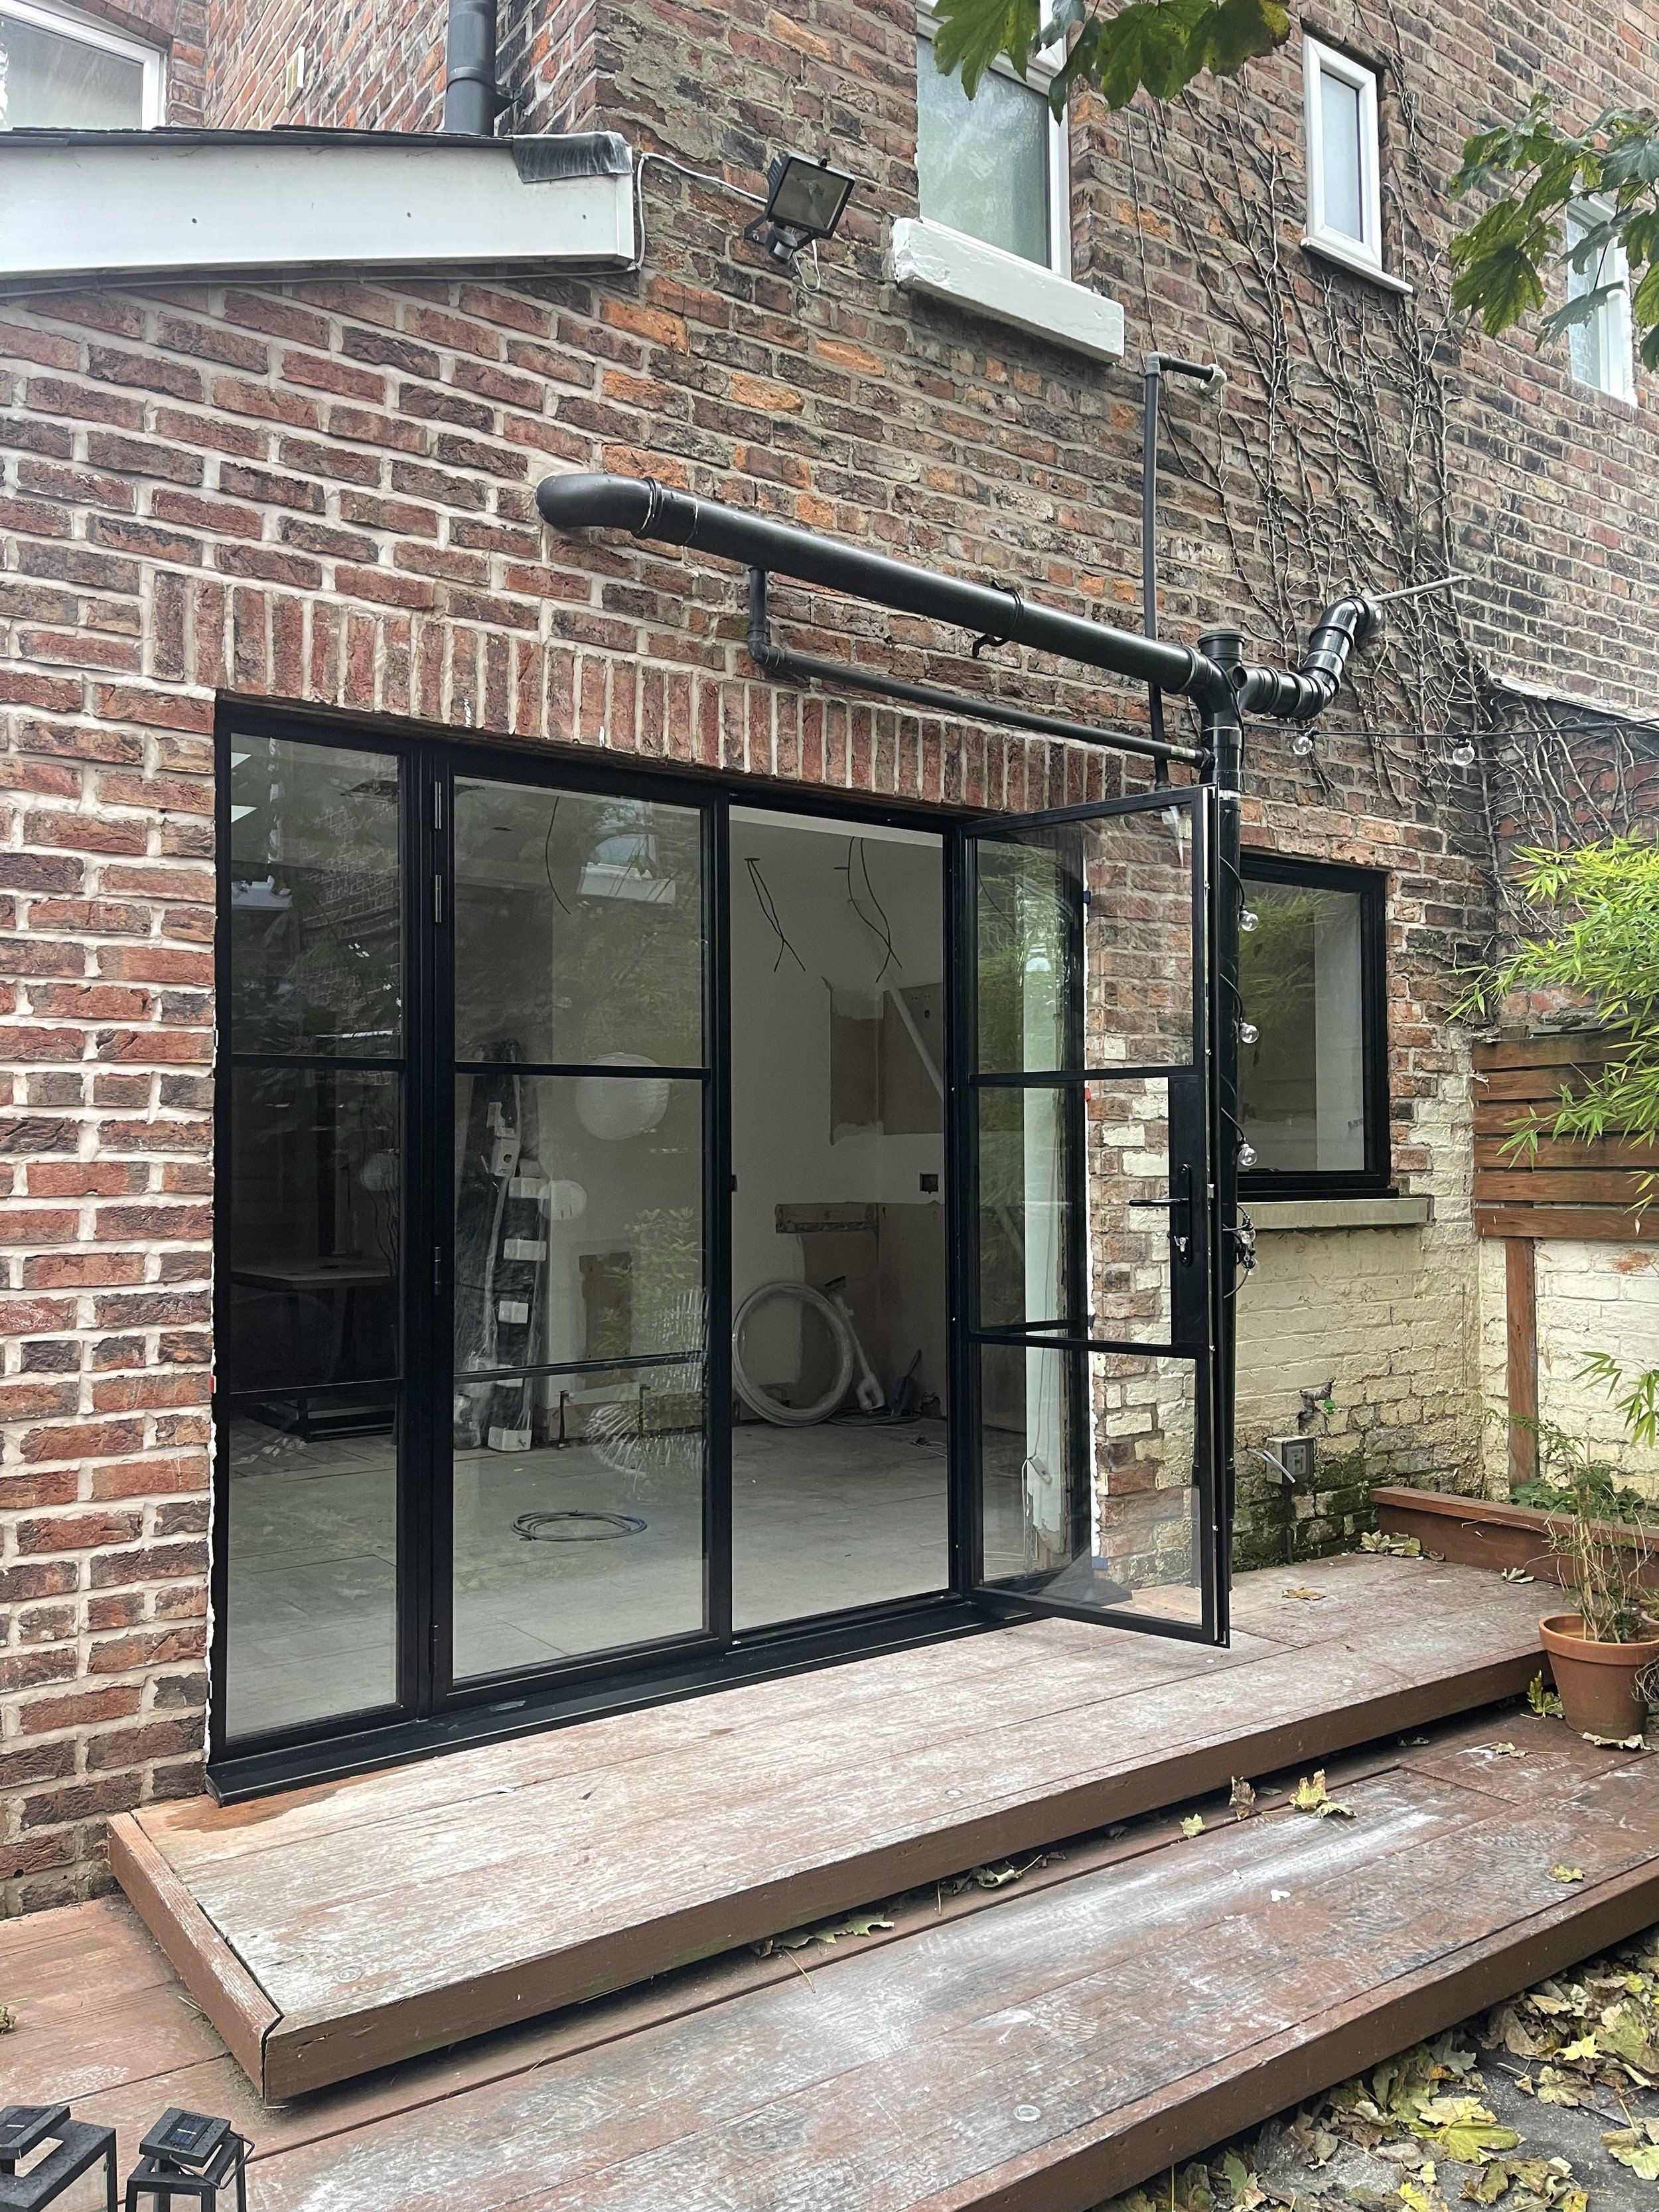
The Doors
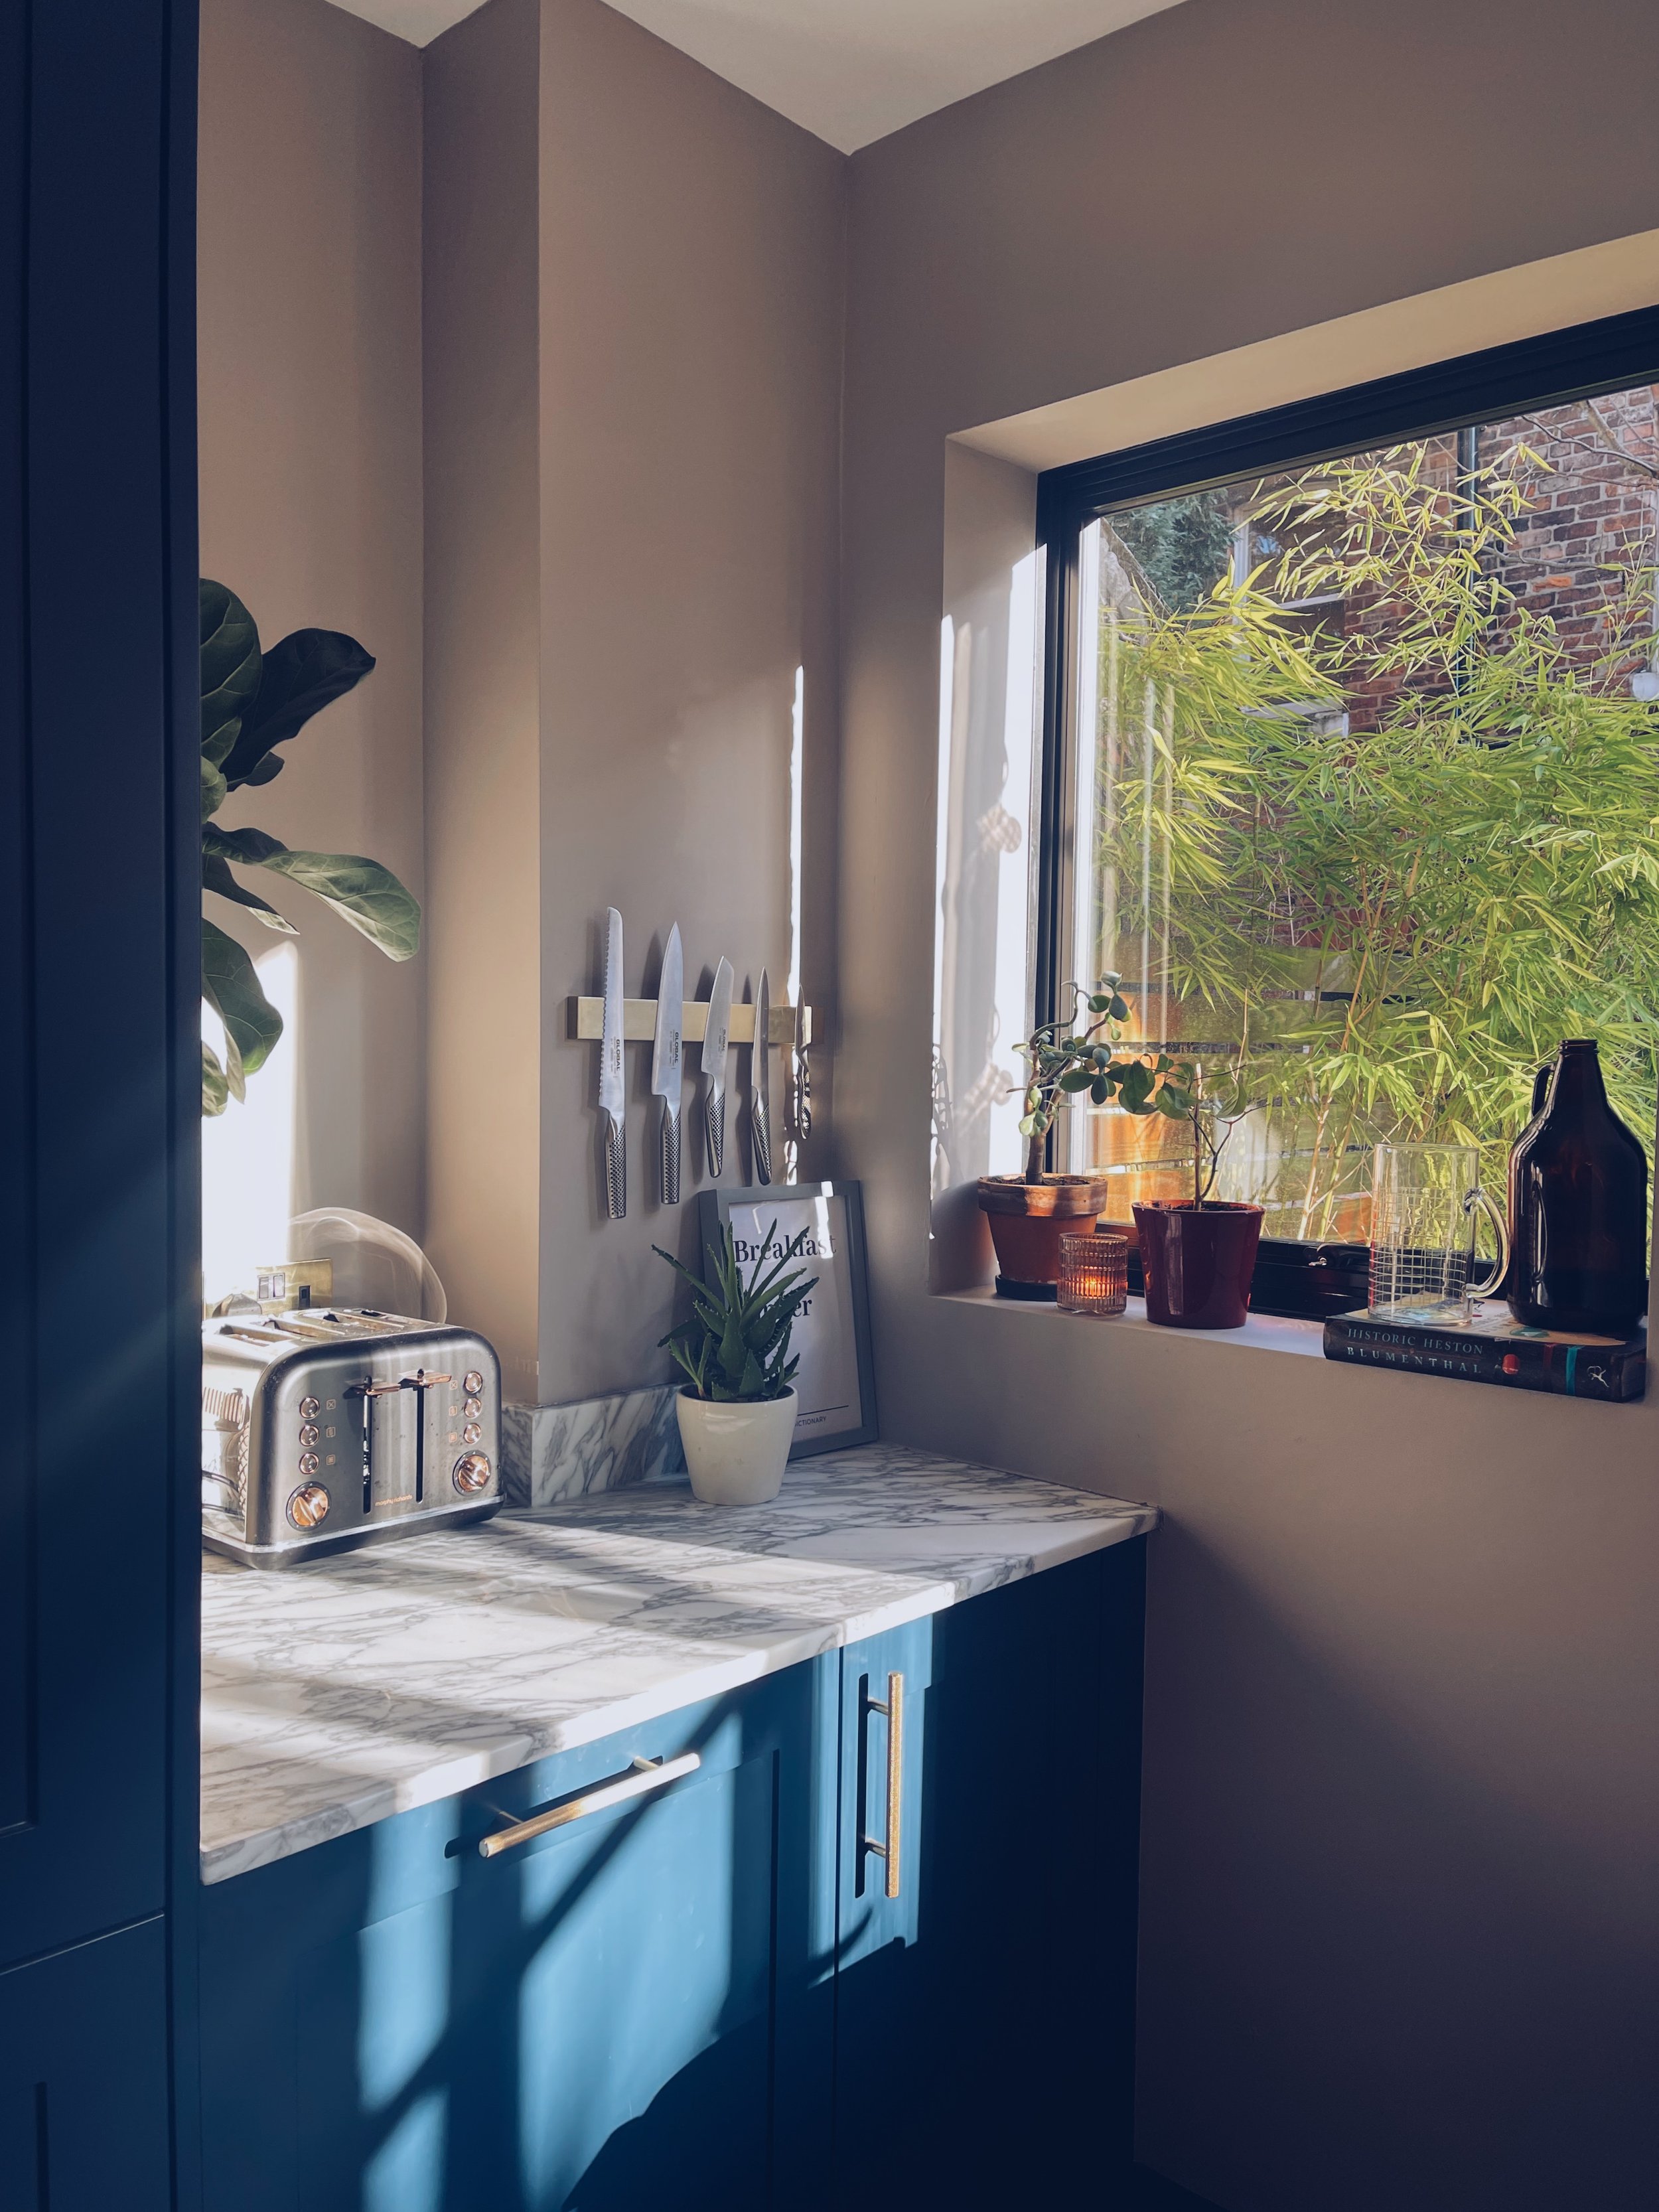
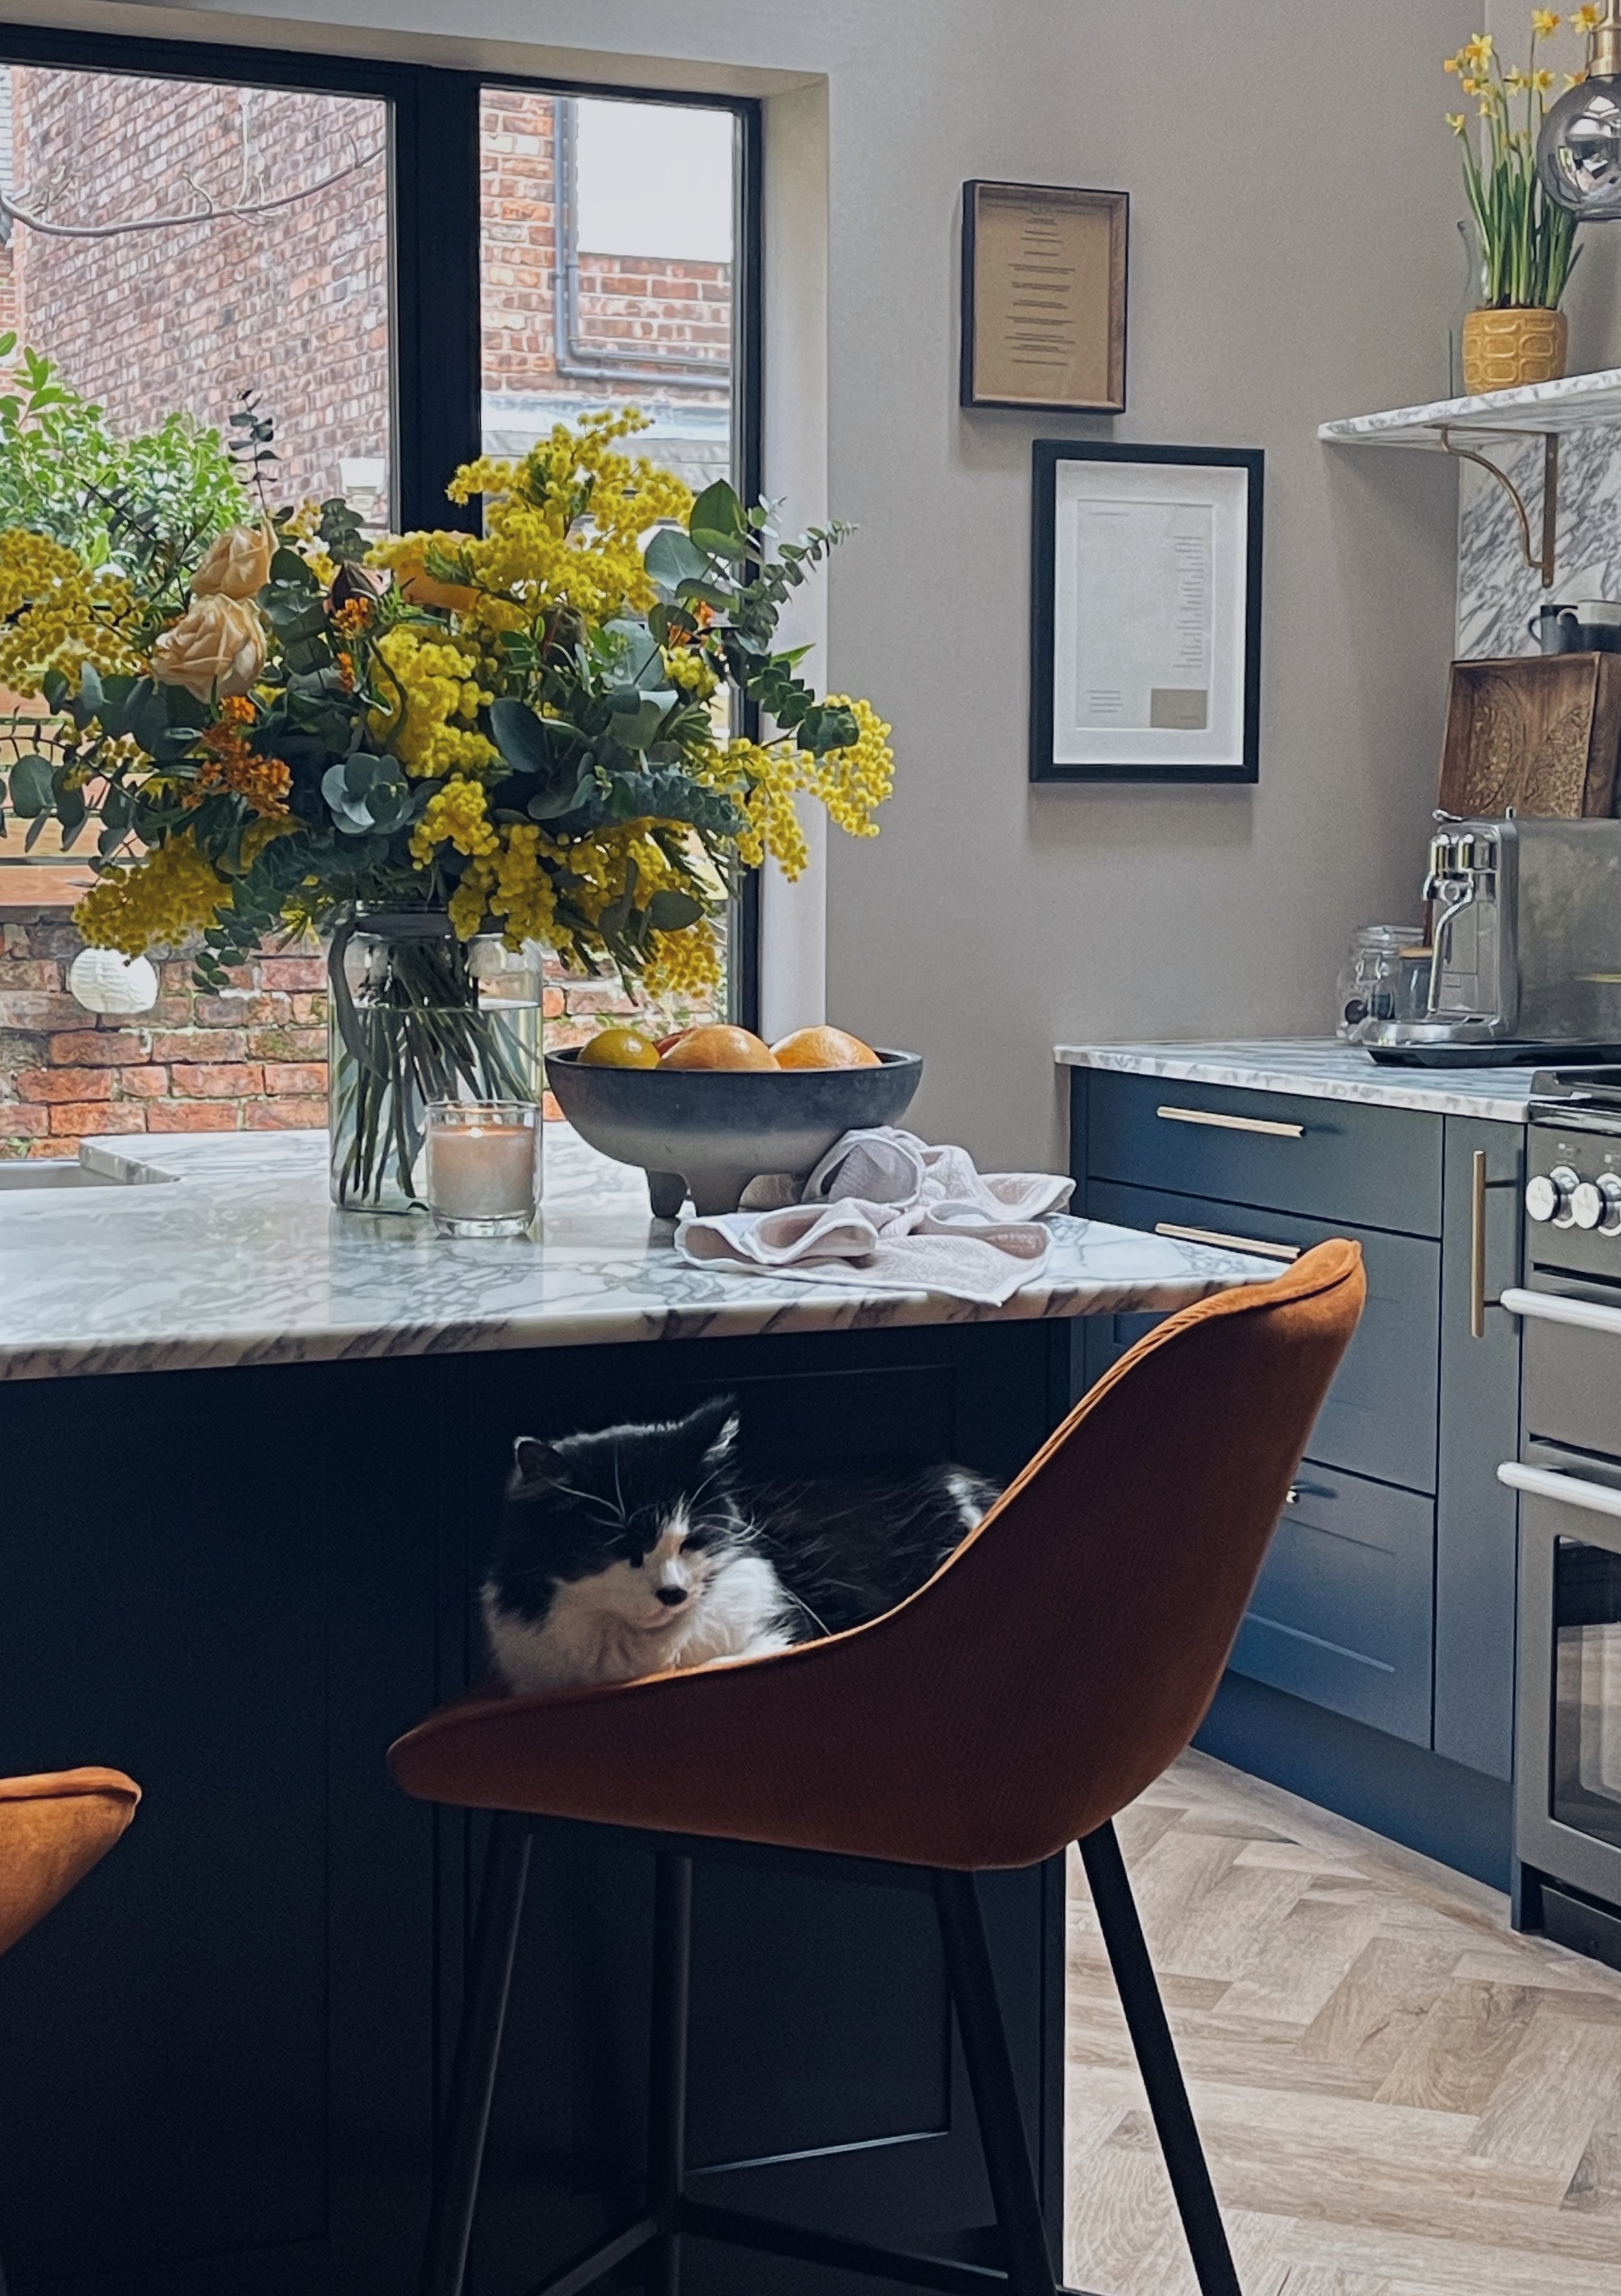
We said goodbye to the old rotted bi-folds and hello to the “Crittall” doors. If you’ve ever gotten a quote for real crittall then you’ll know they don’t come cheap so we went with the next best thing - aluminium. They are Aluco Aluminium doors, supplied and fitted by John Knight Glass. The whole process was super simple, quick and everyone was so friendly. I would highly recommend. I sent across measurements and John Knight Glass mocked up a couple of designs. They then came out and measured properly, installing everything in a day.
The Details
Now this is where I get really excited - choosing all the pretty bits to build into a nice cohesive design.
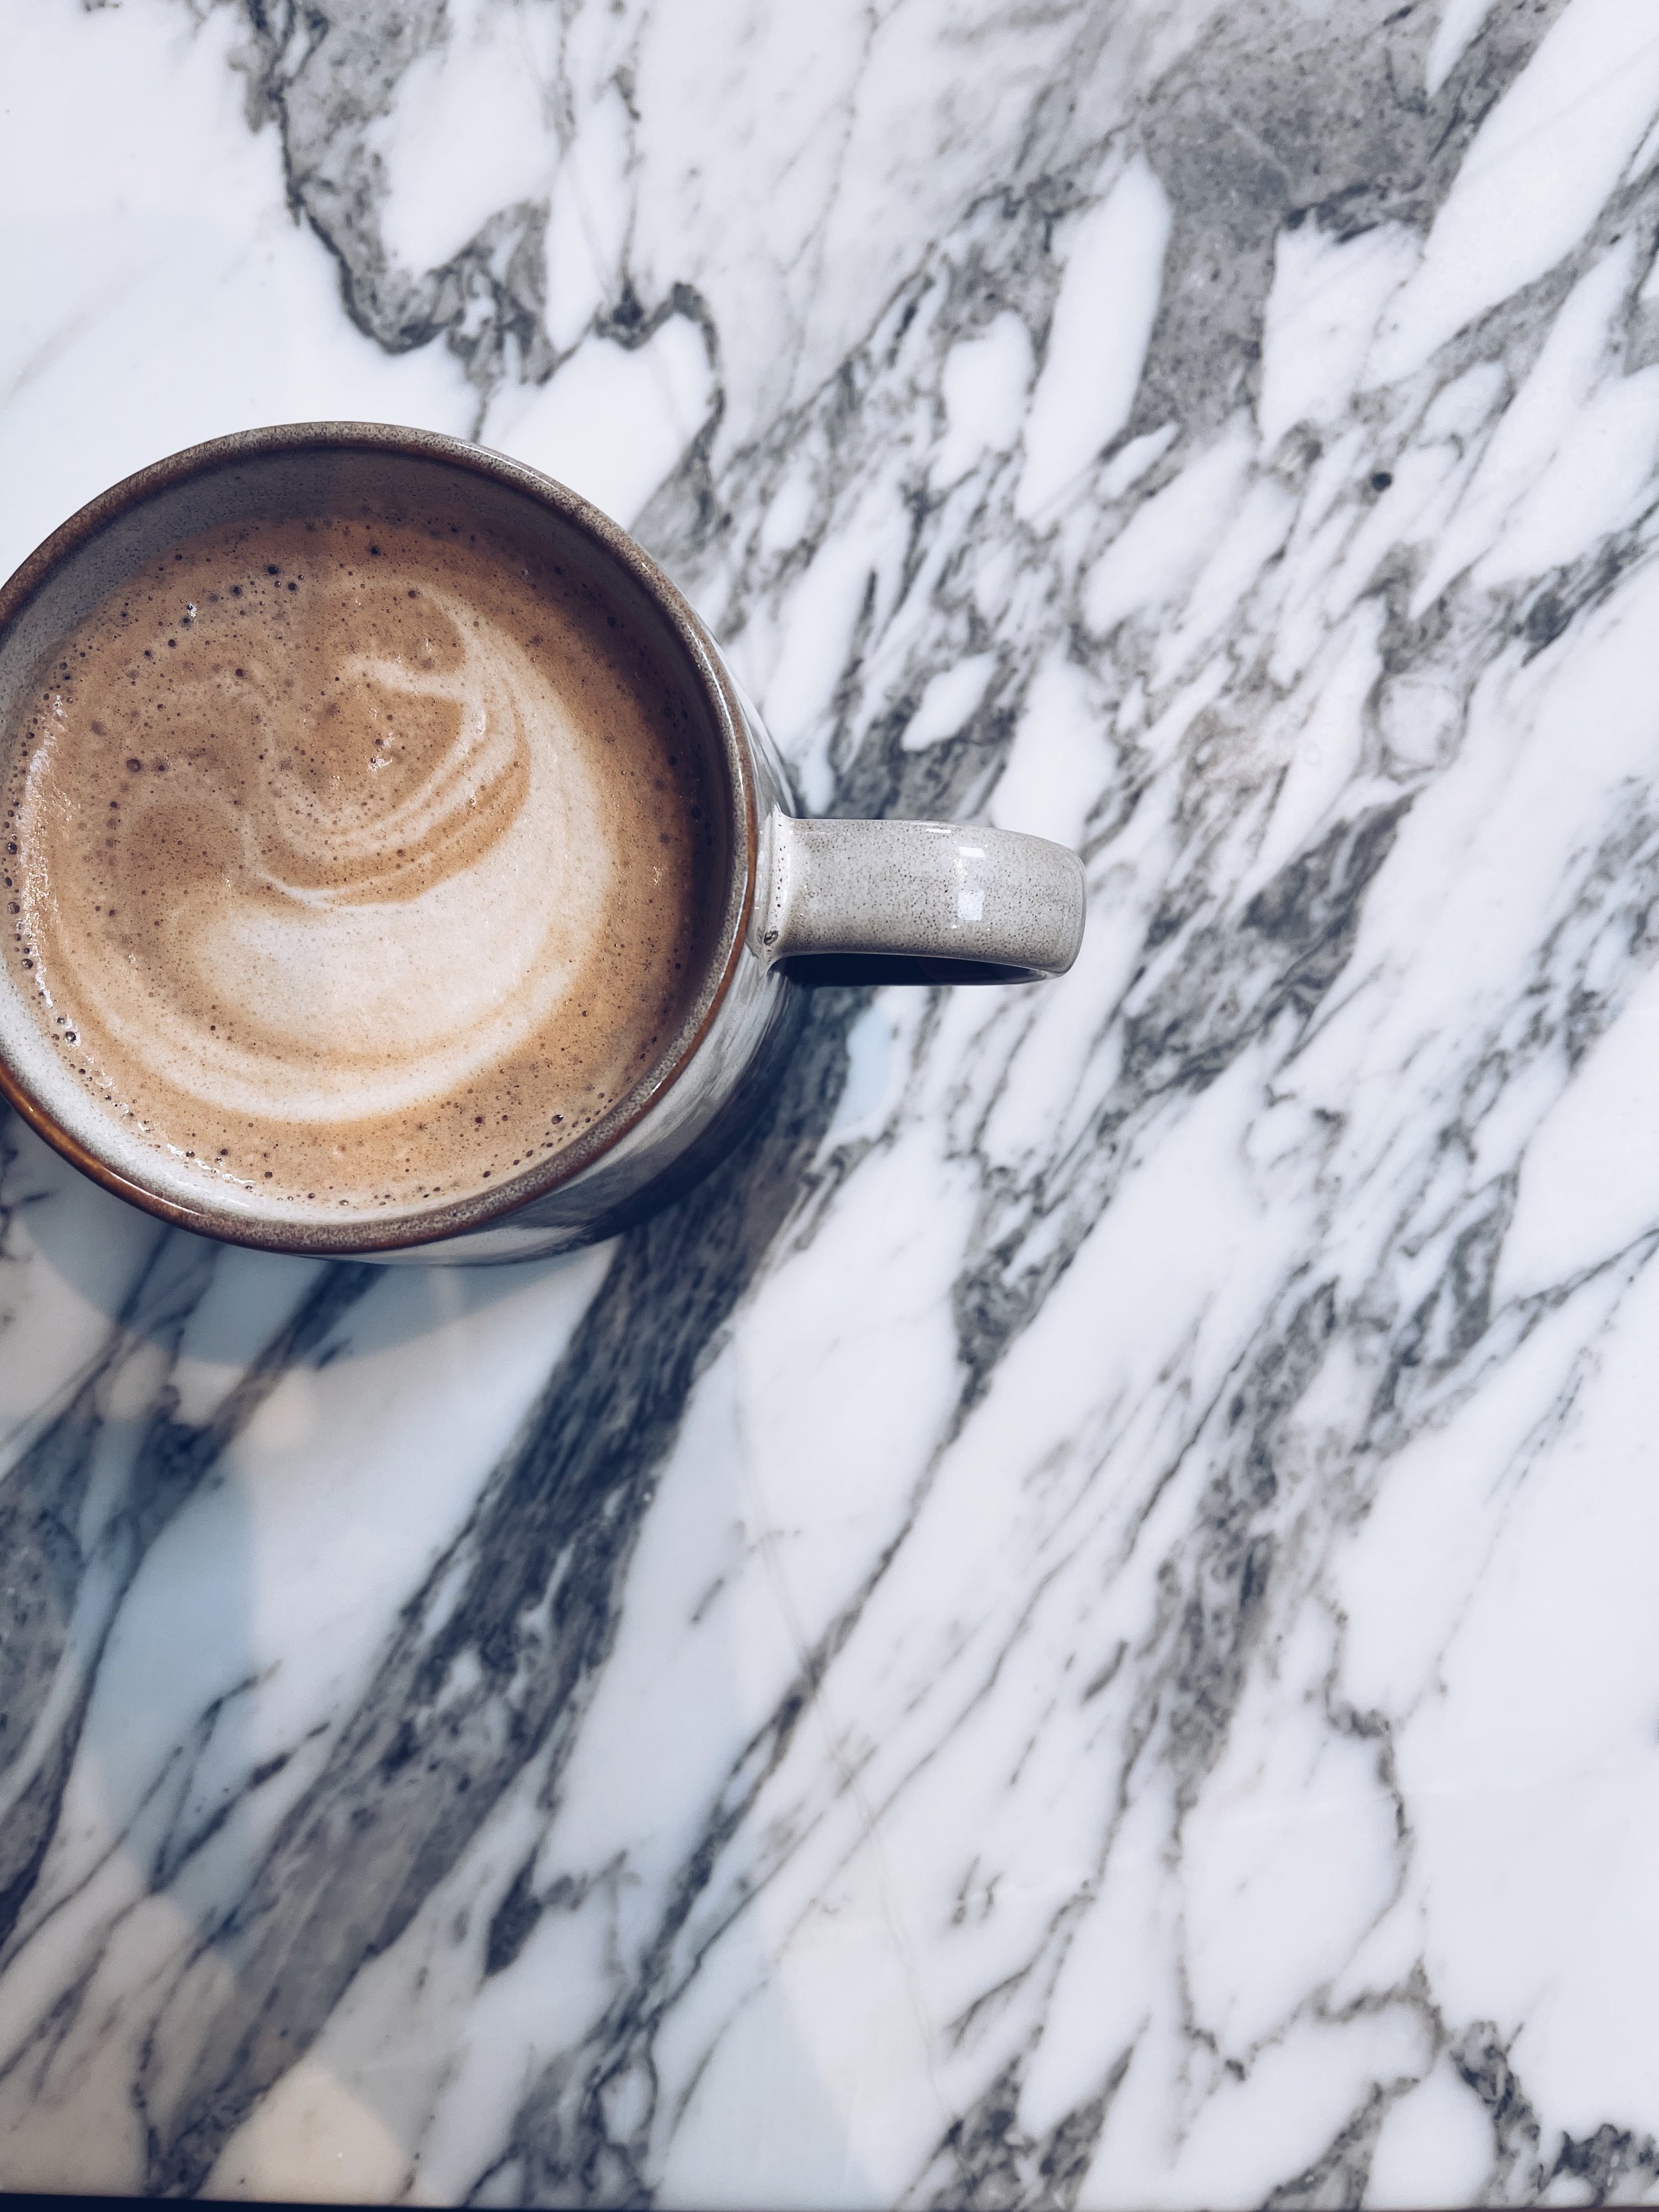
The main expensive of this kitchen was the marble. There’s no skirting around the issue - if you want the real deal then it’s a pricey affair. We ‘ummed’ and ‘ahhed’ for a few weeks, looking at all the other options available but in my opinion there just isn’t a marble effect laminate that can compete with the natural beauty of the real thing. I knew I wanted a statement vein so Arabescato Marble was the perfect choice for us. Maybe in a few years there will be some advances in designs but the wow factor of this vein is still going strong even 11 months on.
There are pros and cons of marble which I will save for another blog post as this is going on long enough! Well done for getting this far! Not long left, I promise.
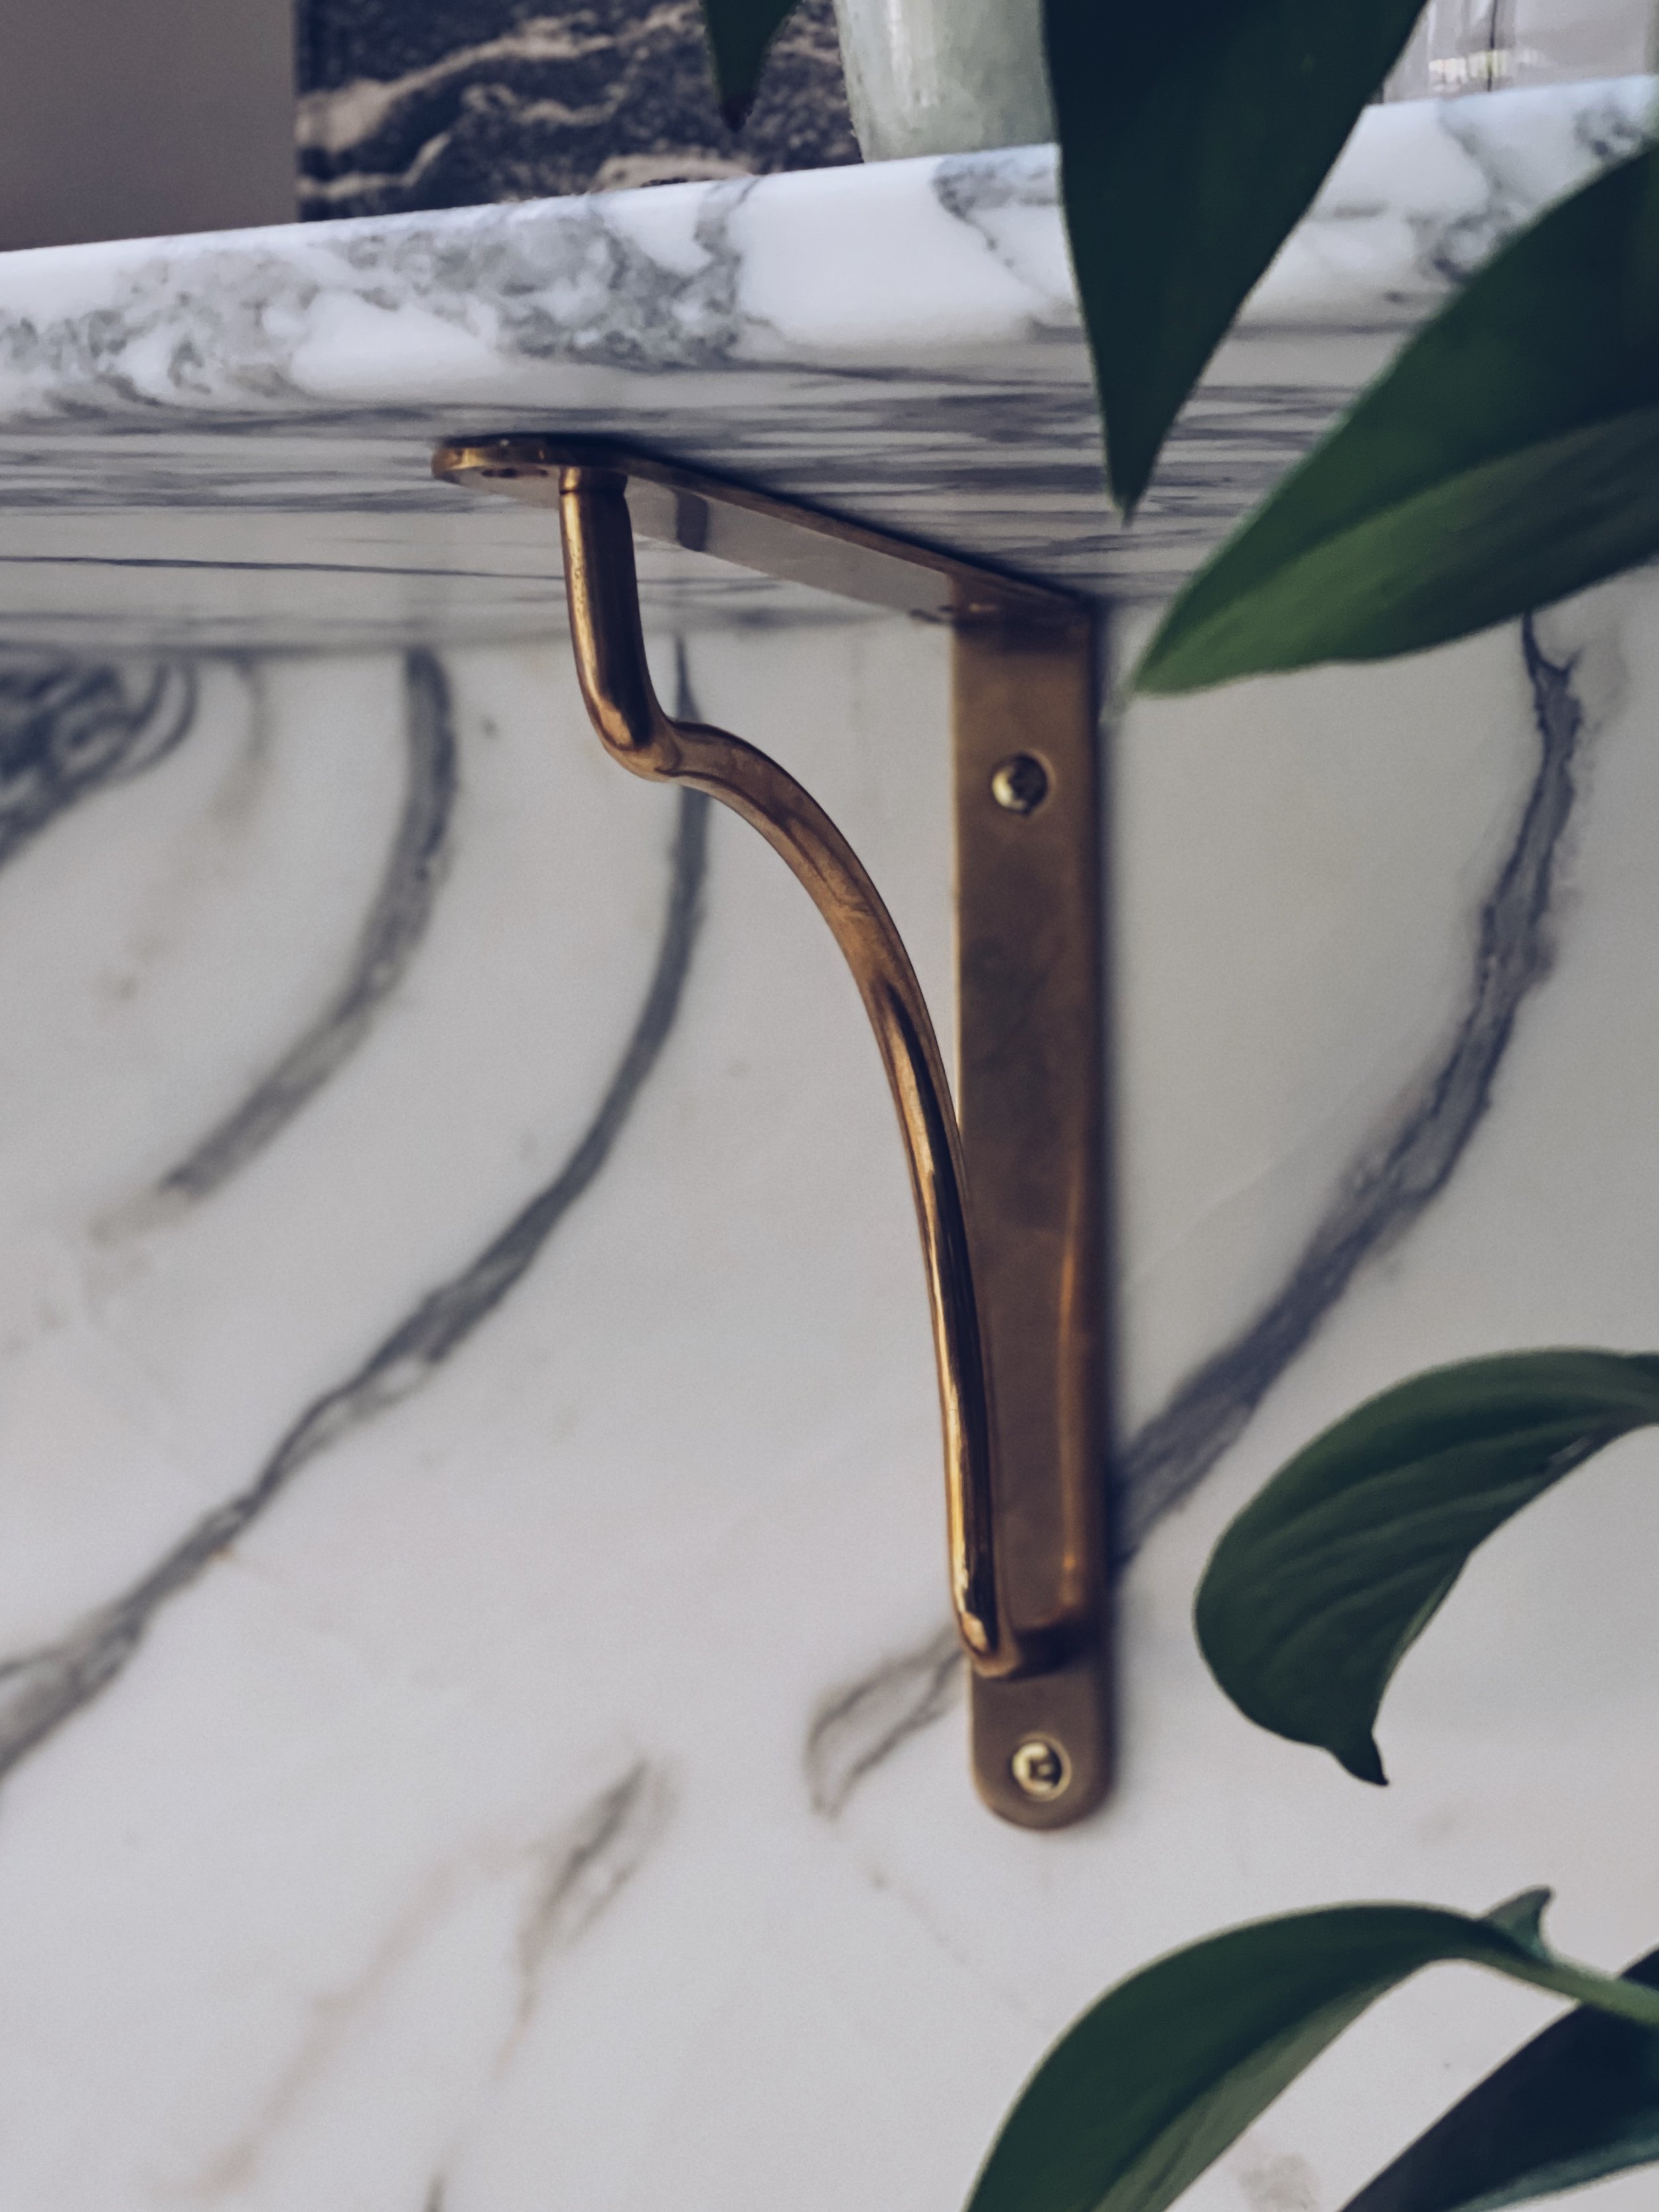
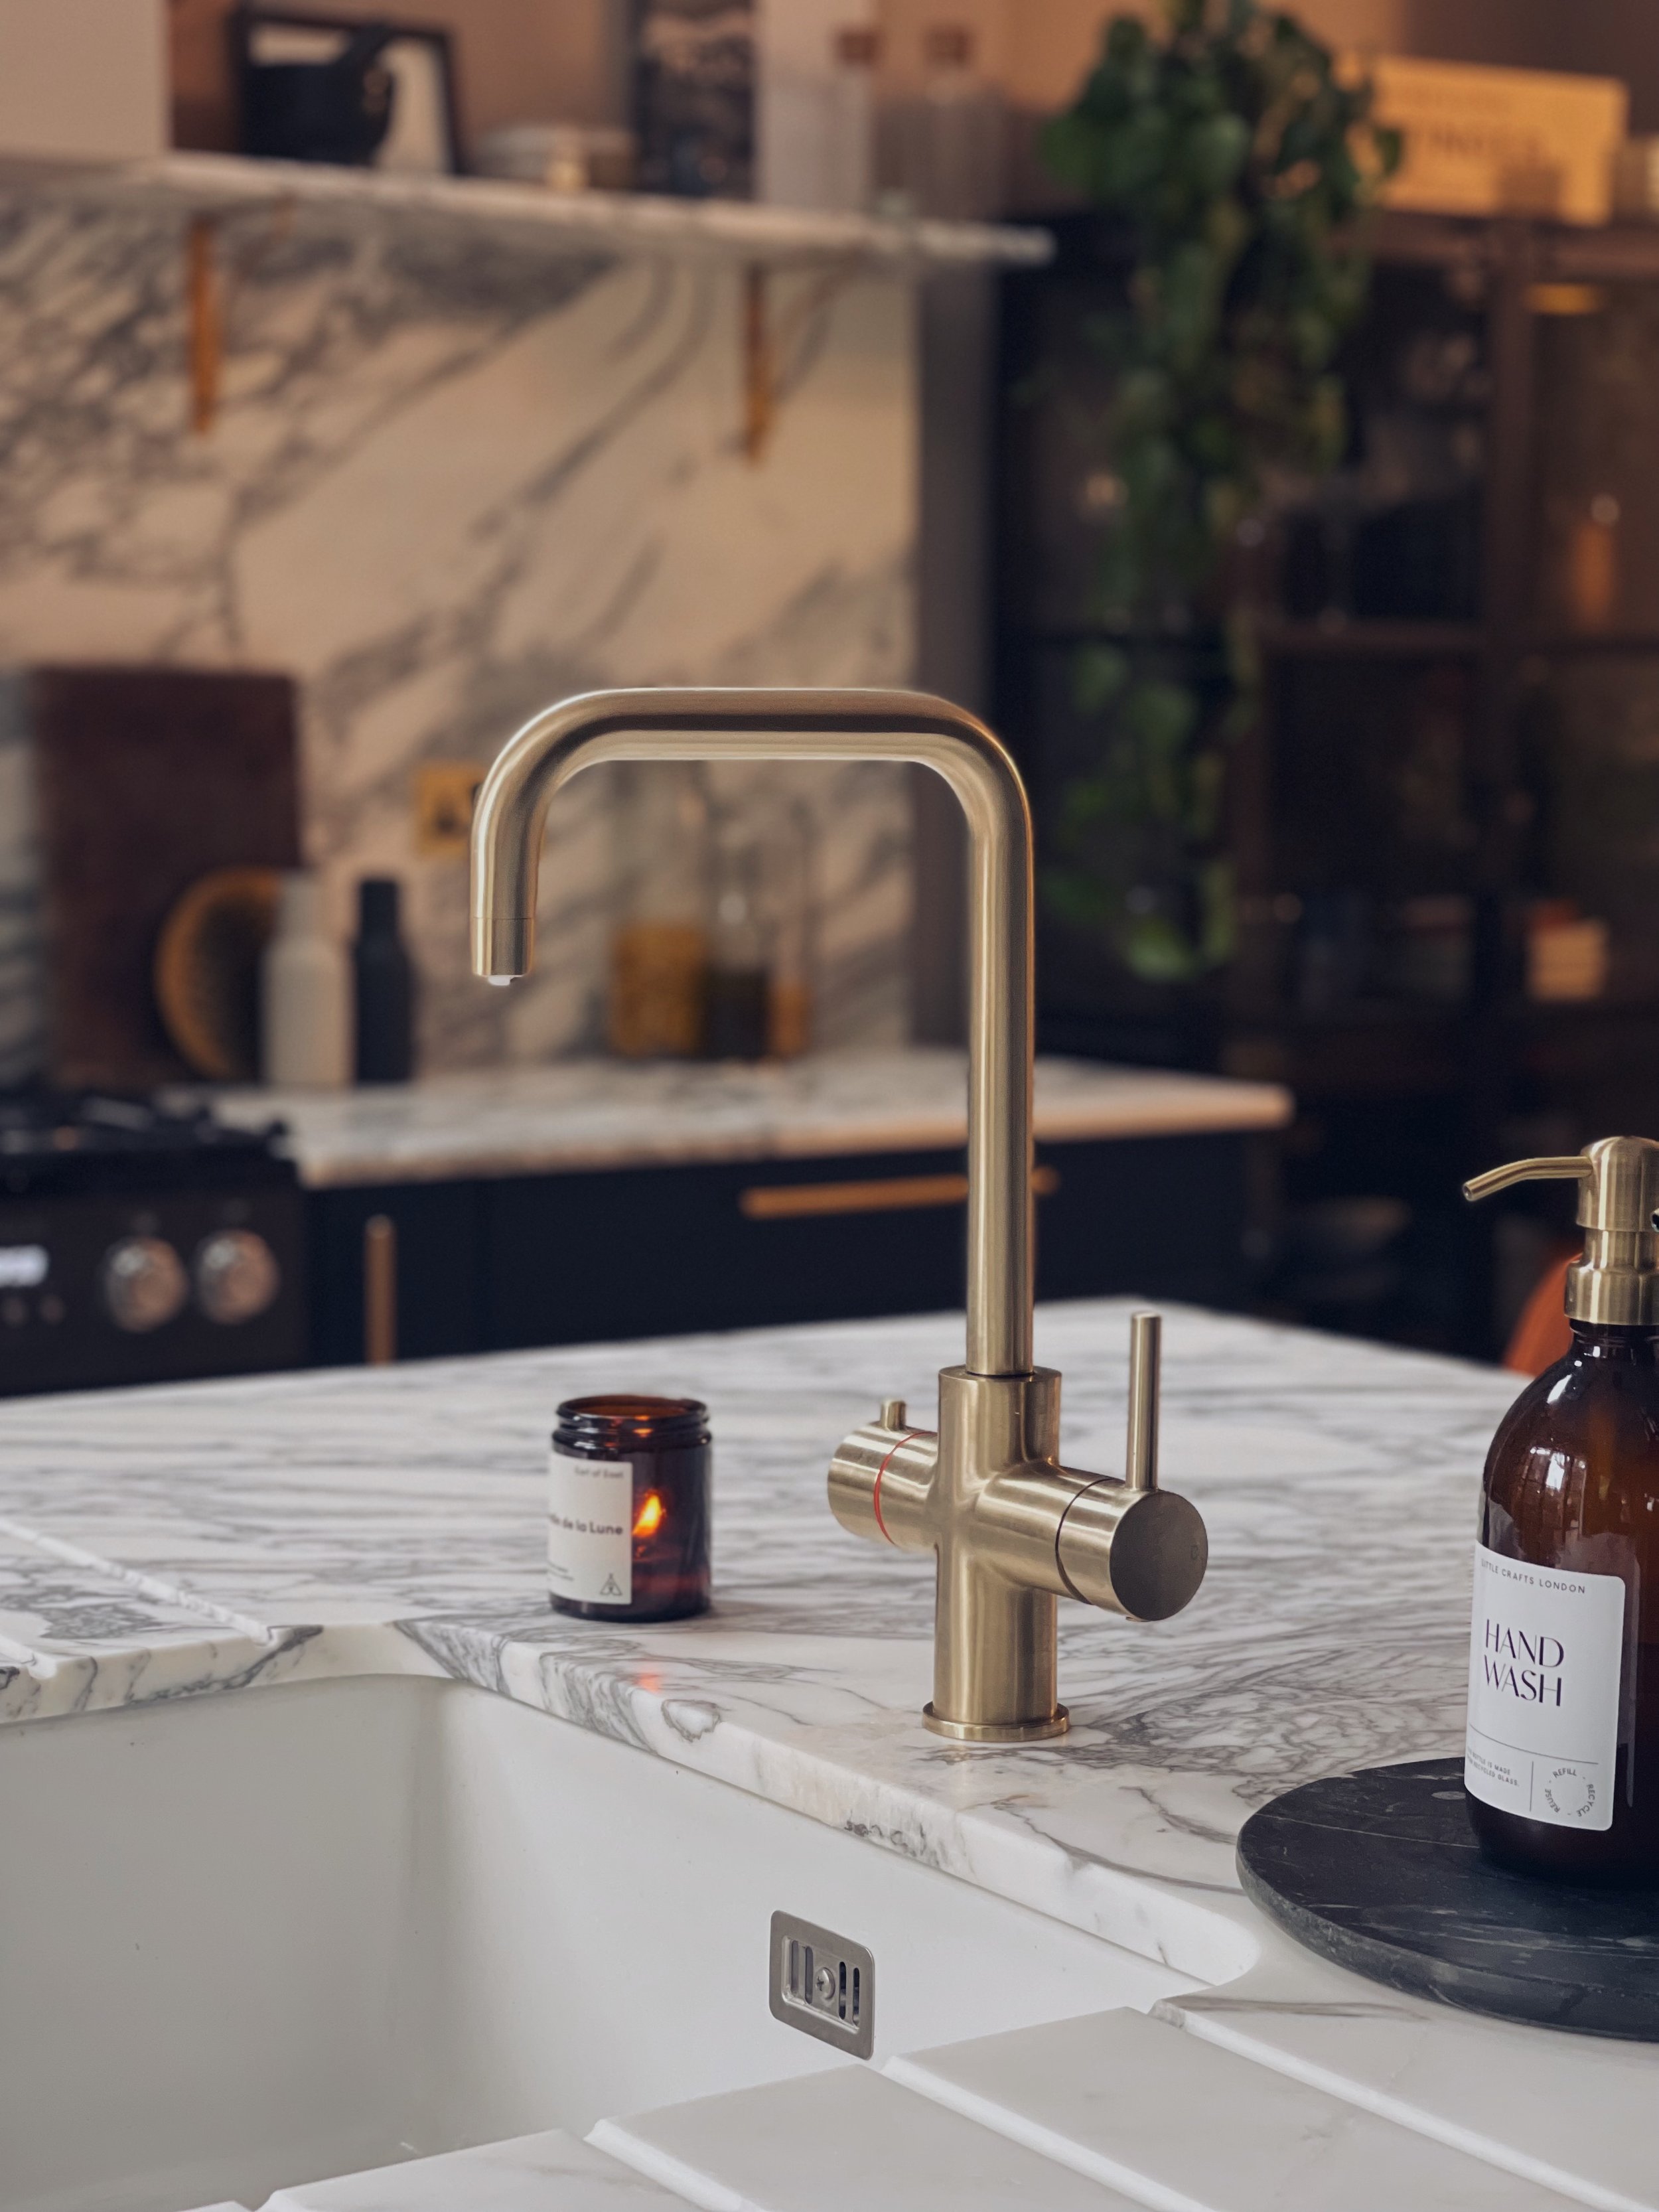
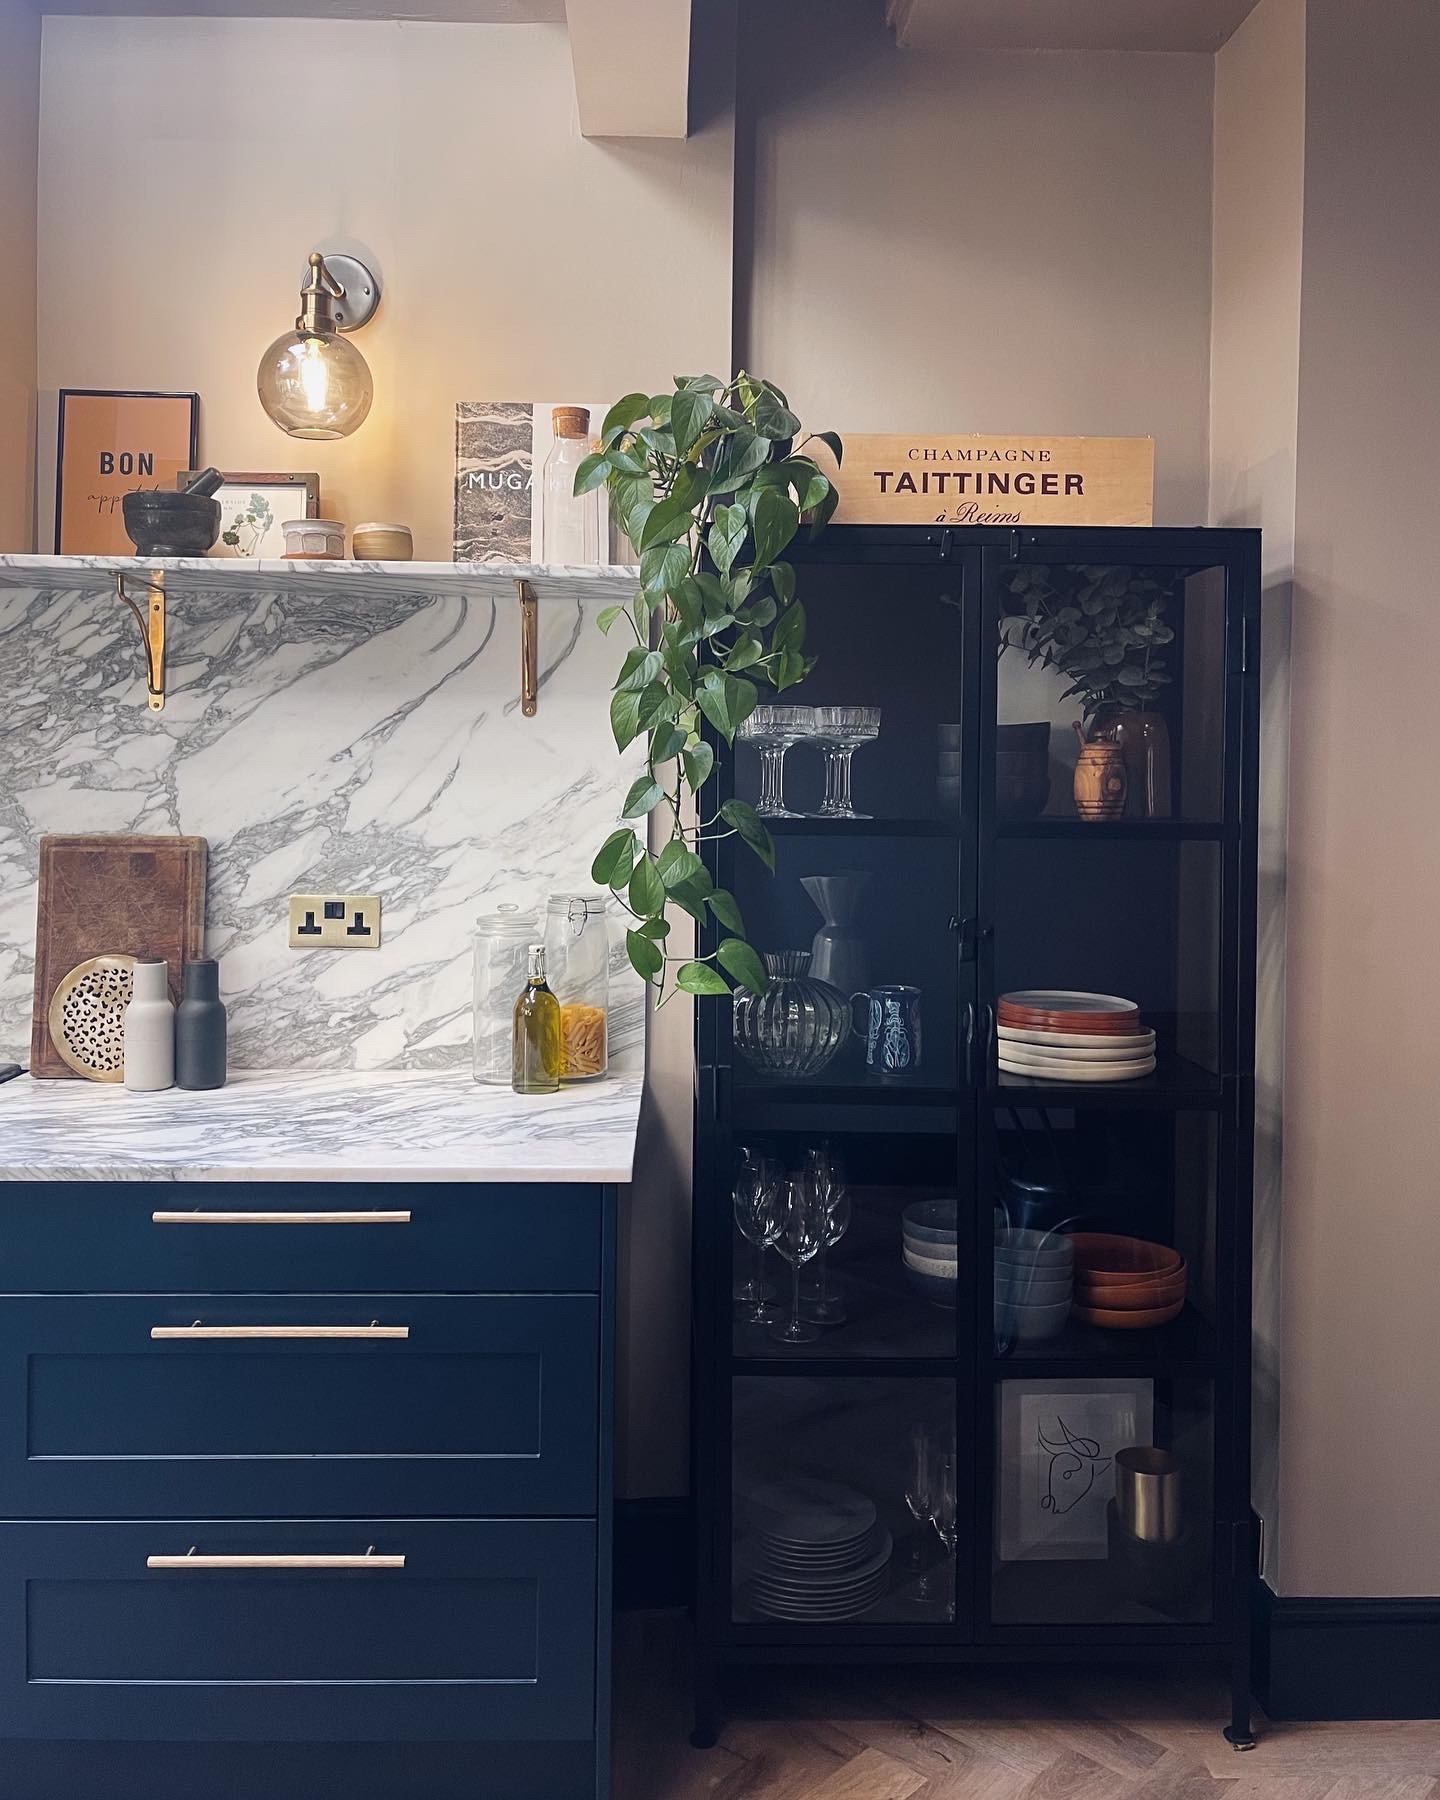
I tied in the brass accents through the shelving brackets, handles and switches. We took a punt on a relatively unknown hot water tap brand Fohen - because it was the only tap on the market which has the right brass tone that I wanted. Plus it was a hell of a lot cheaper than the other leading market taps so it was a clear winner. (PR discount)
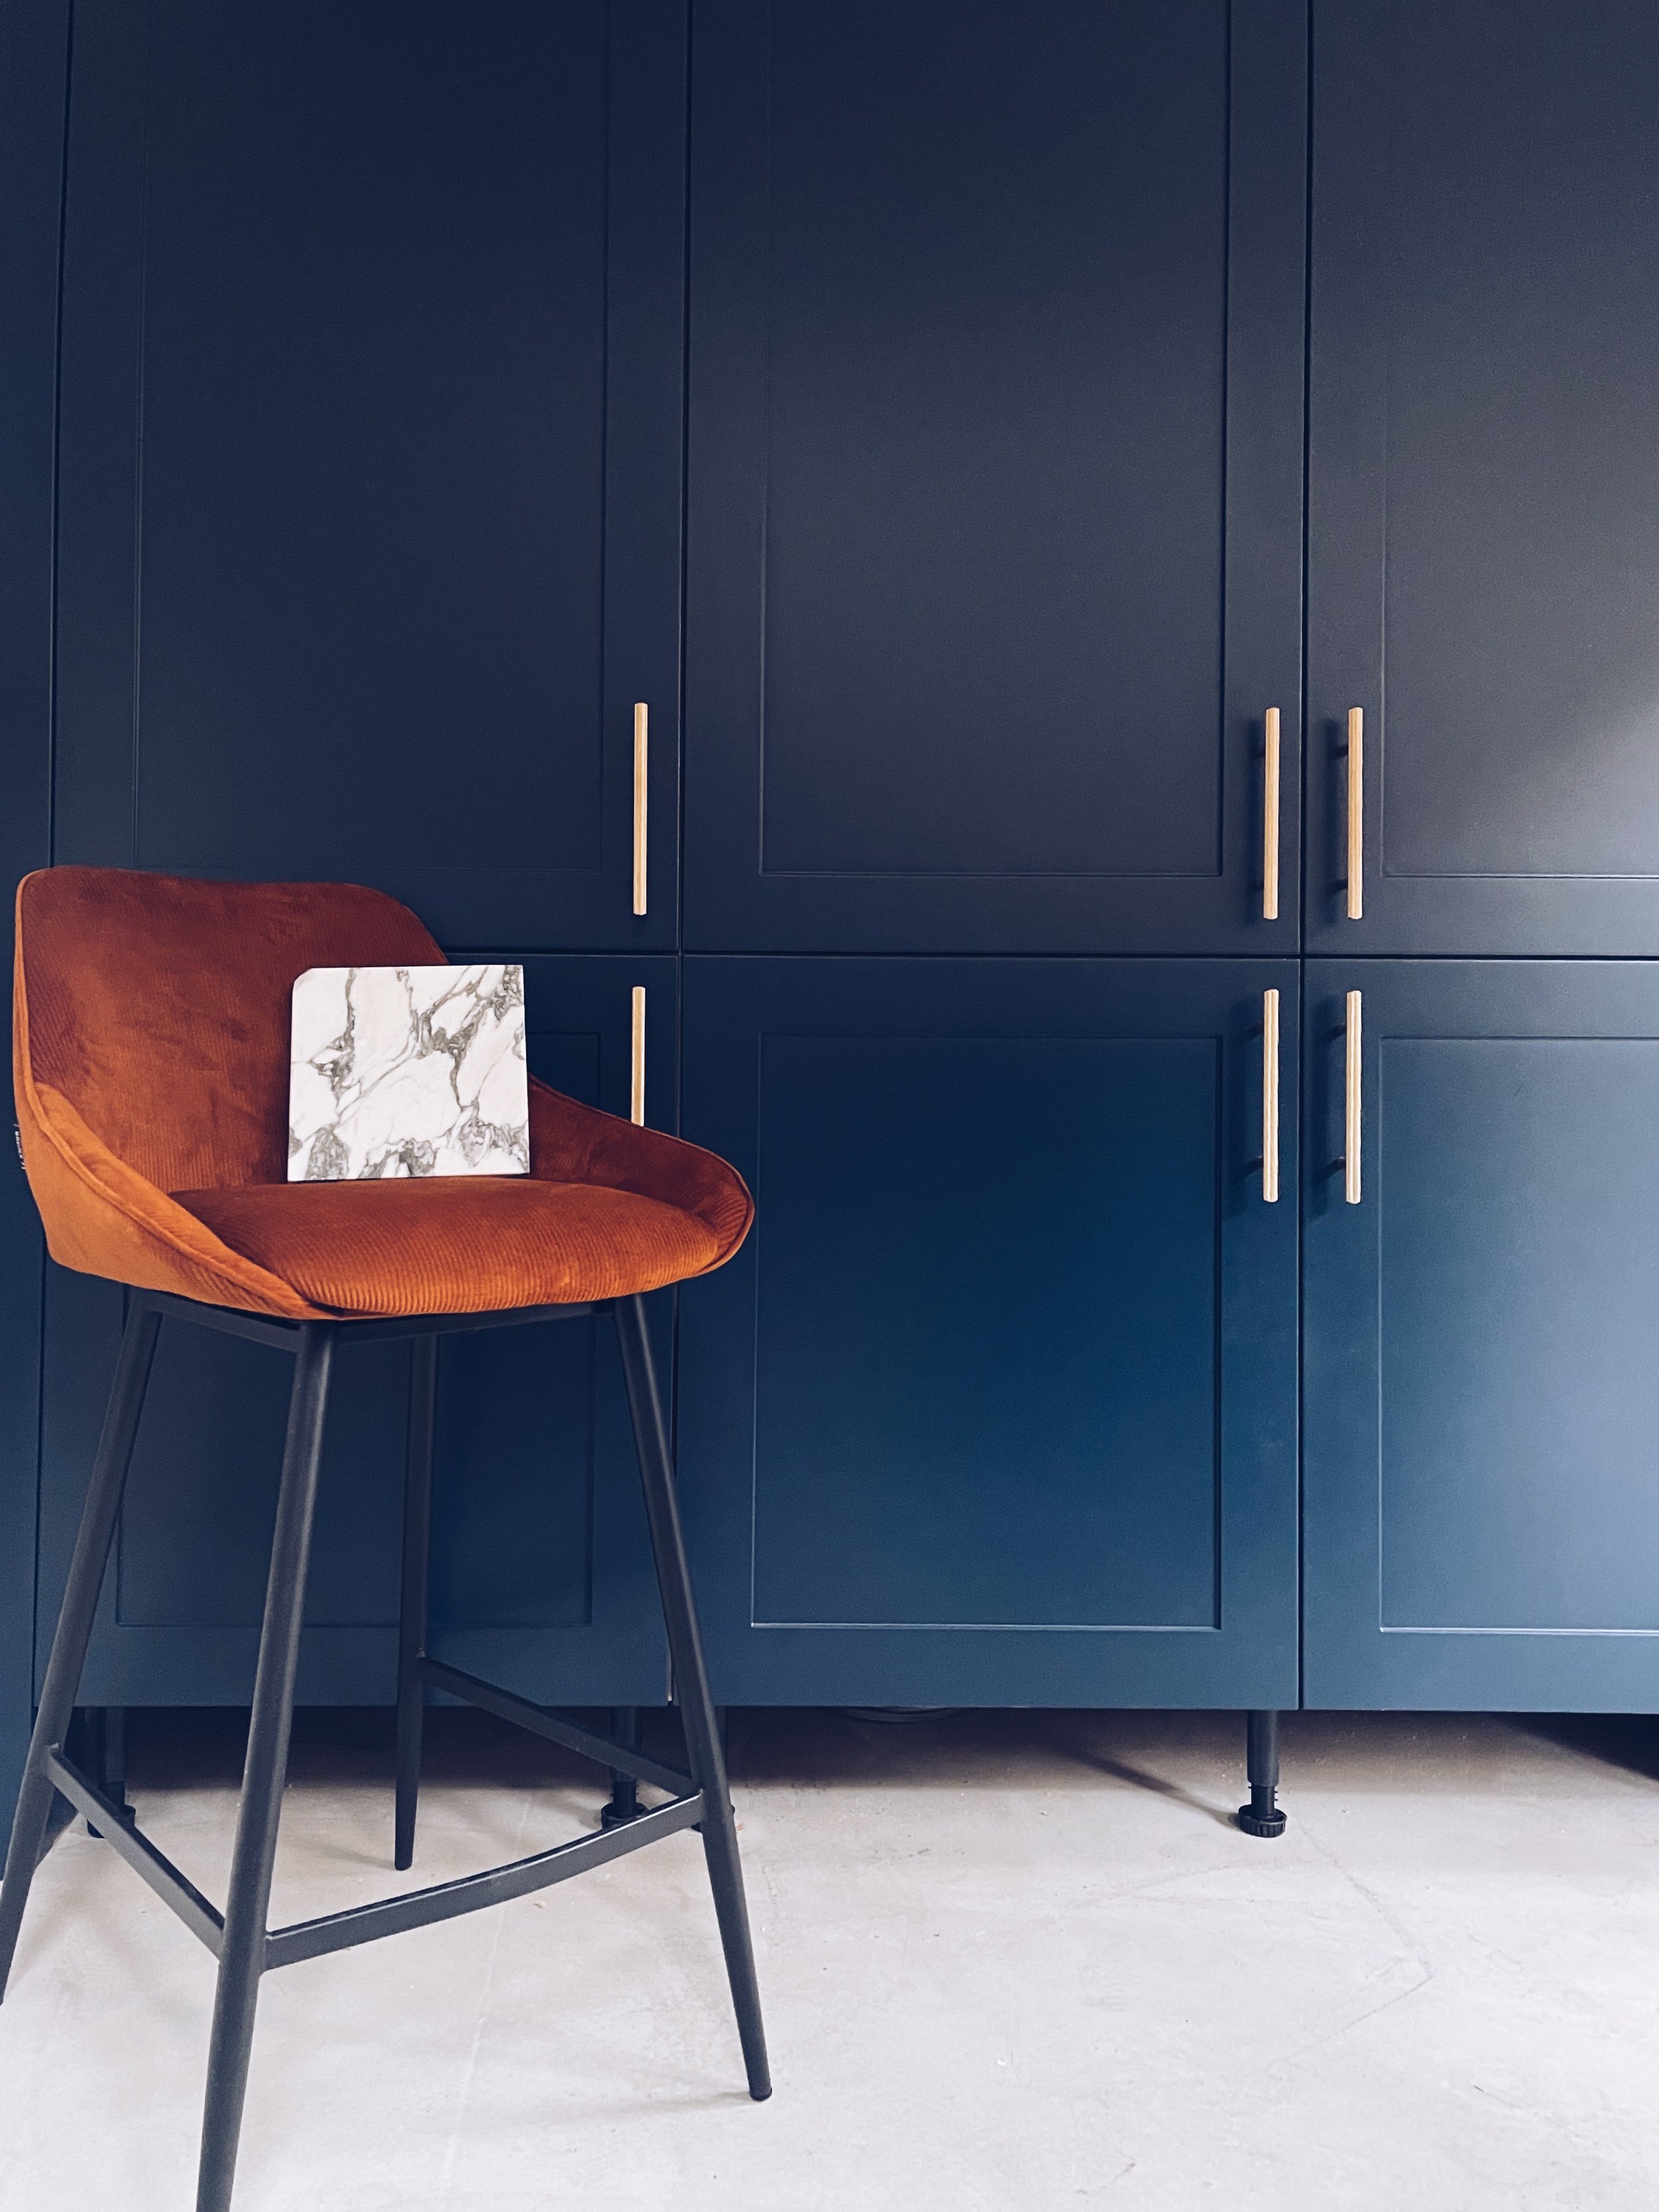
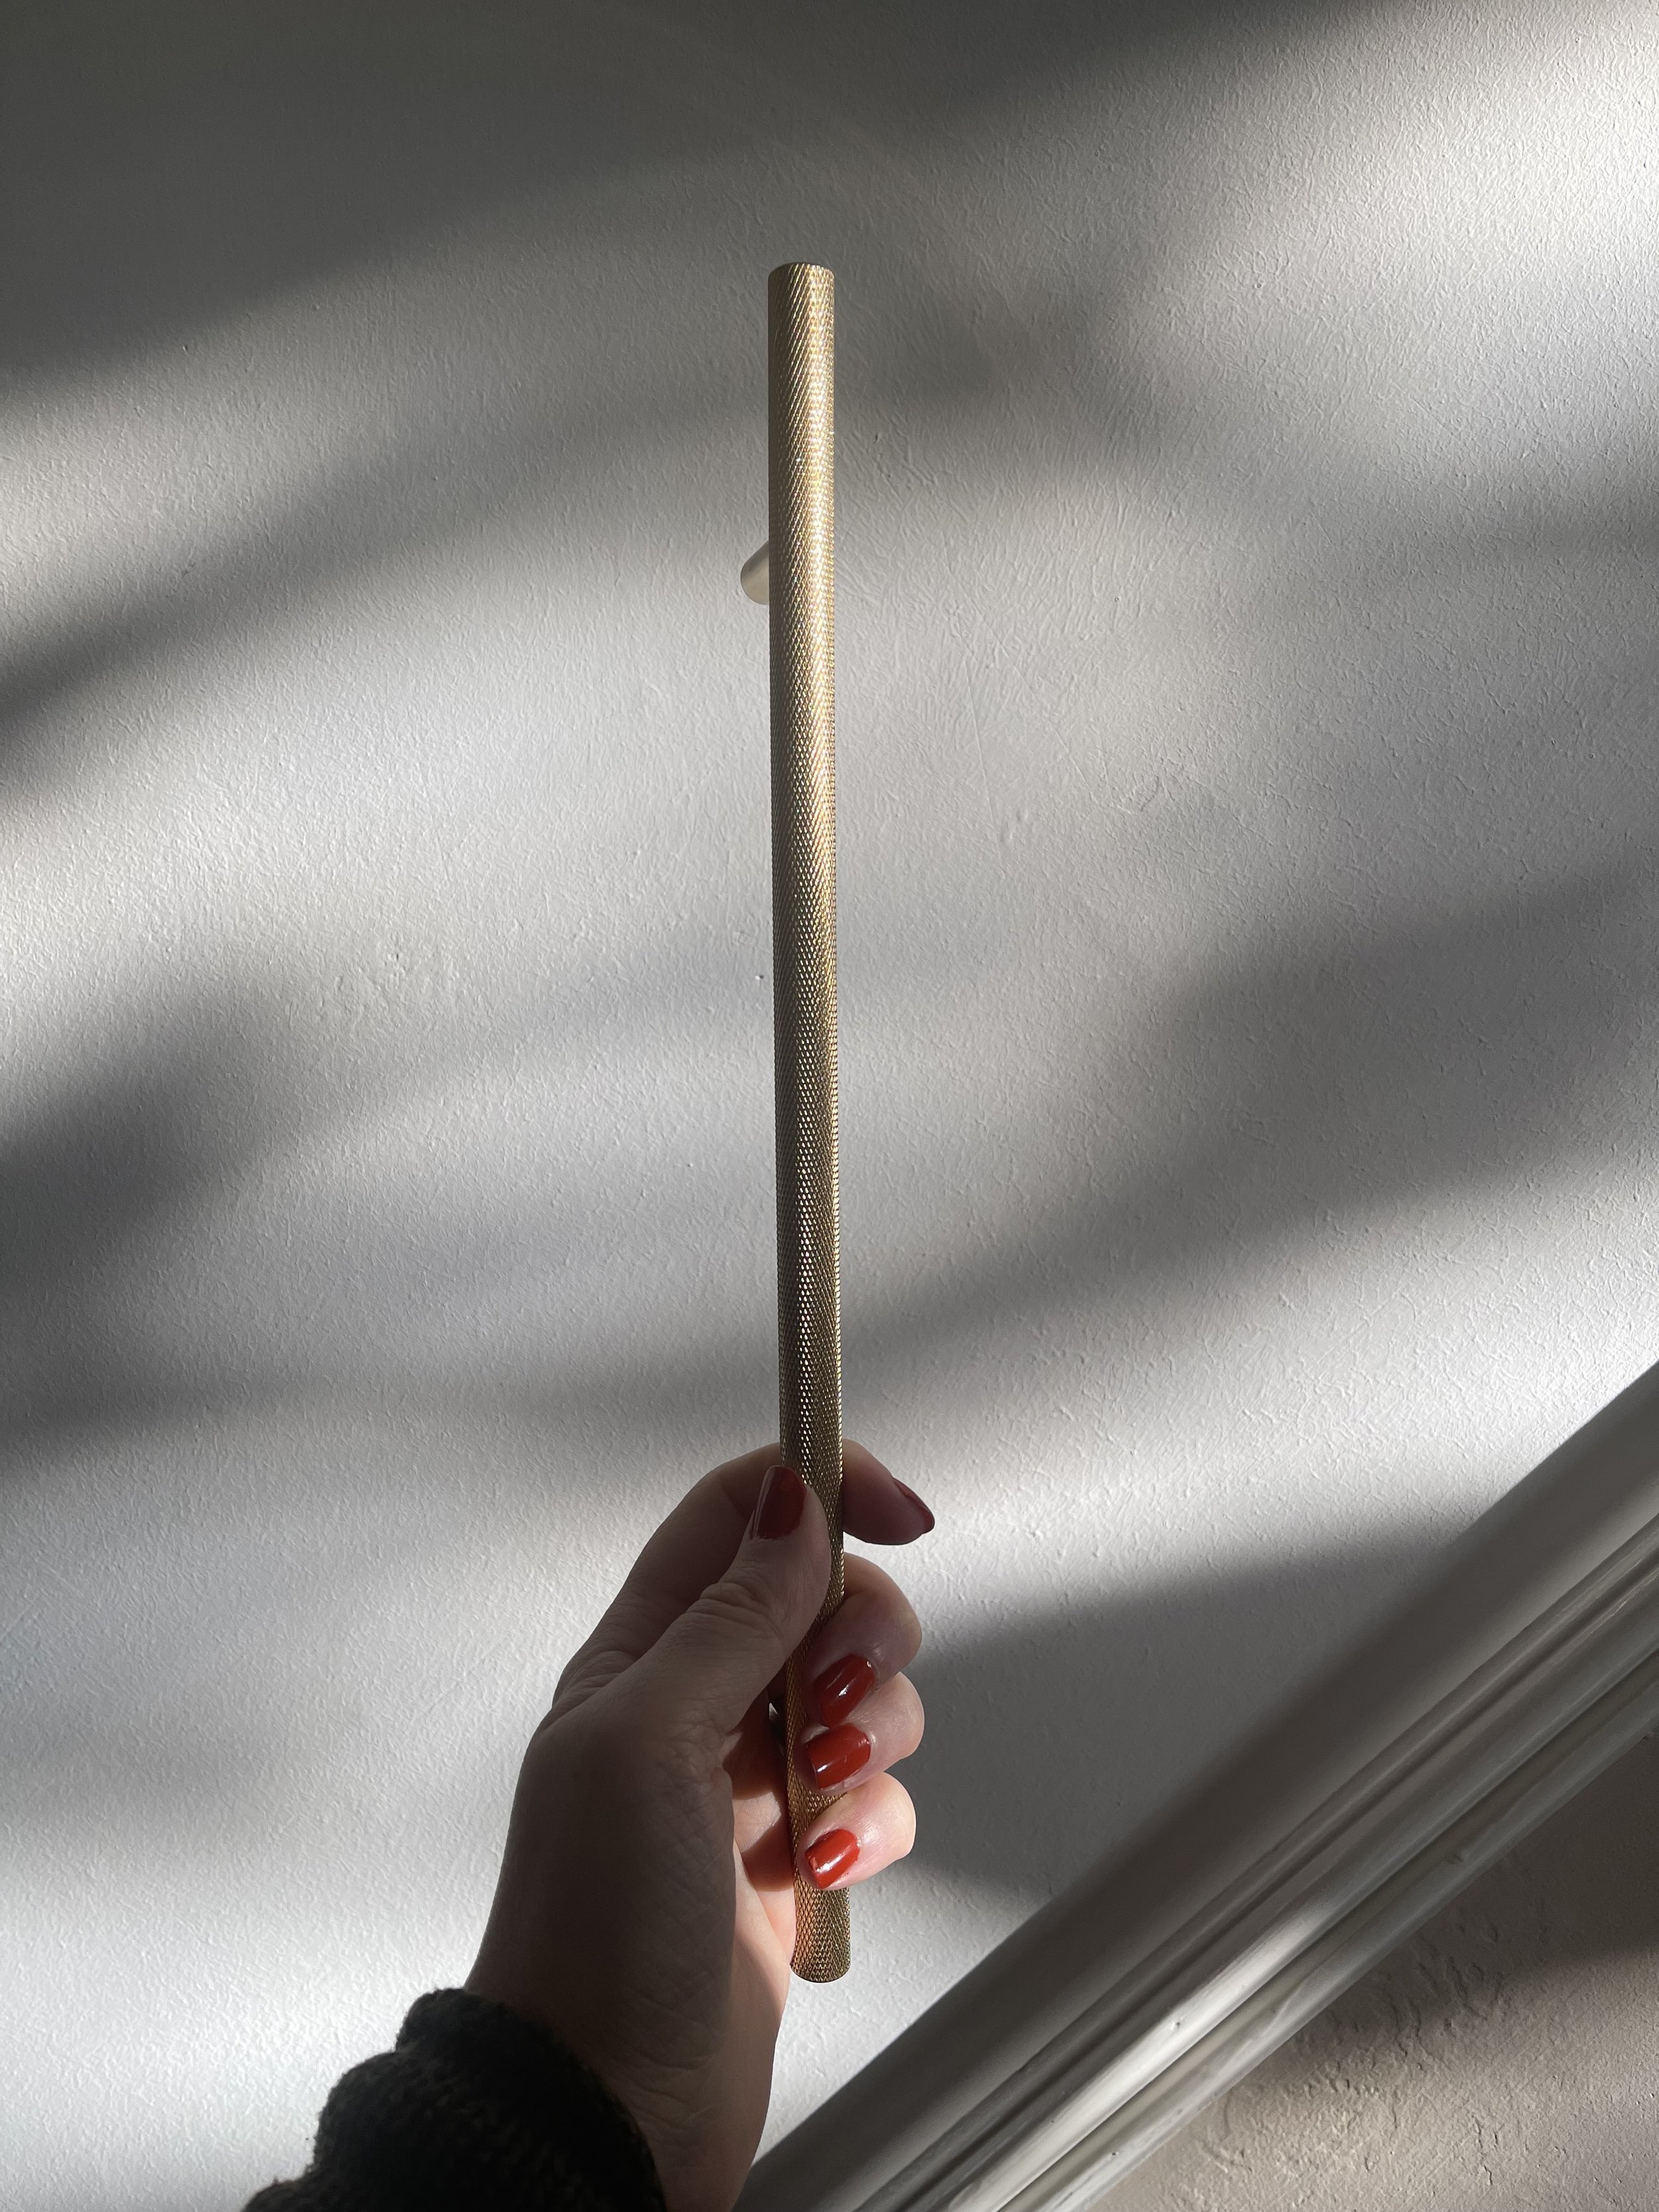
Handles were from my favourite supplier Dowsing & Reynolds, having collaborated with them in my previous kitchen revamp. I went for the Skyscraper Knurled handle in two sizes to give a nice linear look. (AD)
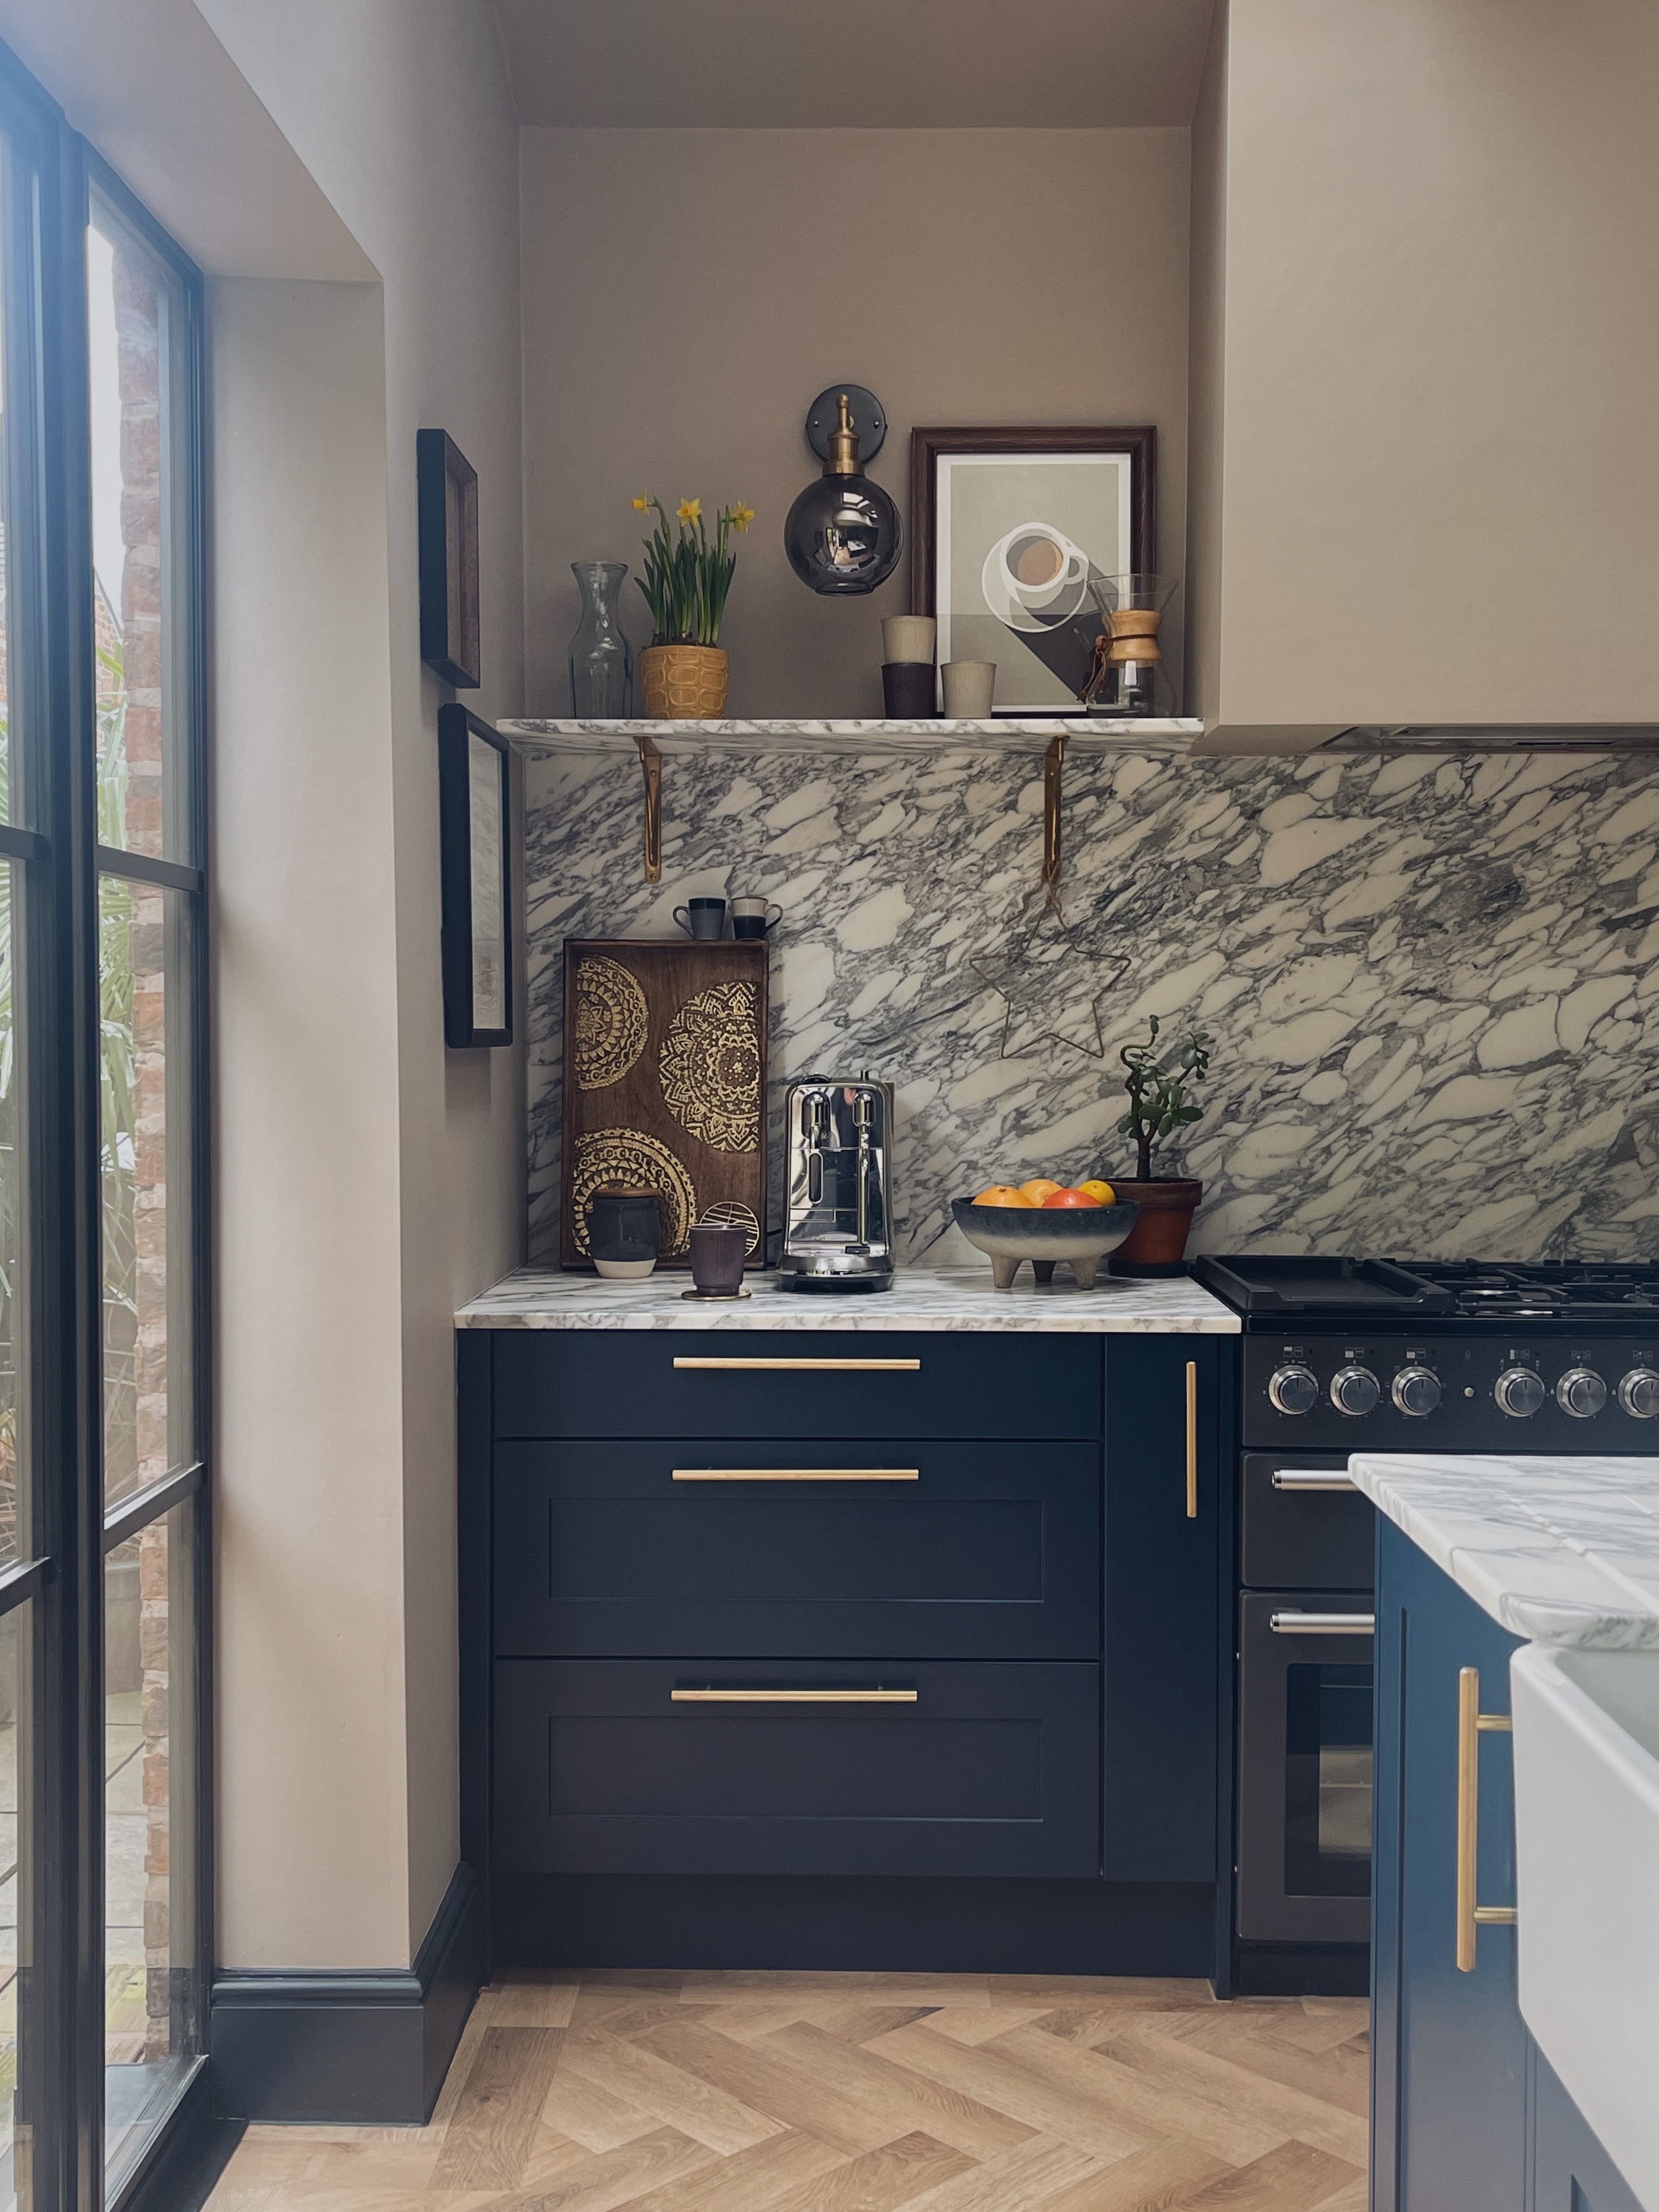
Handles by Dowsing & Reynolds
Flooring was by far the hardest choice for me. I looked at soooo many samples. Some were too yellow, some were too light. In an ideal world where money was no object, we probably would have gone with engineered wood/real timber but having blown most of the budget on the marble - LVT was the way forward. I have no regrets though, the floor looks really good for LVT and the marble wins every time.
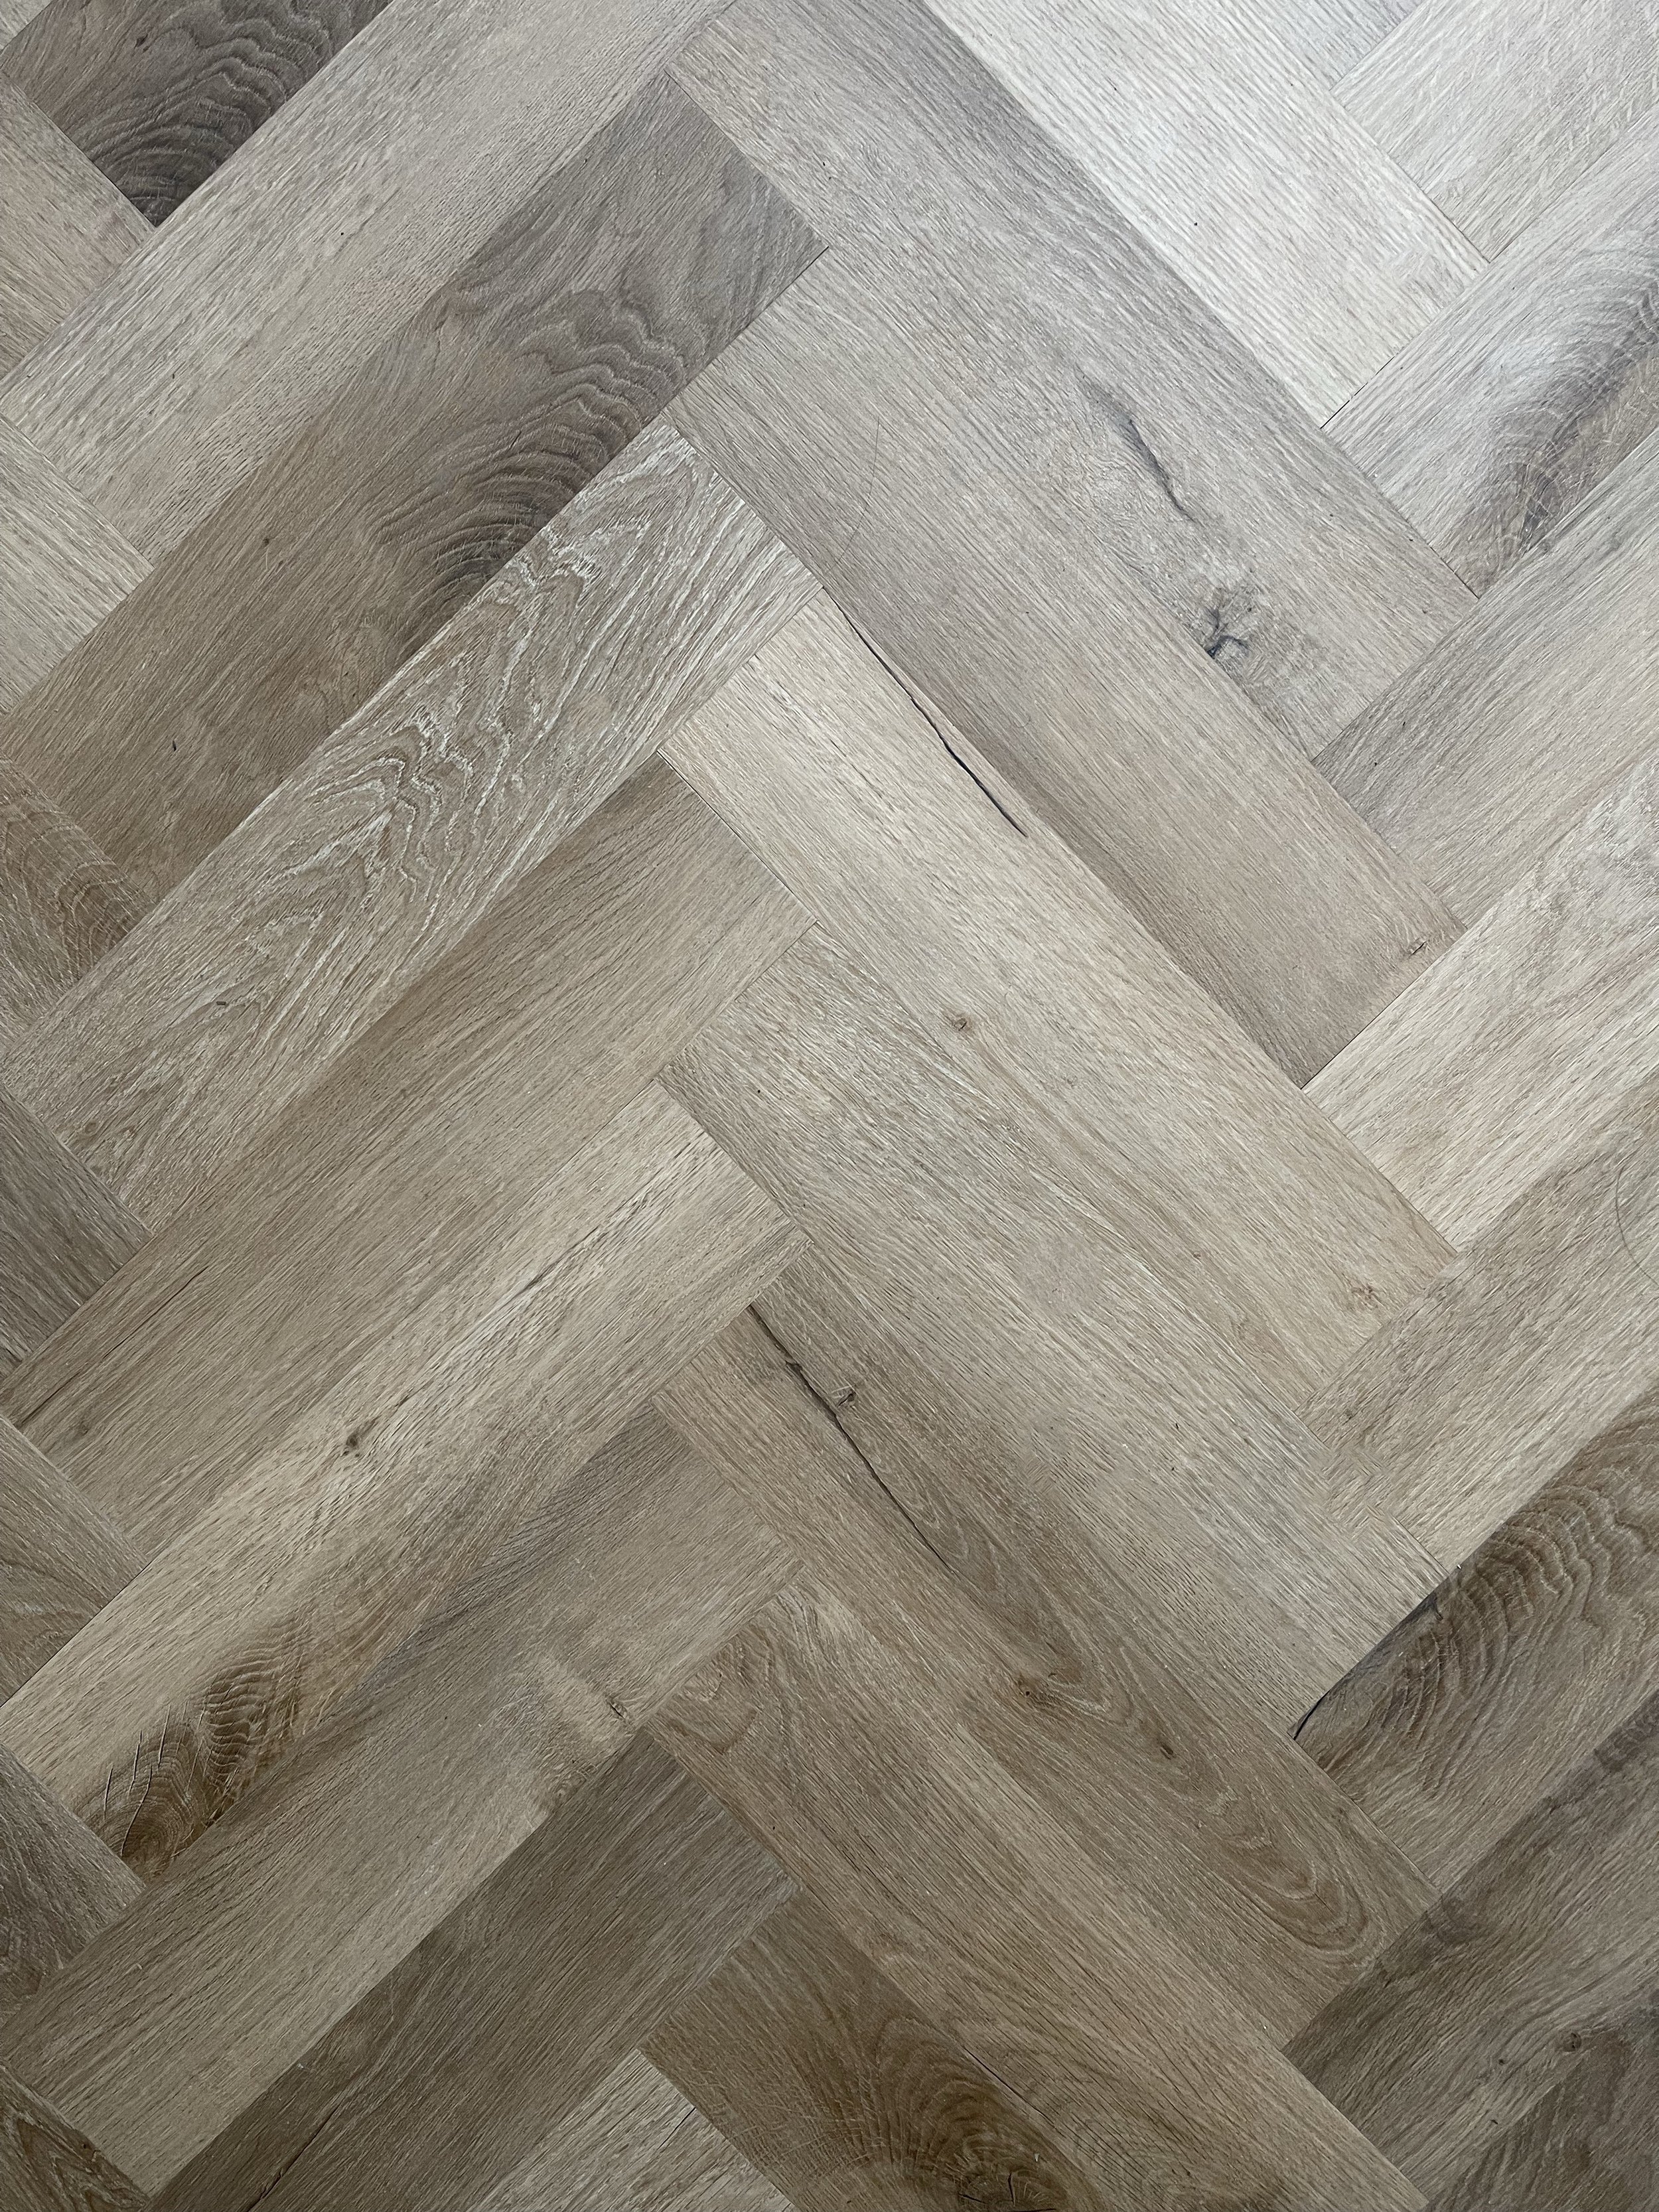
Our flooring fitter introduced me to Invictus and i picked the floor without seeing it in real life. Their visualiser is that good in my opinion. We went for Royal Oak Traditional in herringbone and the tone of the wood fits perfectly with the rest of the scheme.

Invictus Traditional Royal Oak
The End

The whole thing took about 7 weeks from start to finish, just in time for Christmas. It wasn’t fun living through it but 100% worth it in the end. I won’t bore you with an in depth breakdown of timings but if you would like to know then just give me a shout.
Rest of the Details
Walls : Valspar Smooth Pebbles
Skirting Boards : Valspar Evening Coat
Bar Cabinet : Atkin & Thyme
Kitchen Cabinet : Nordal Interiors
Pendant Light : Lights and Lamps
Wall Lights : Industville
Chandelier : Pooky Lights
Bar Stools : Furnwise

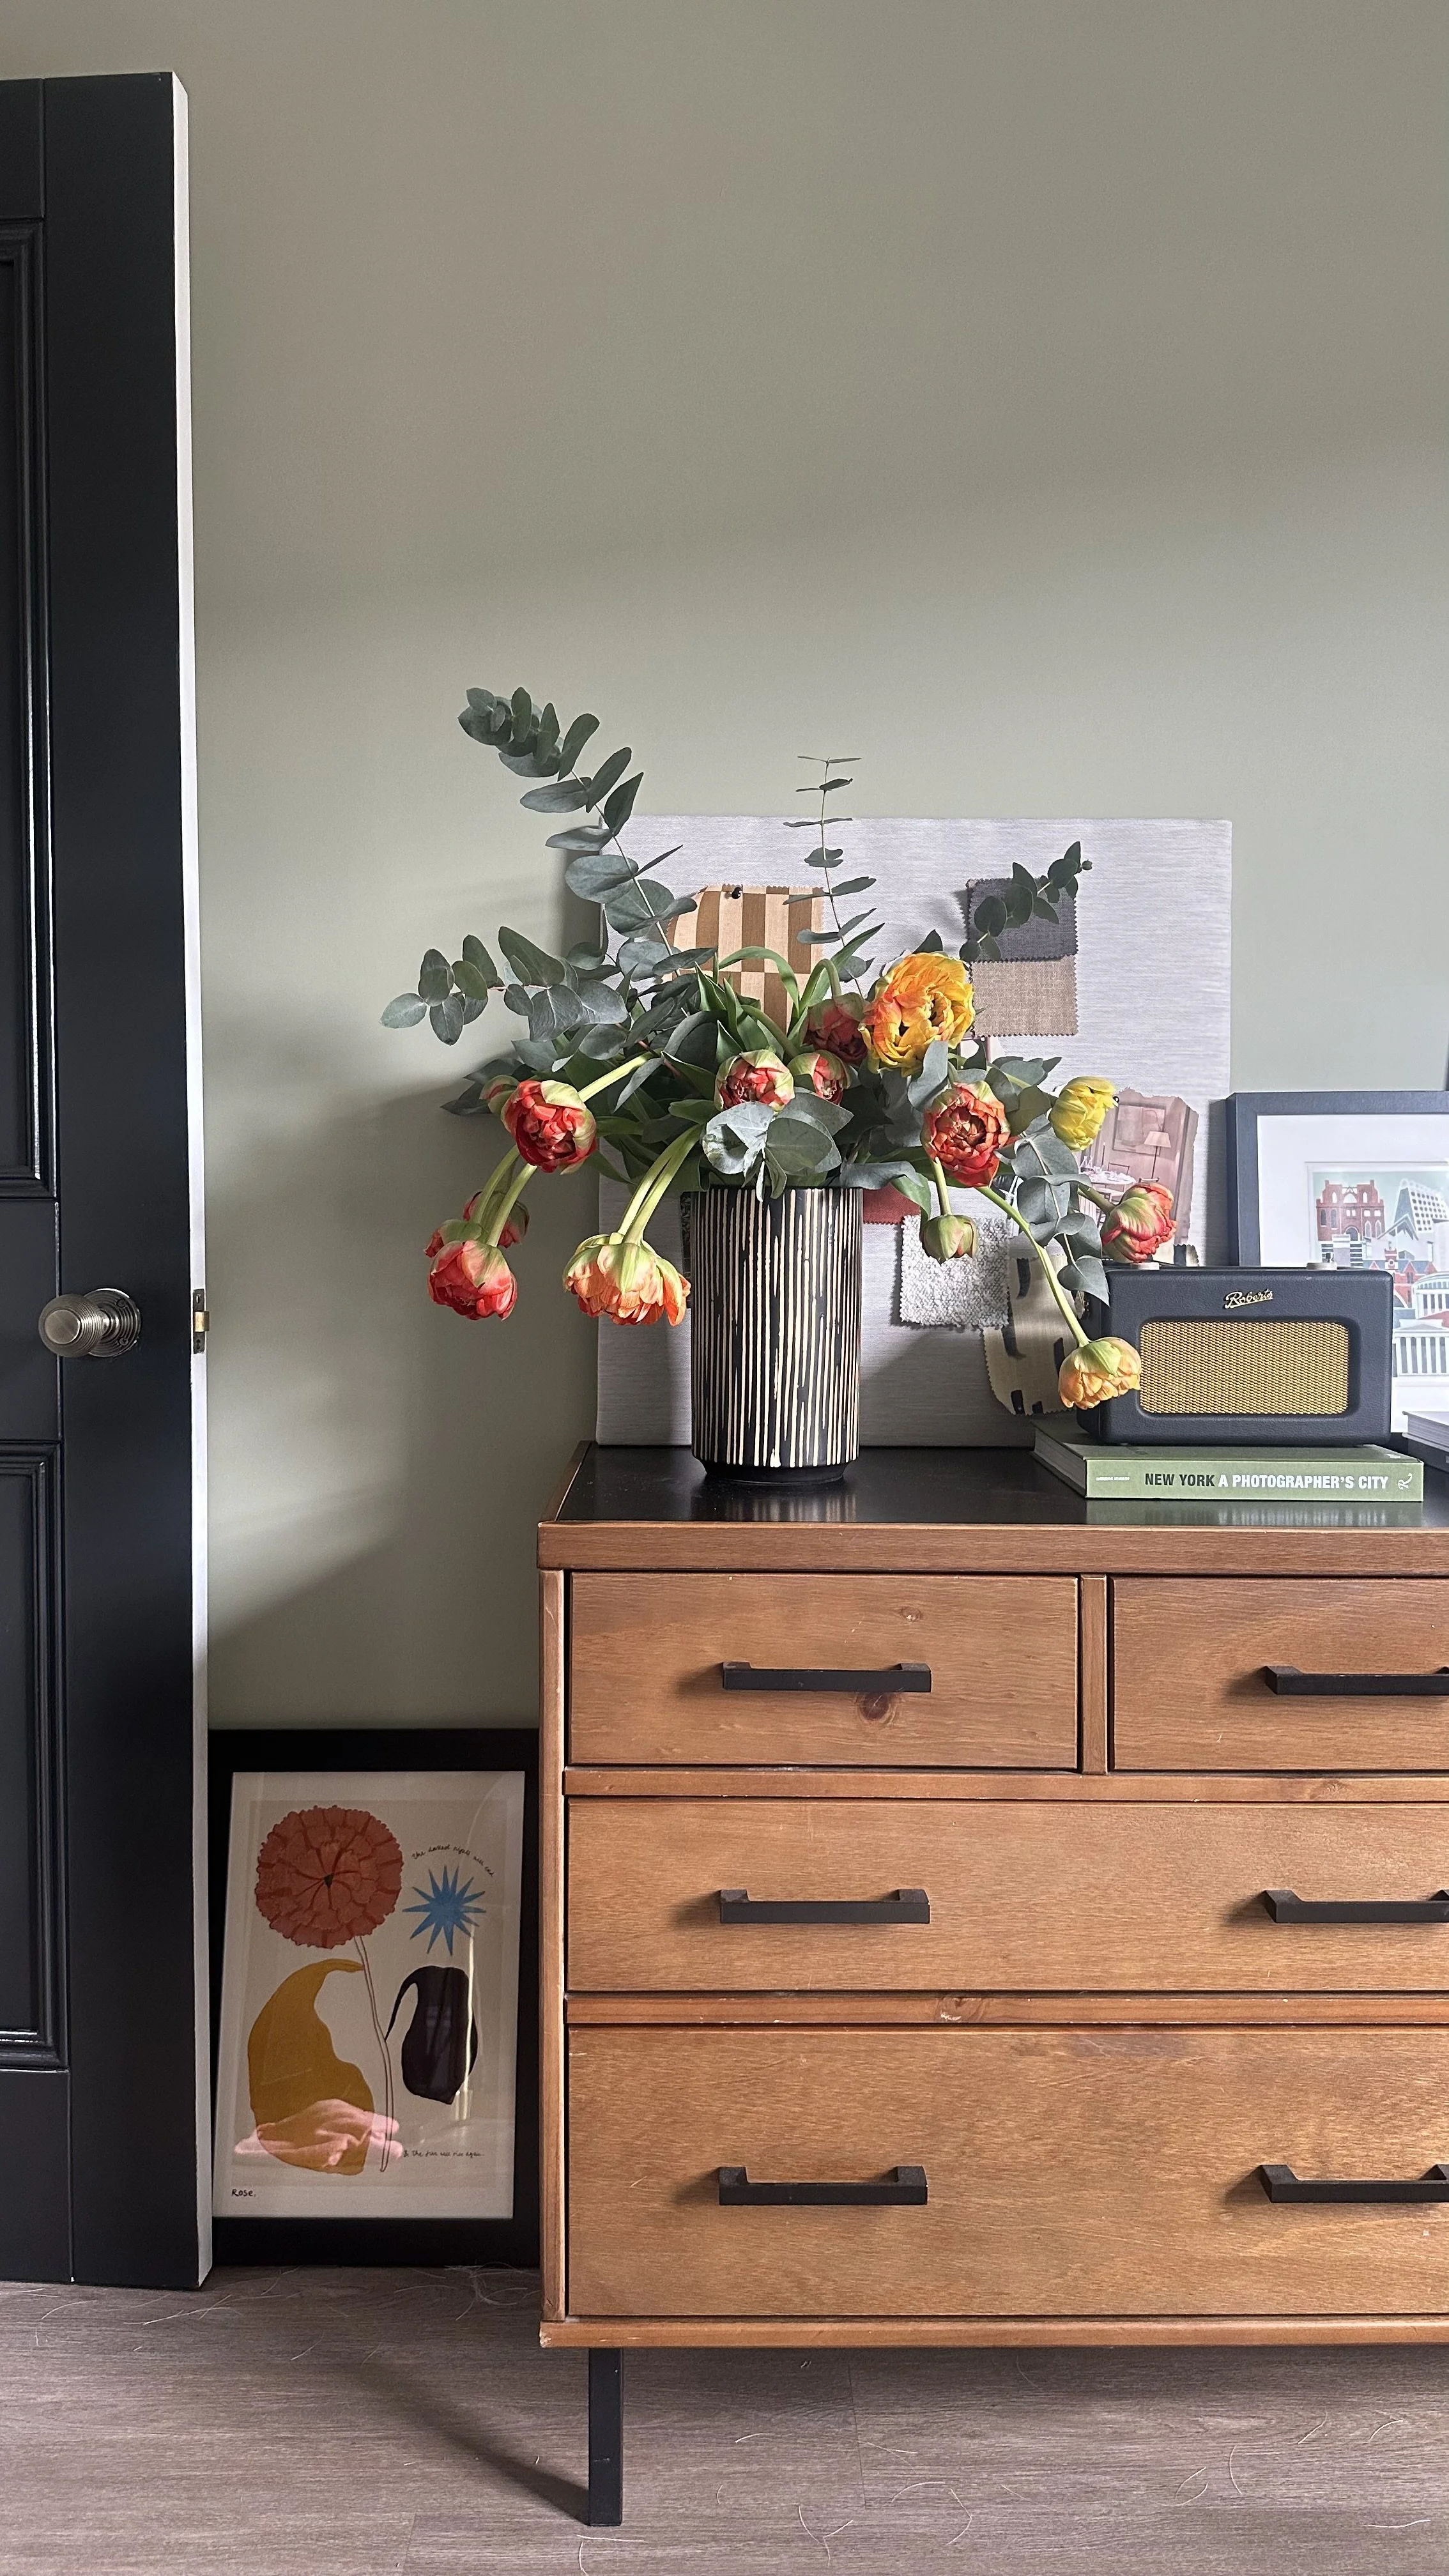
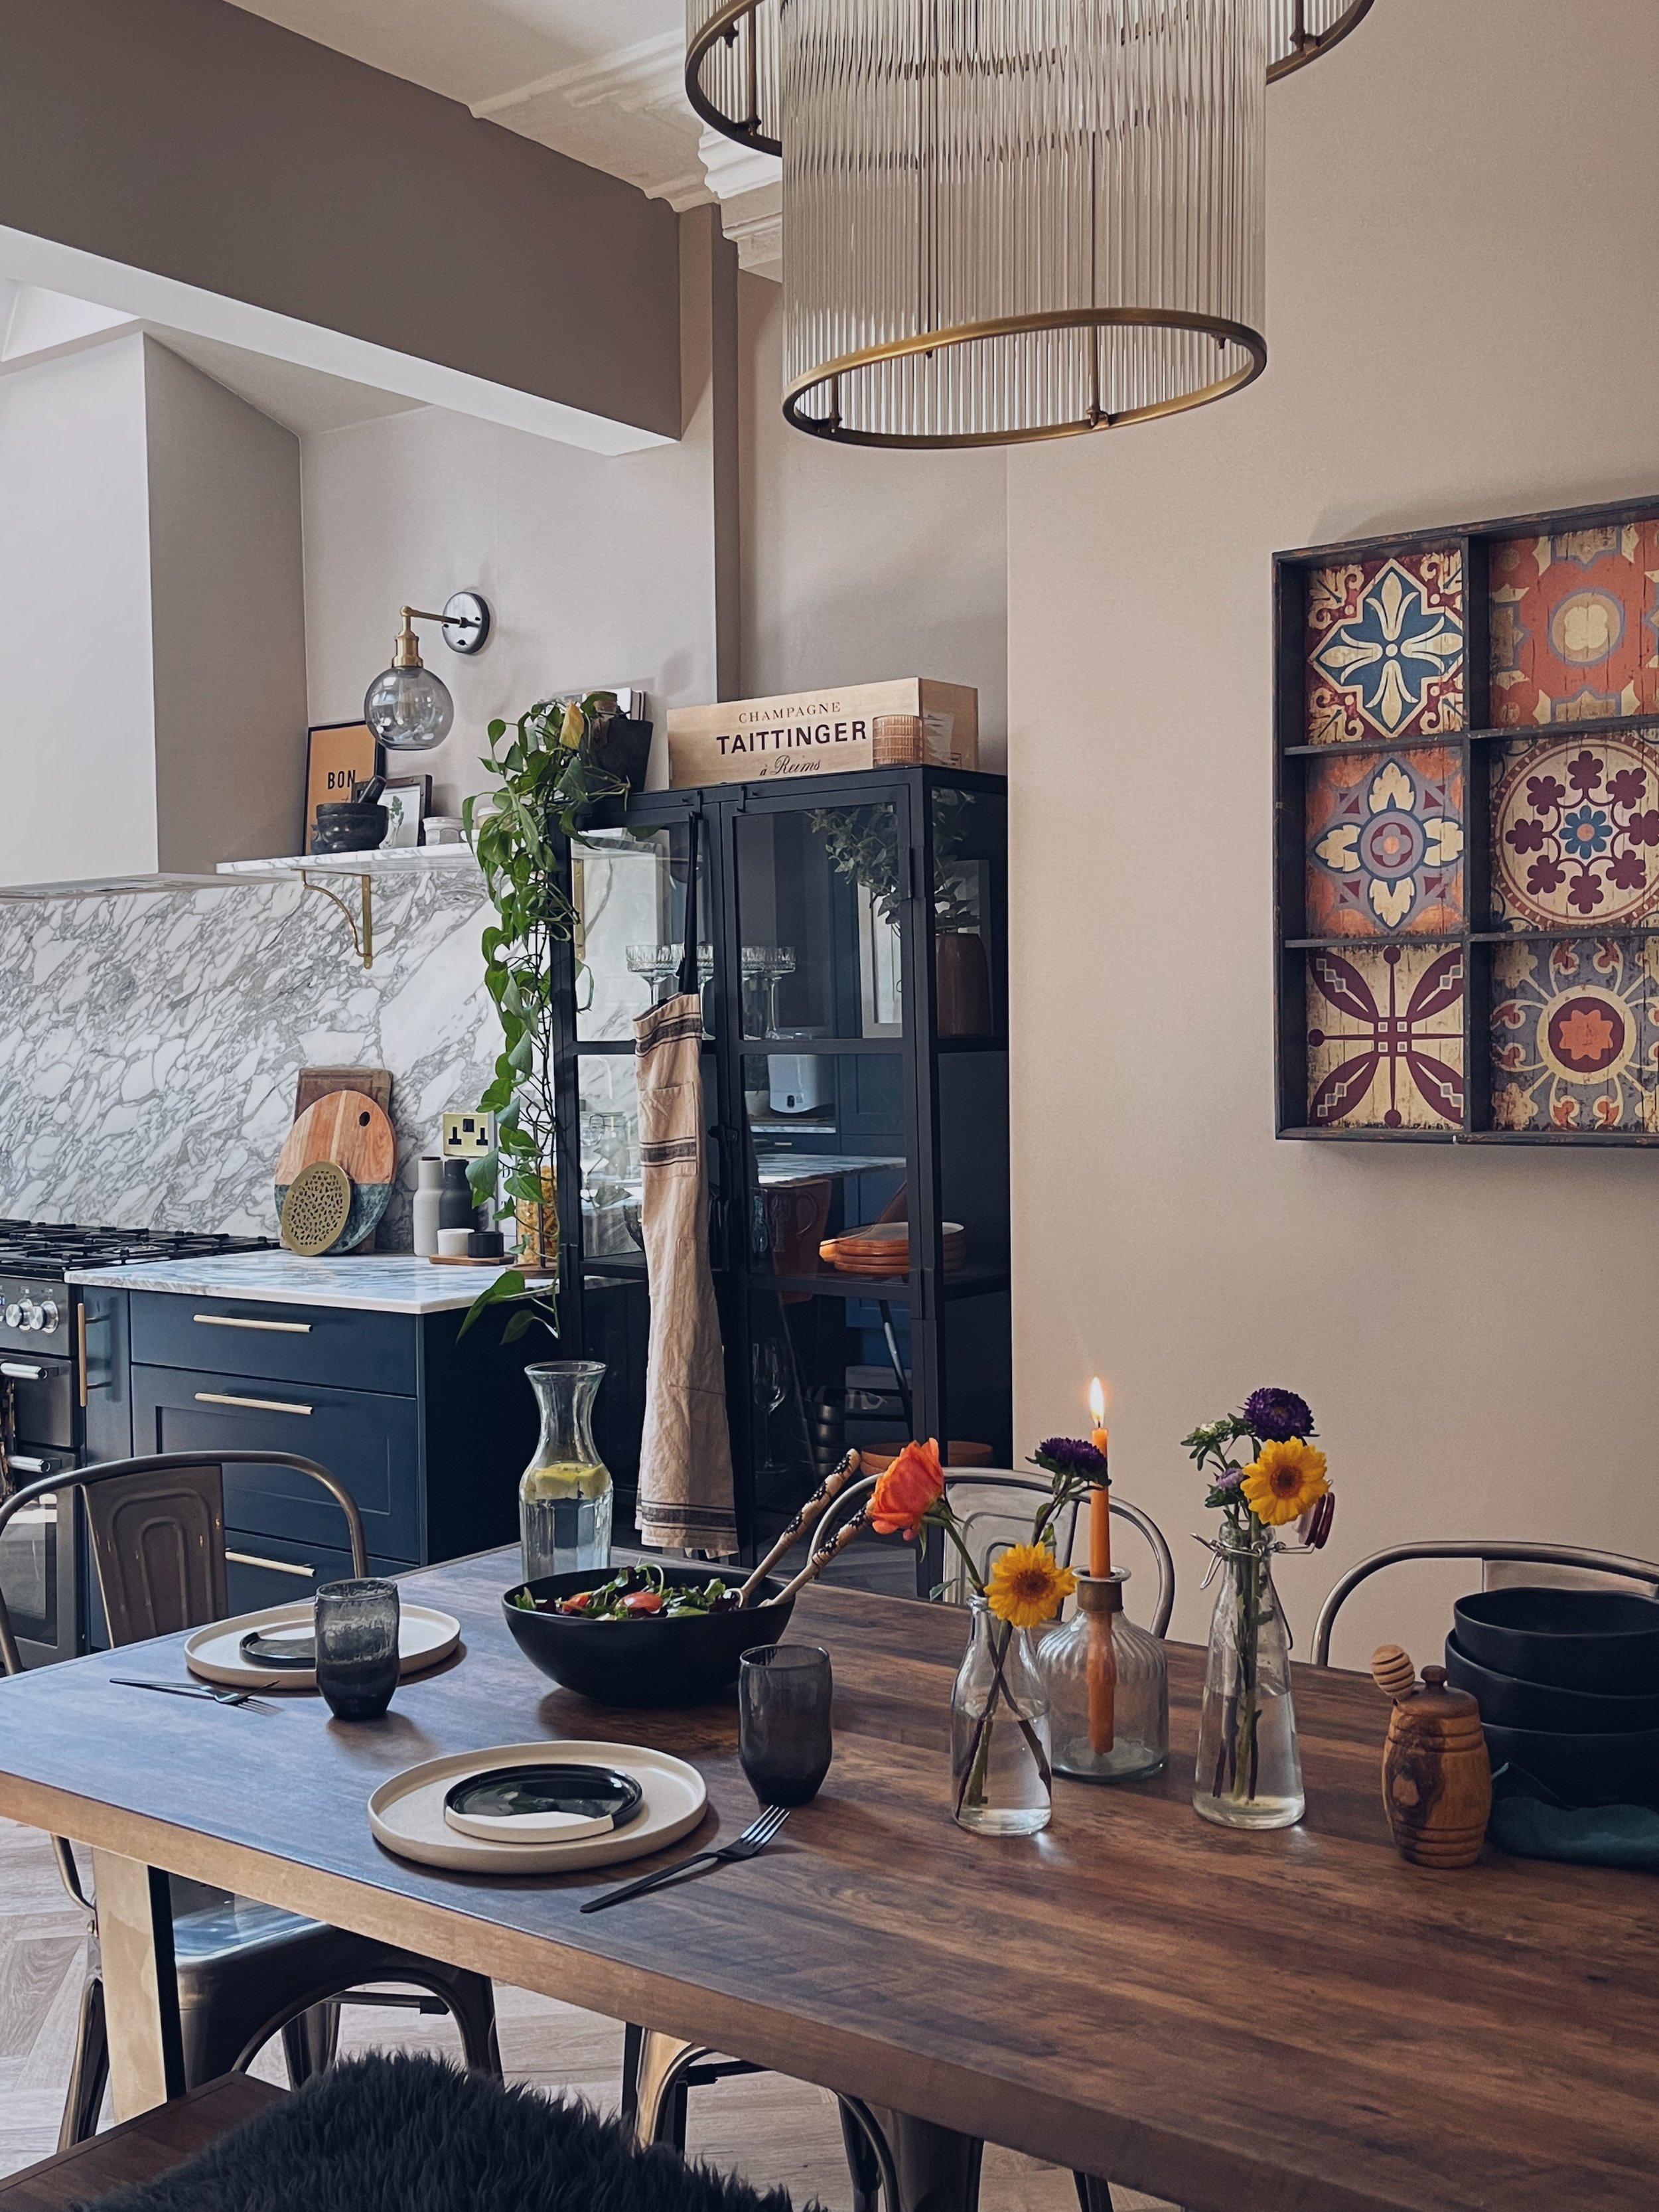
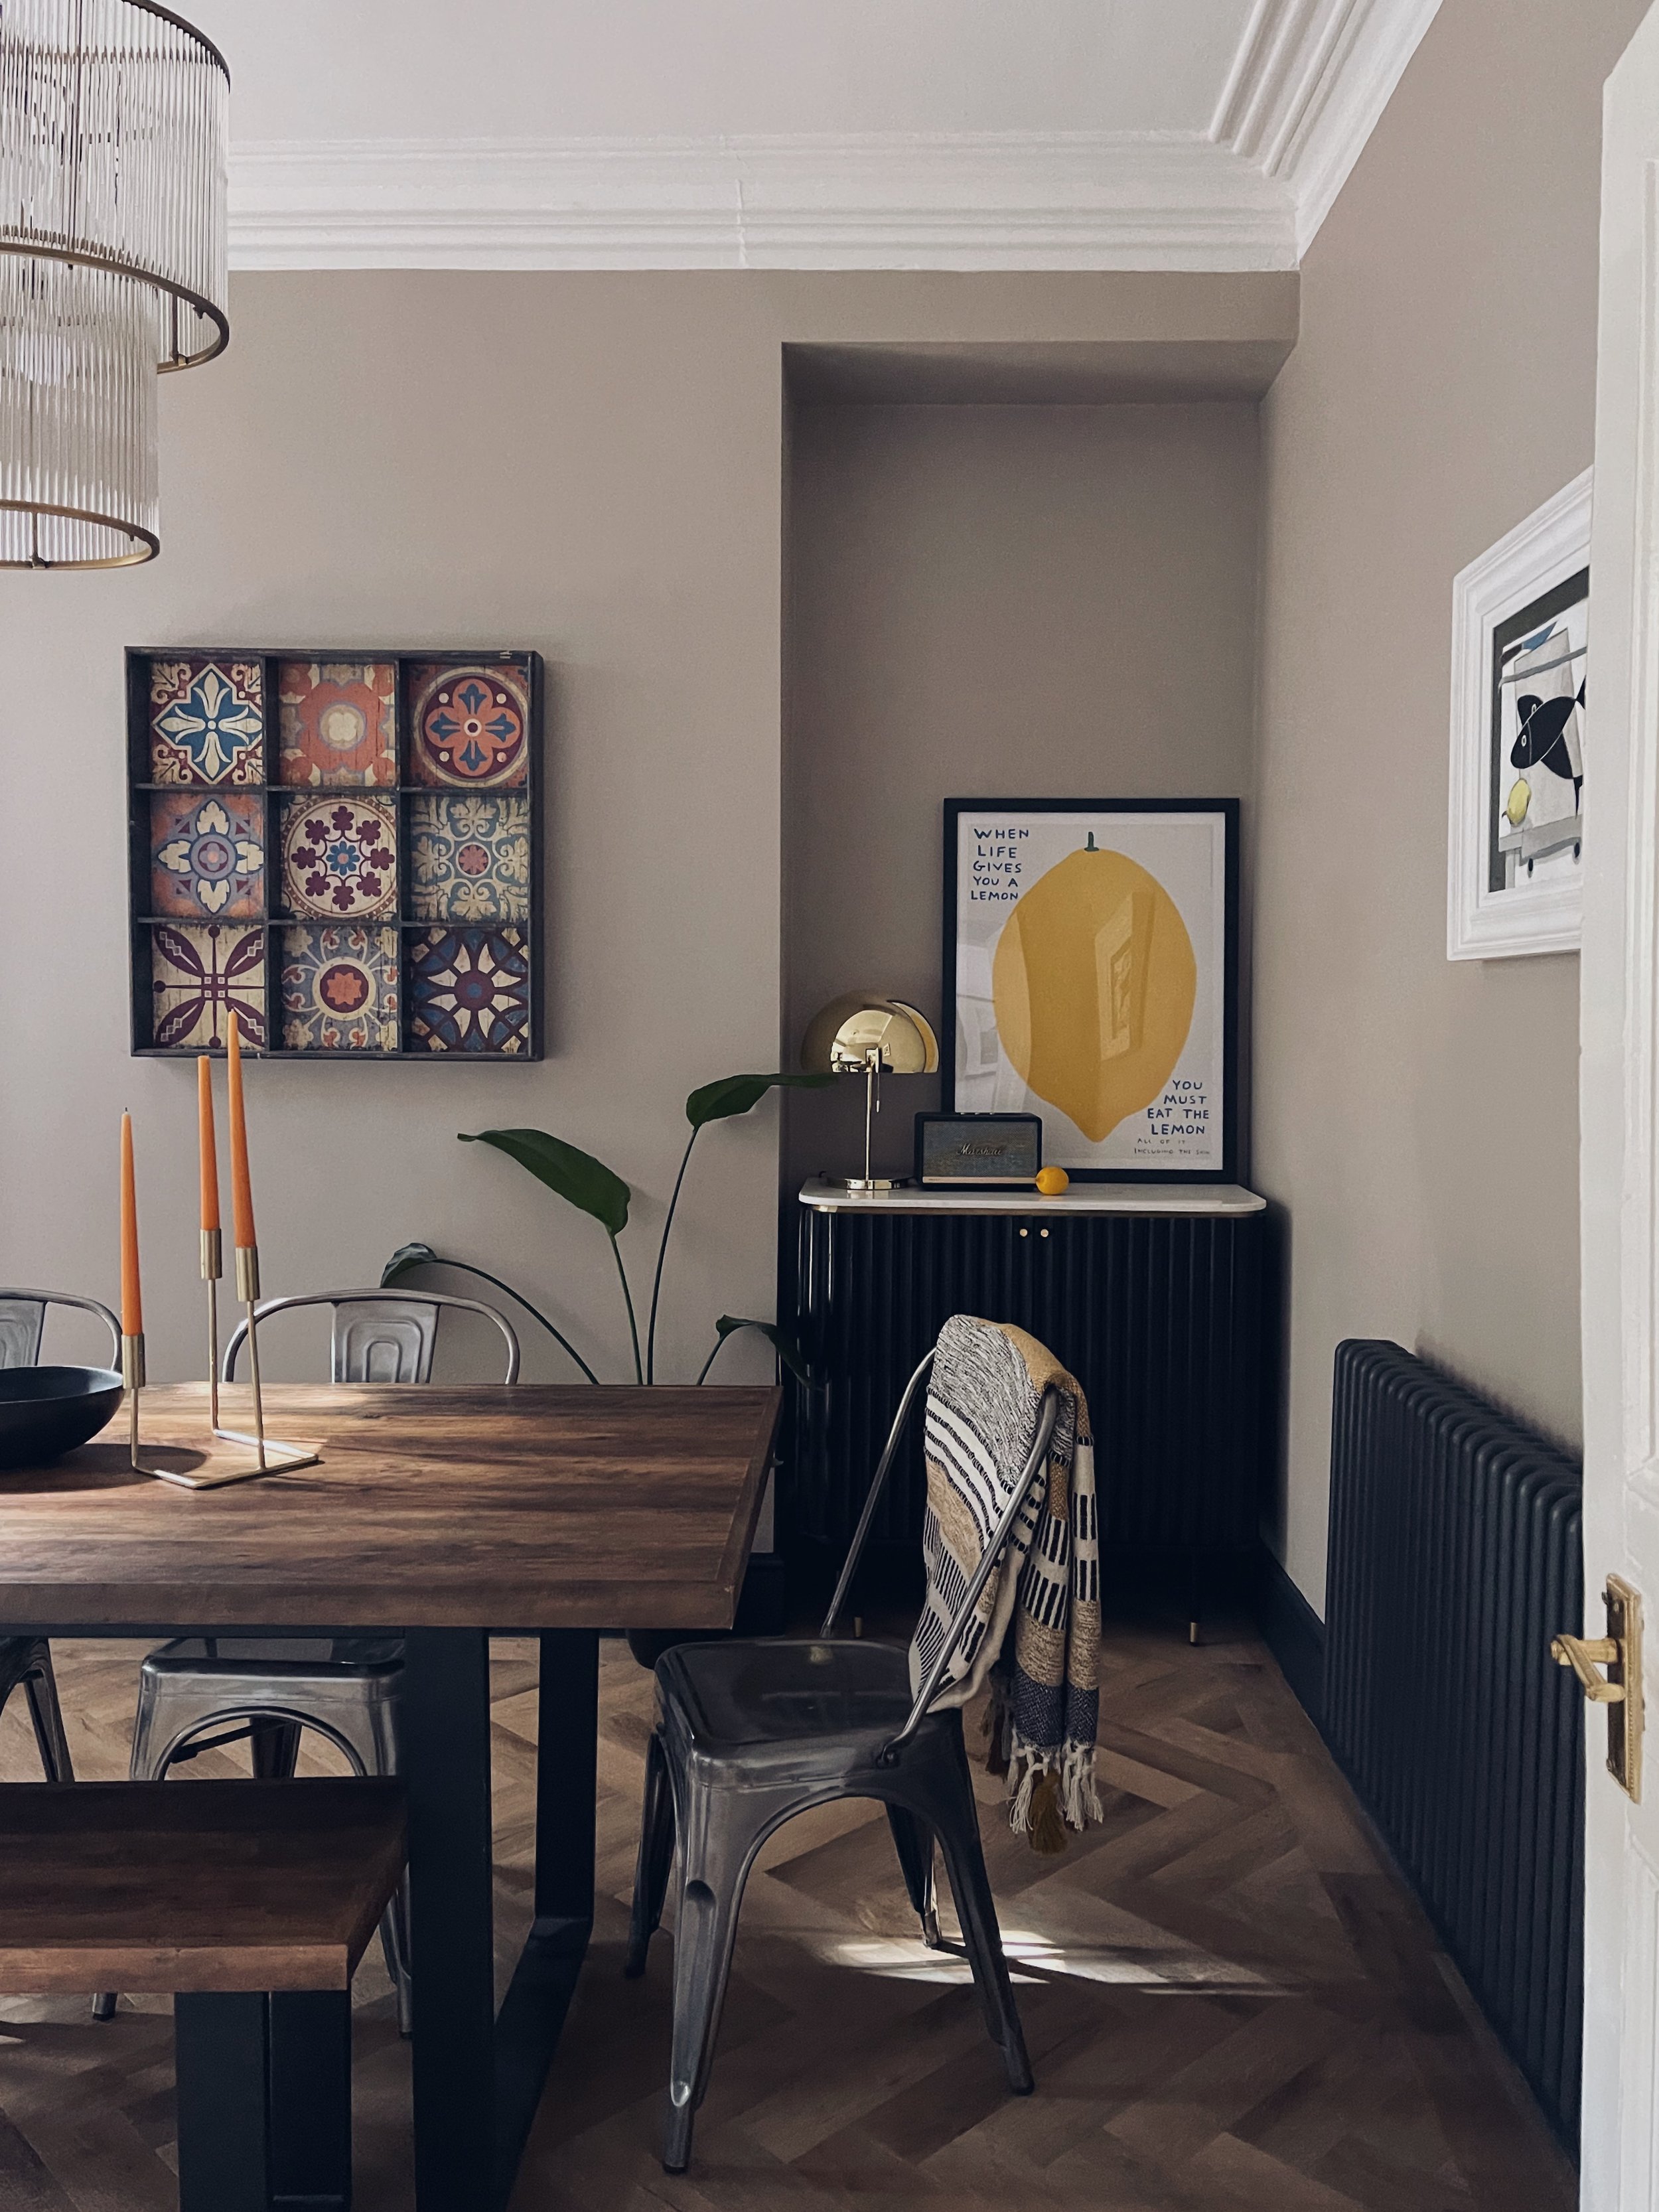
The dining room was finished off around 8 months after the kitchen because I had the small matter of giving birth to a tiny human and navigating motherhood in between. It saw the return of the infamous ‘wall hangy thing’ which pretty much built my Instagram and slowly I have found the time to do tablescapes again. There have only been a few new additions like the bar cabinet but we have kept the dining table and chairs from the old house, although a chair update might be something we do in the future.
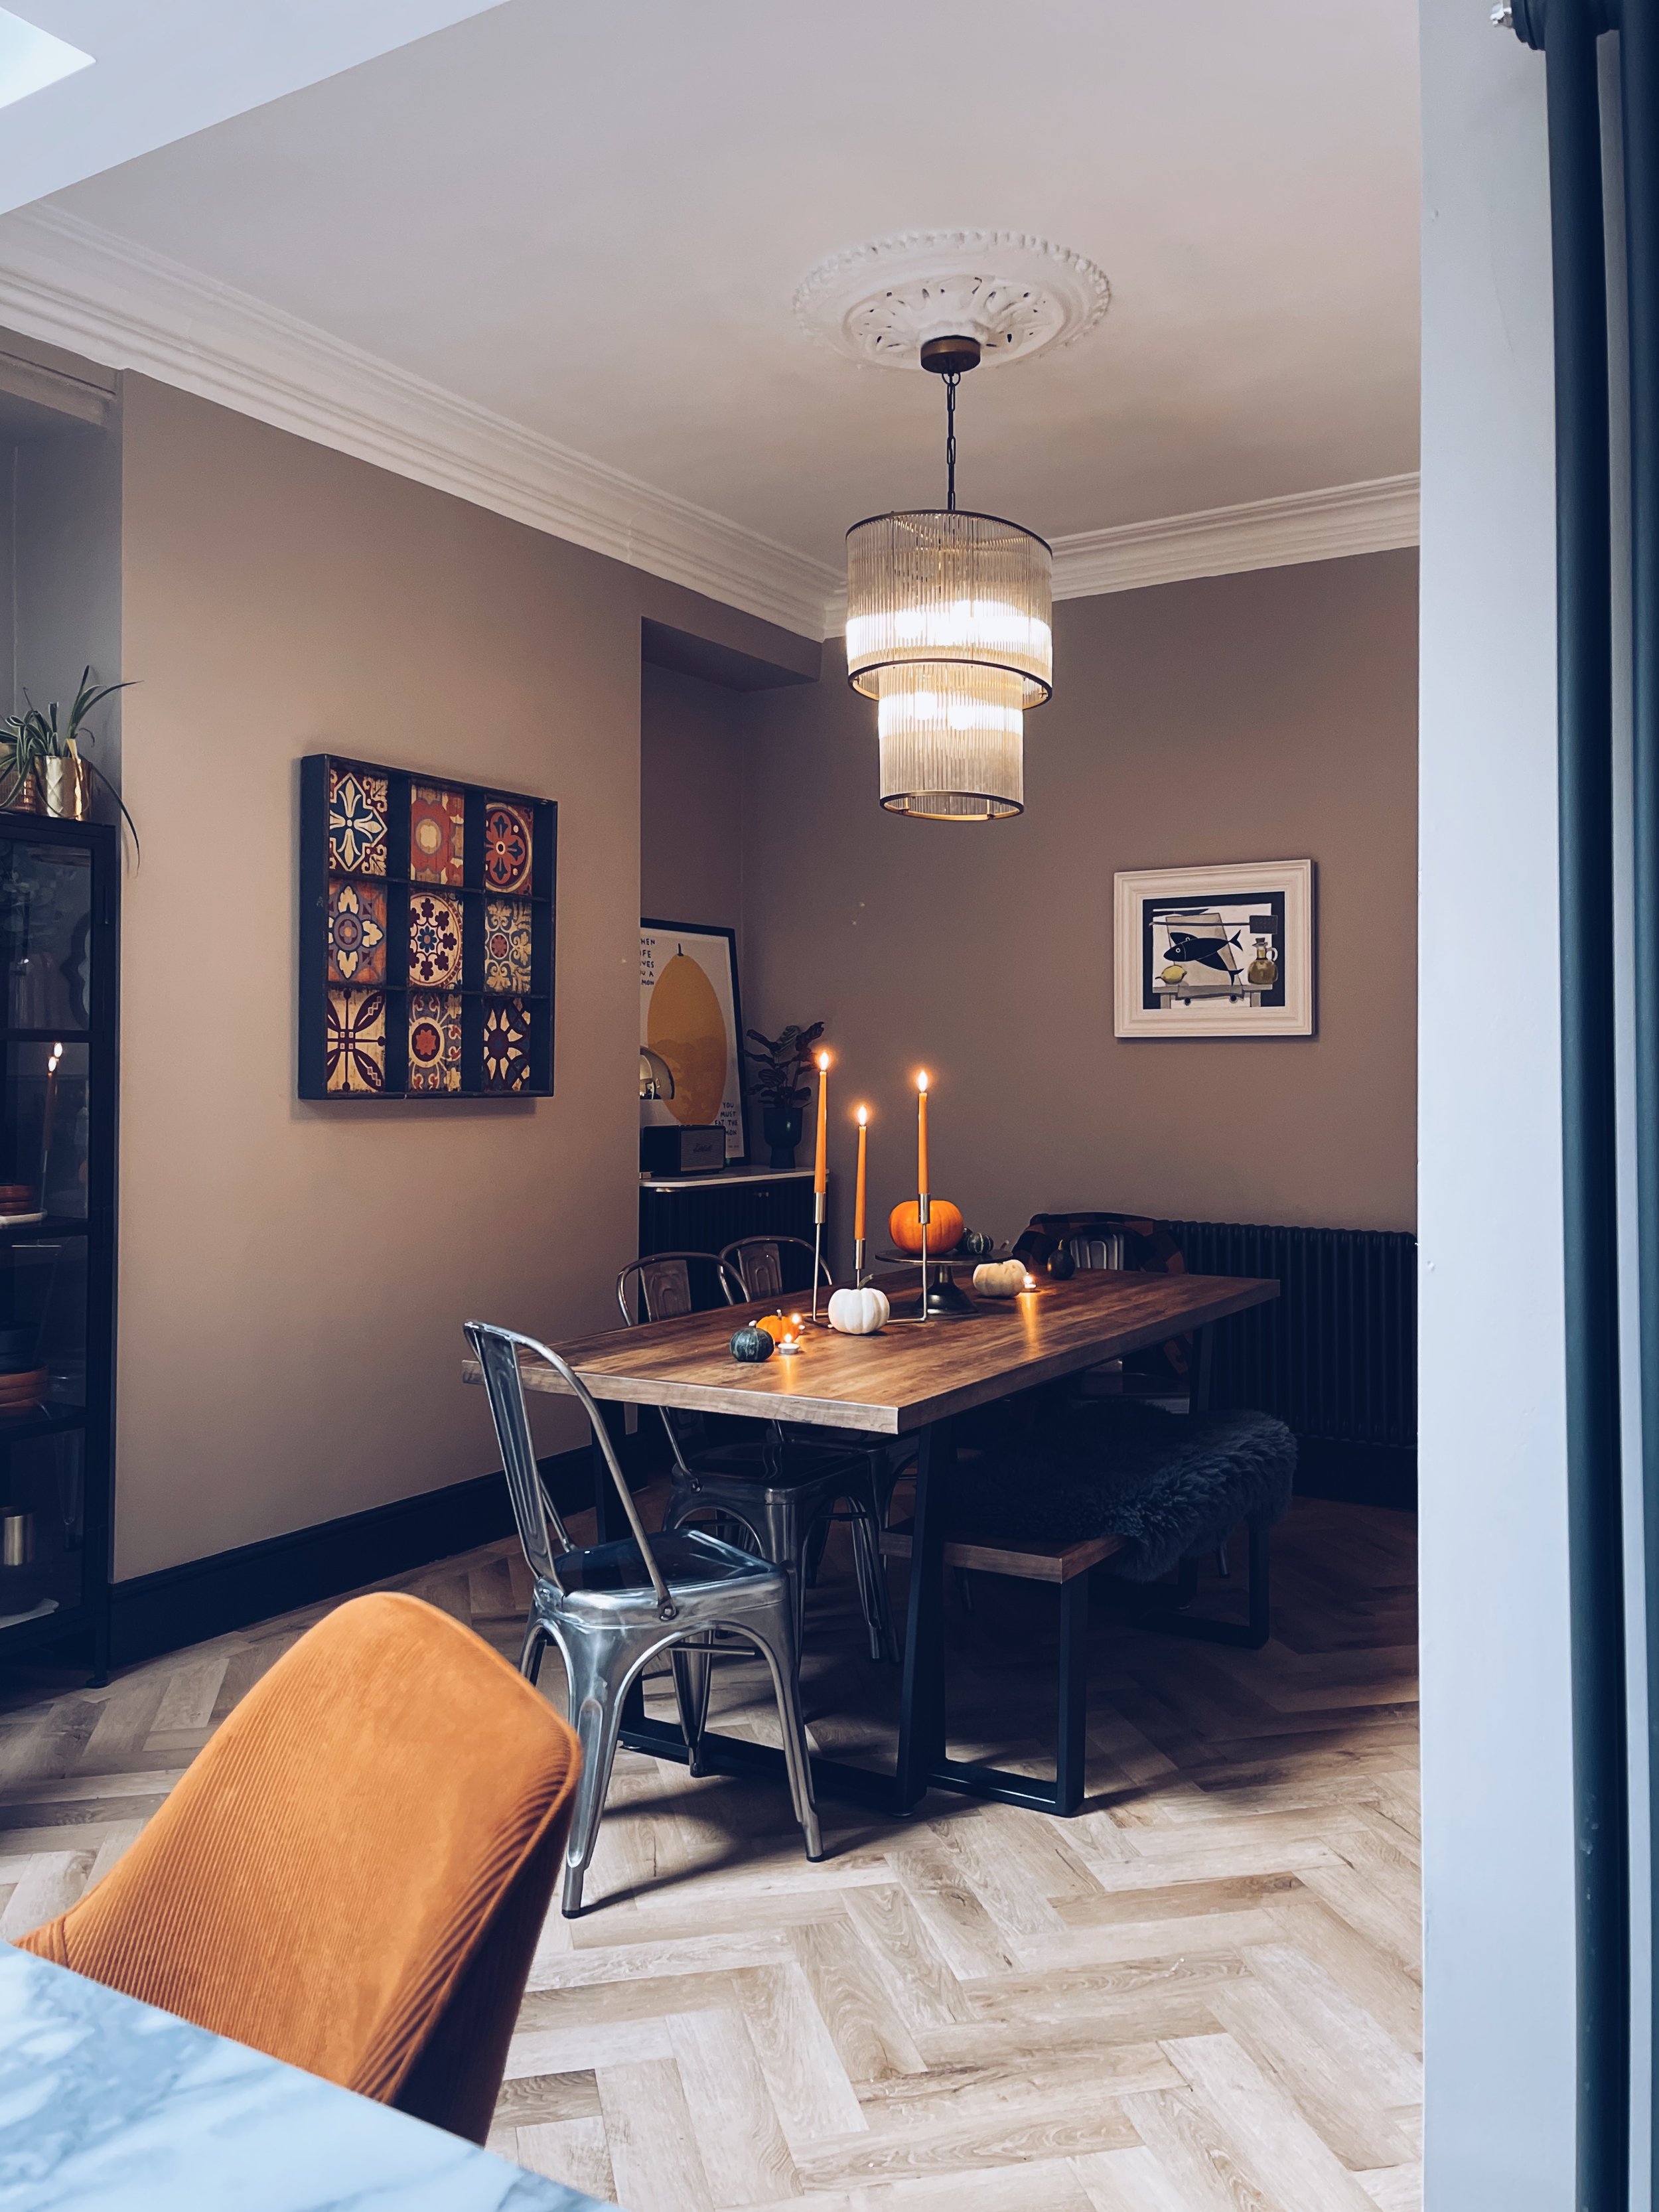
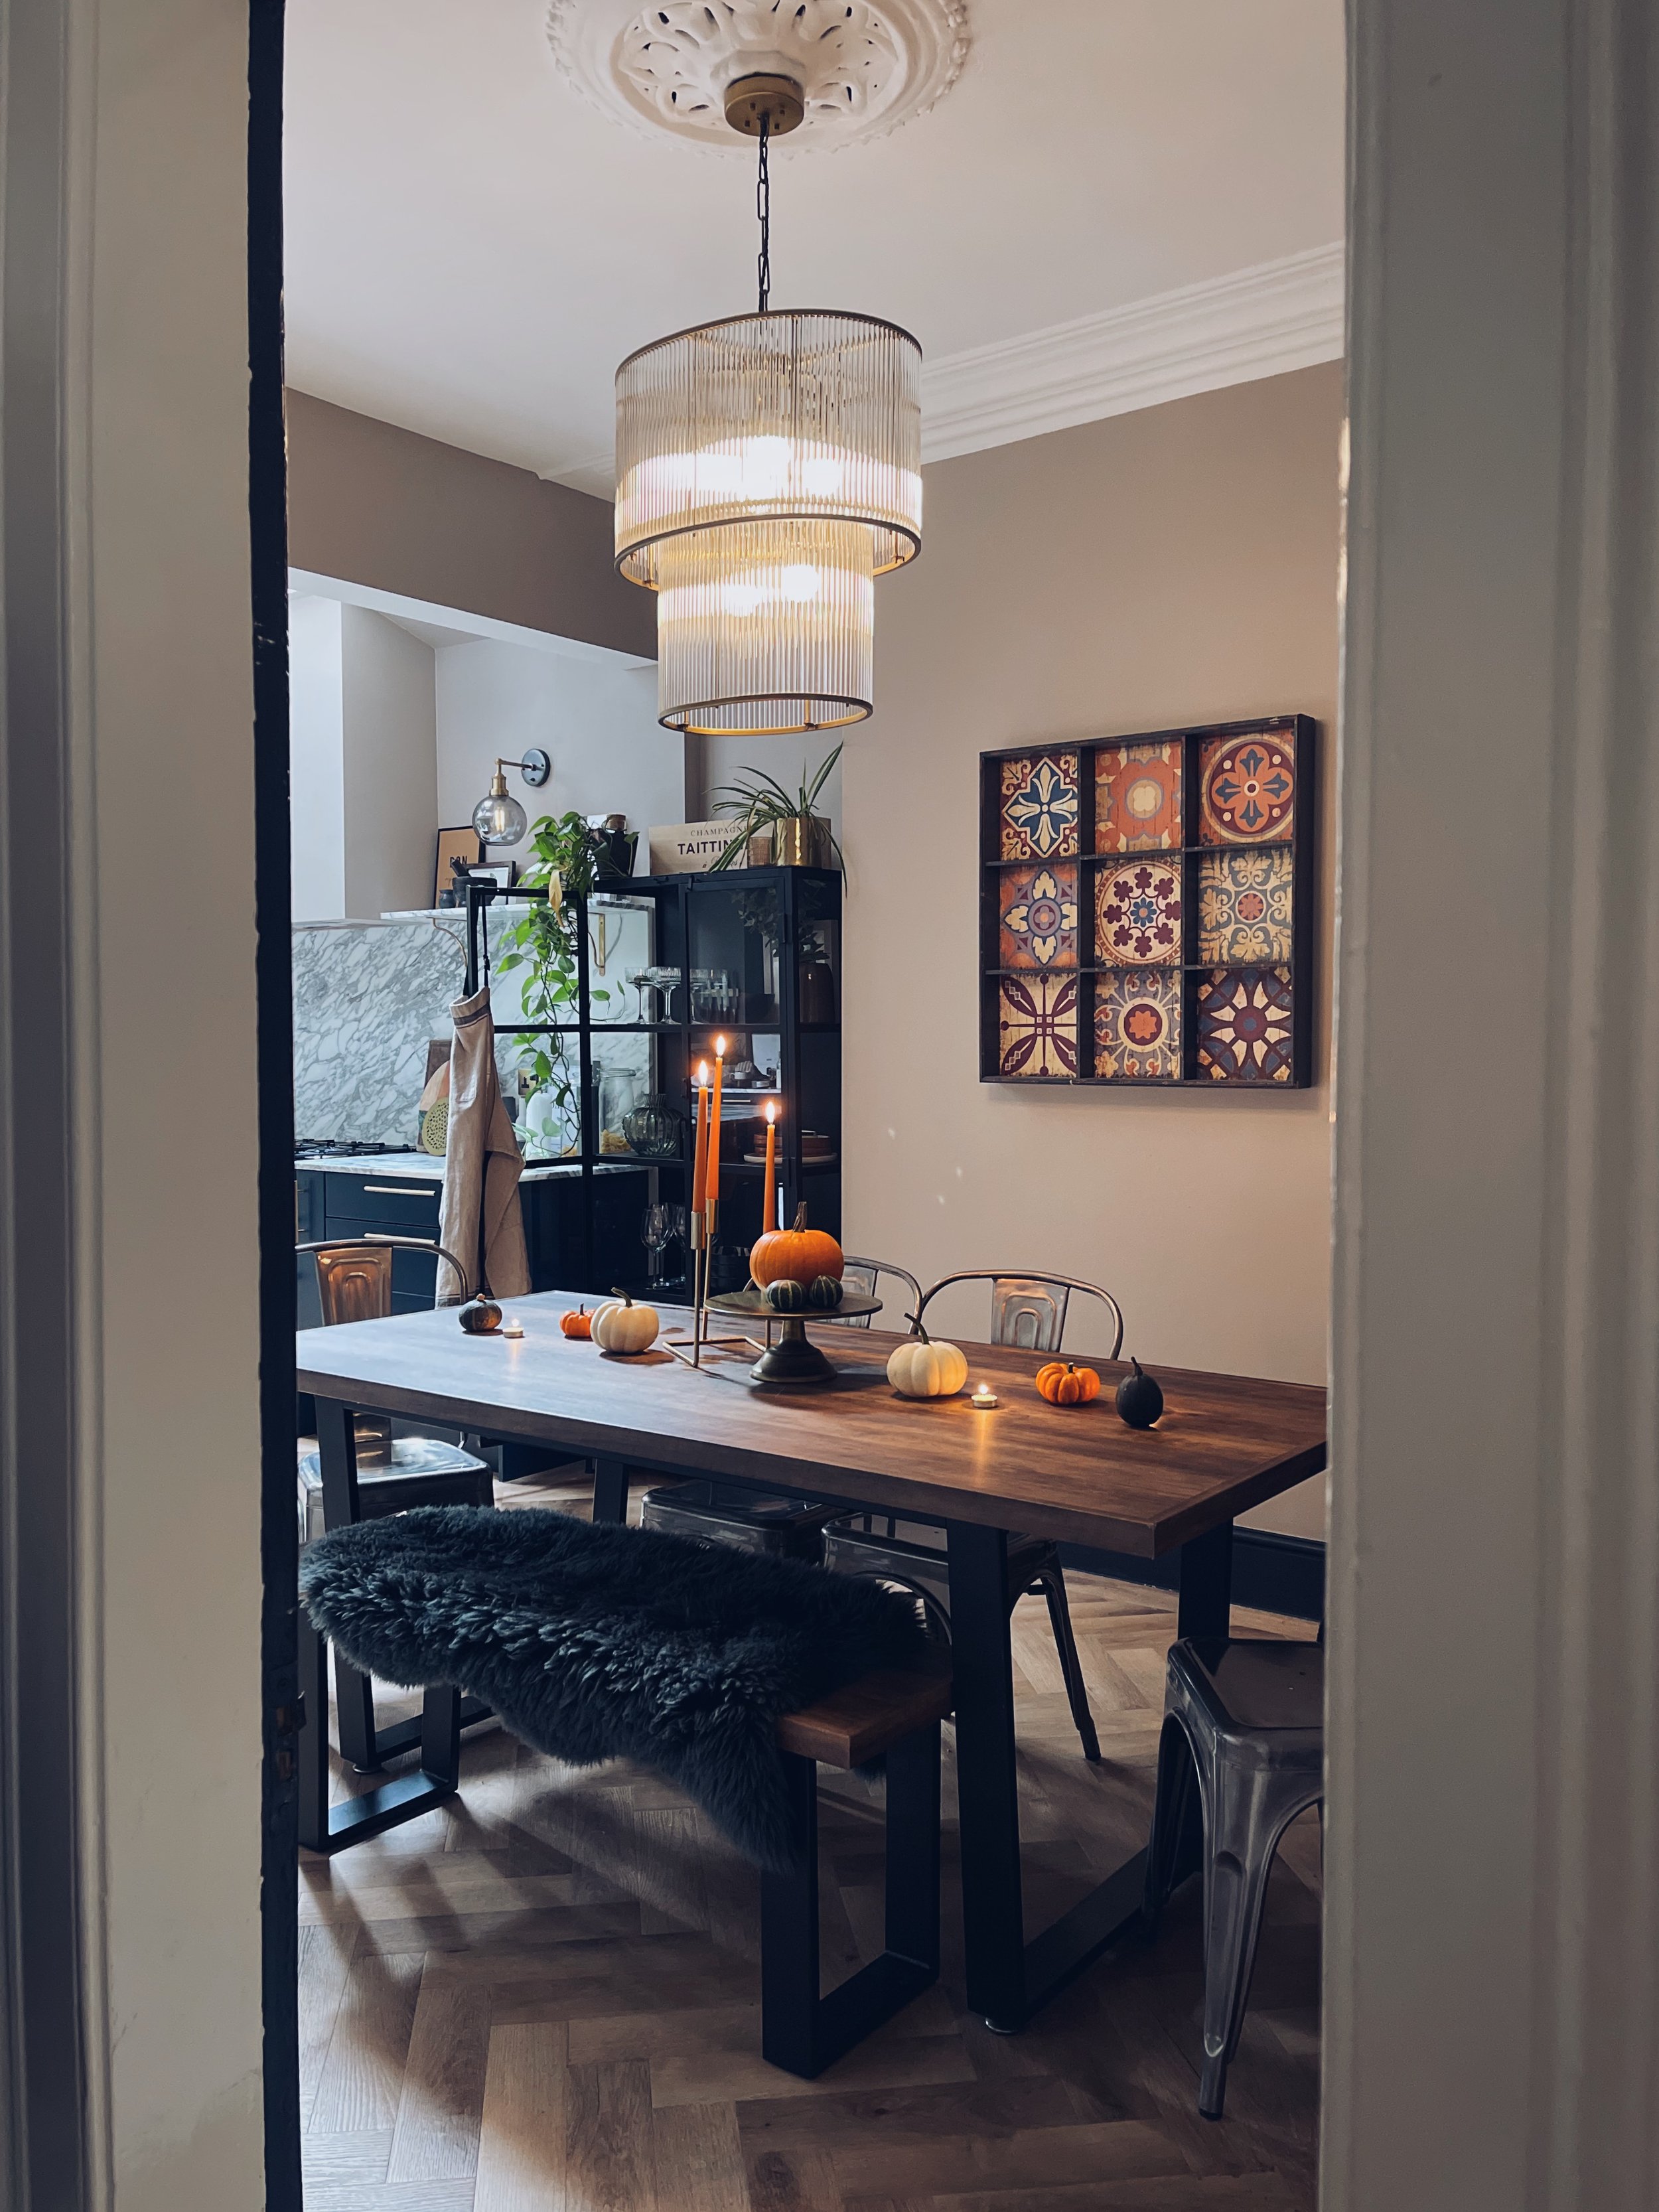
The kitchen was, and still is our hub of the home. I absolutely adore this space, after almost a year it never gets old. We have had a Covid Christmas in here, spring births, dappled summer rays with the doors wide open and now the lovely warm Autumn sunshine. There were many feedings on the bar stools, having people over for cuddles and cake around the kitchen island and now there is all the fun of weaning our little man.
I can’t wait for this kitchen to age and mature with our little family. Dinner parties will be back on the horizon soon!

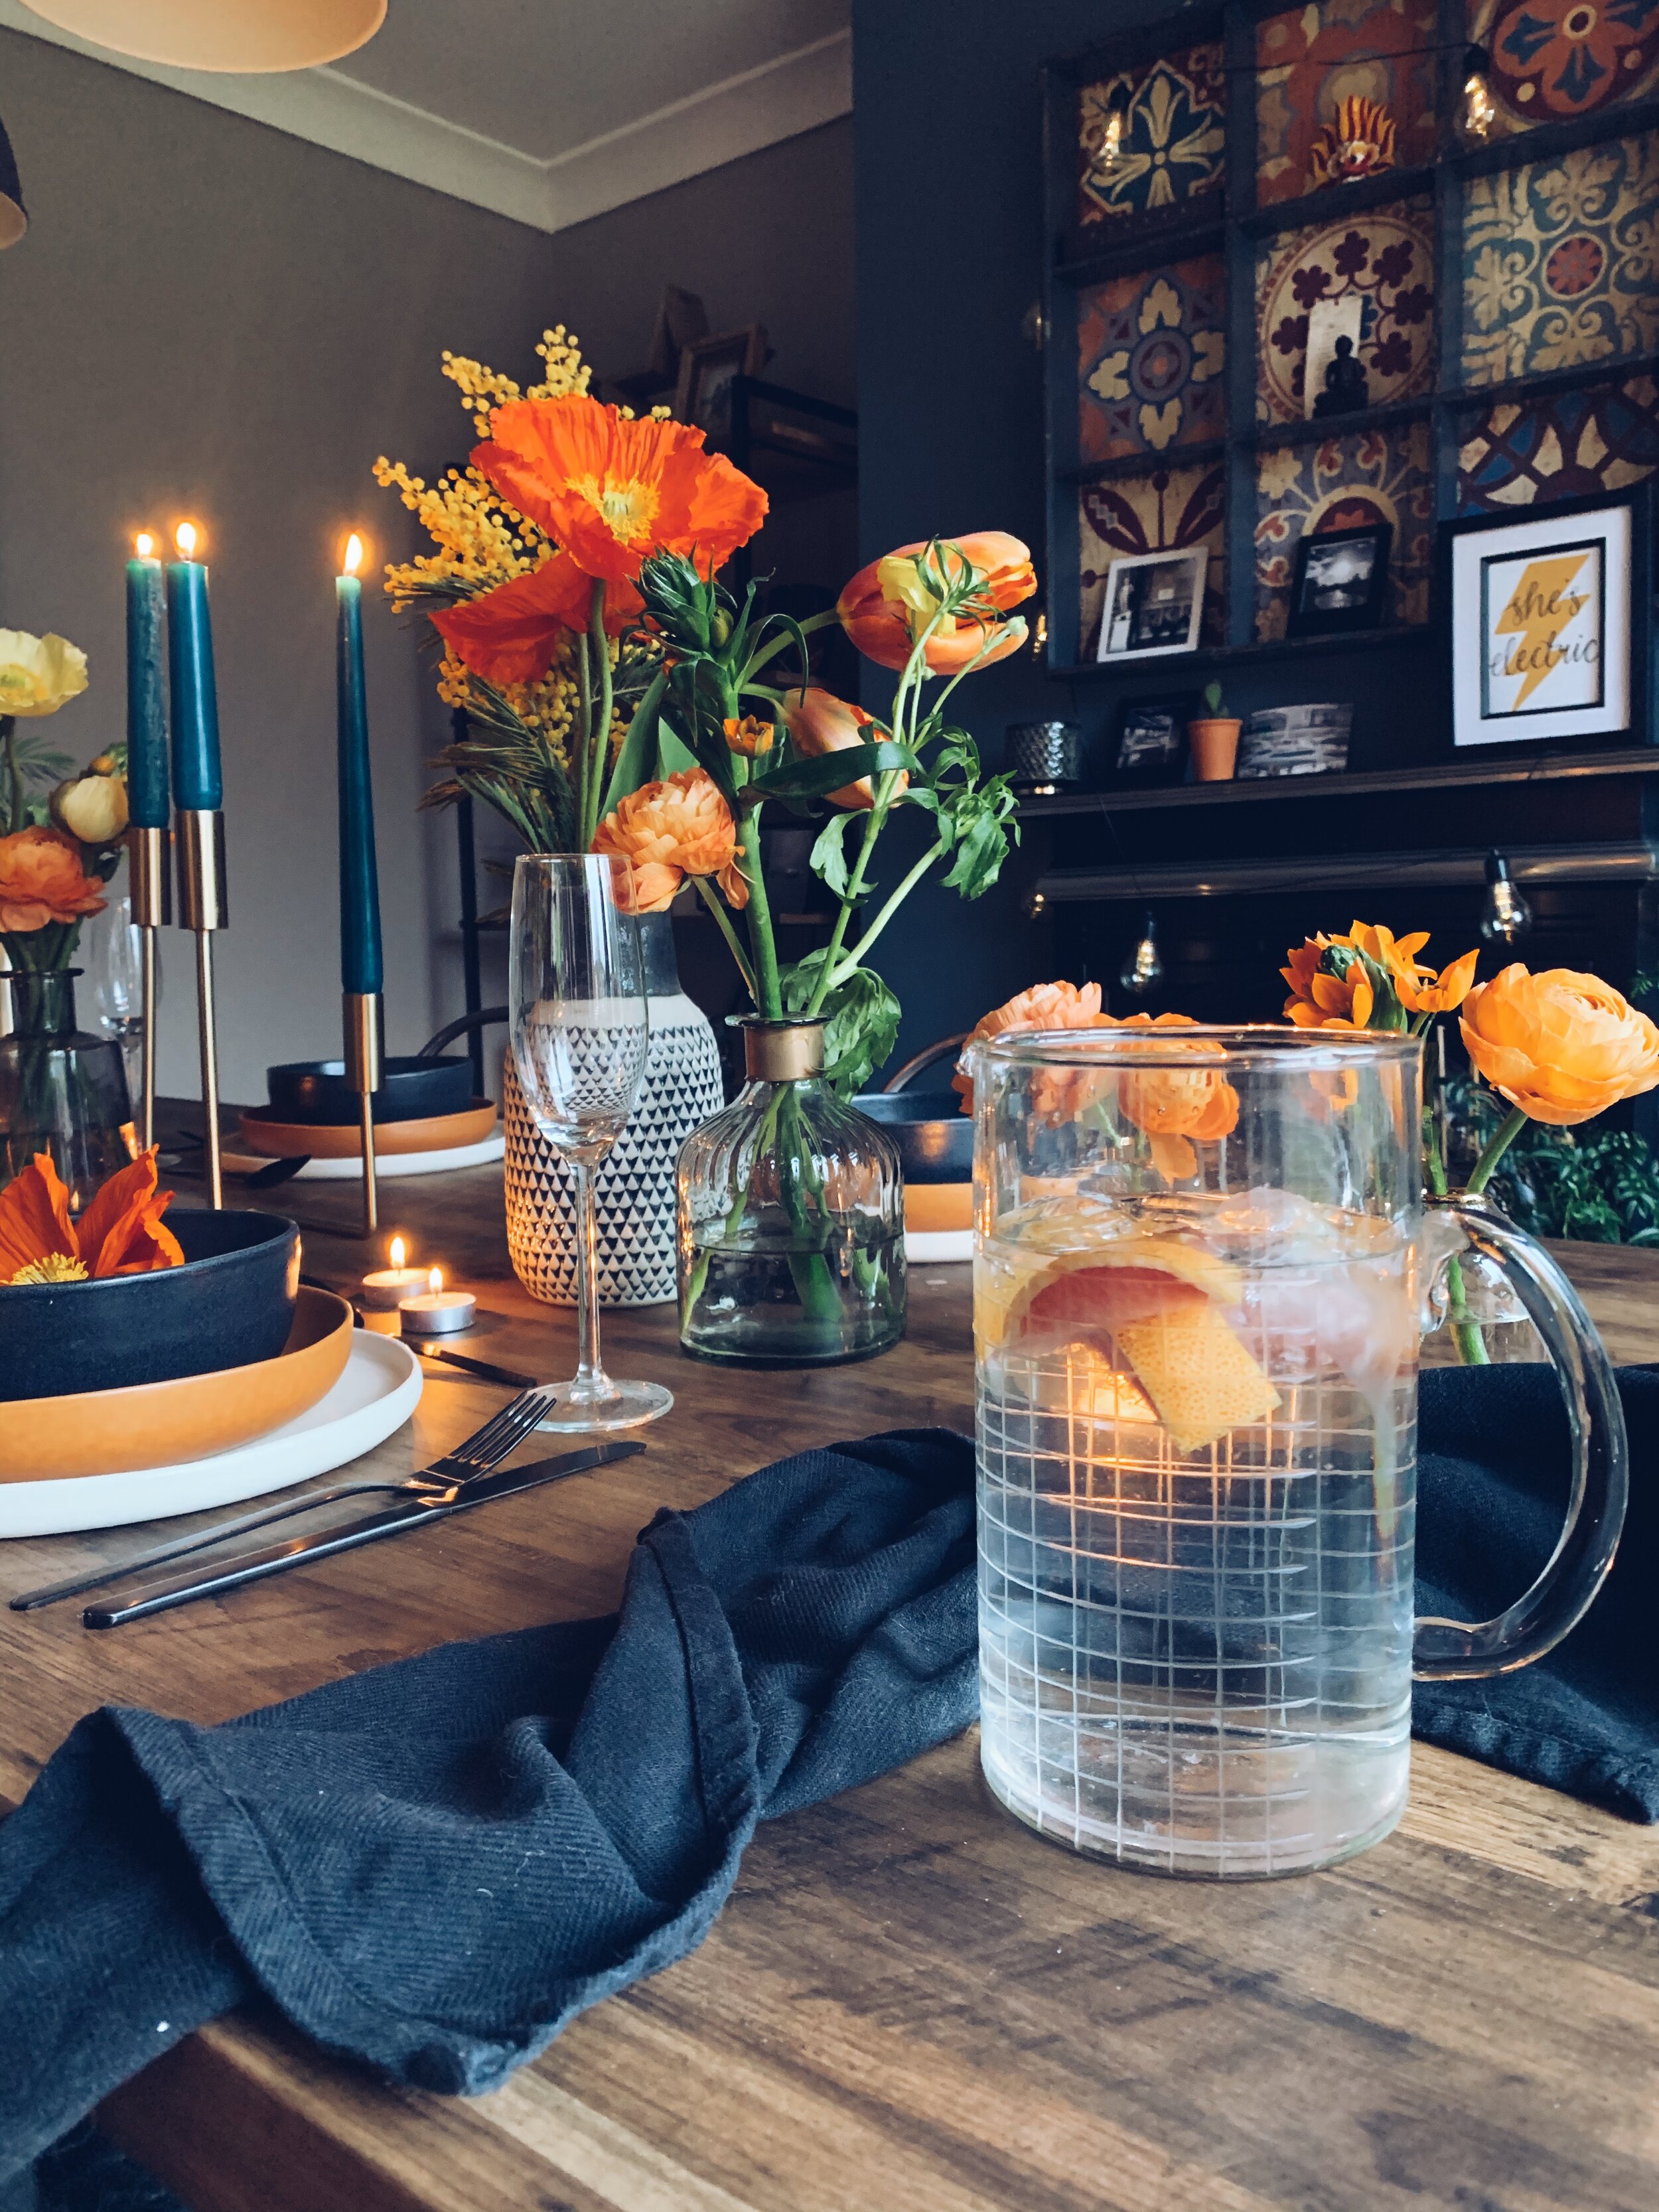
Styling A "Dinner Party Ready" Table
Featuring gifted items from MADE
One of my favourite things to do is throw dinner parties for friends and whilst I’m staying as far away from the kitchen as possible, I am making sure the dining table has the wow factor! By breaking the styling into stages it isn’t as daunting as it may seem. I used gifted products from Made and gifted flowers from The Flower Lounge but this can just as easily be achieved with existing tableware you already have.

How To Style a “Dinner Party Ready” Table
Step 1
Start with a blank canvas. It may sound obvious but you’d be surprised how many people don’t strip the table first, trying to rearrange things already on there. By stripping it back completely, you are able to assess what items you do and don’t have, what bits you don’t need and what needs to go on first.

Step 1. Strip the table back to a blank canvas.
Step 2
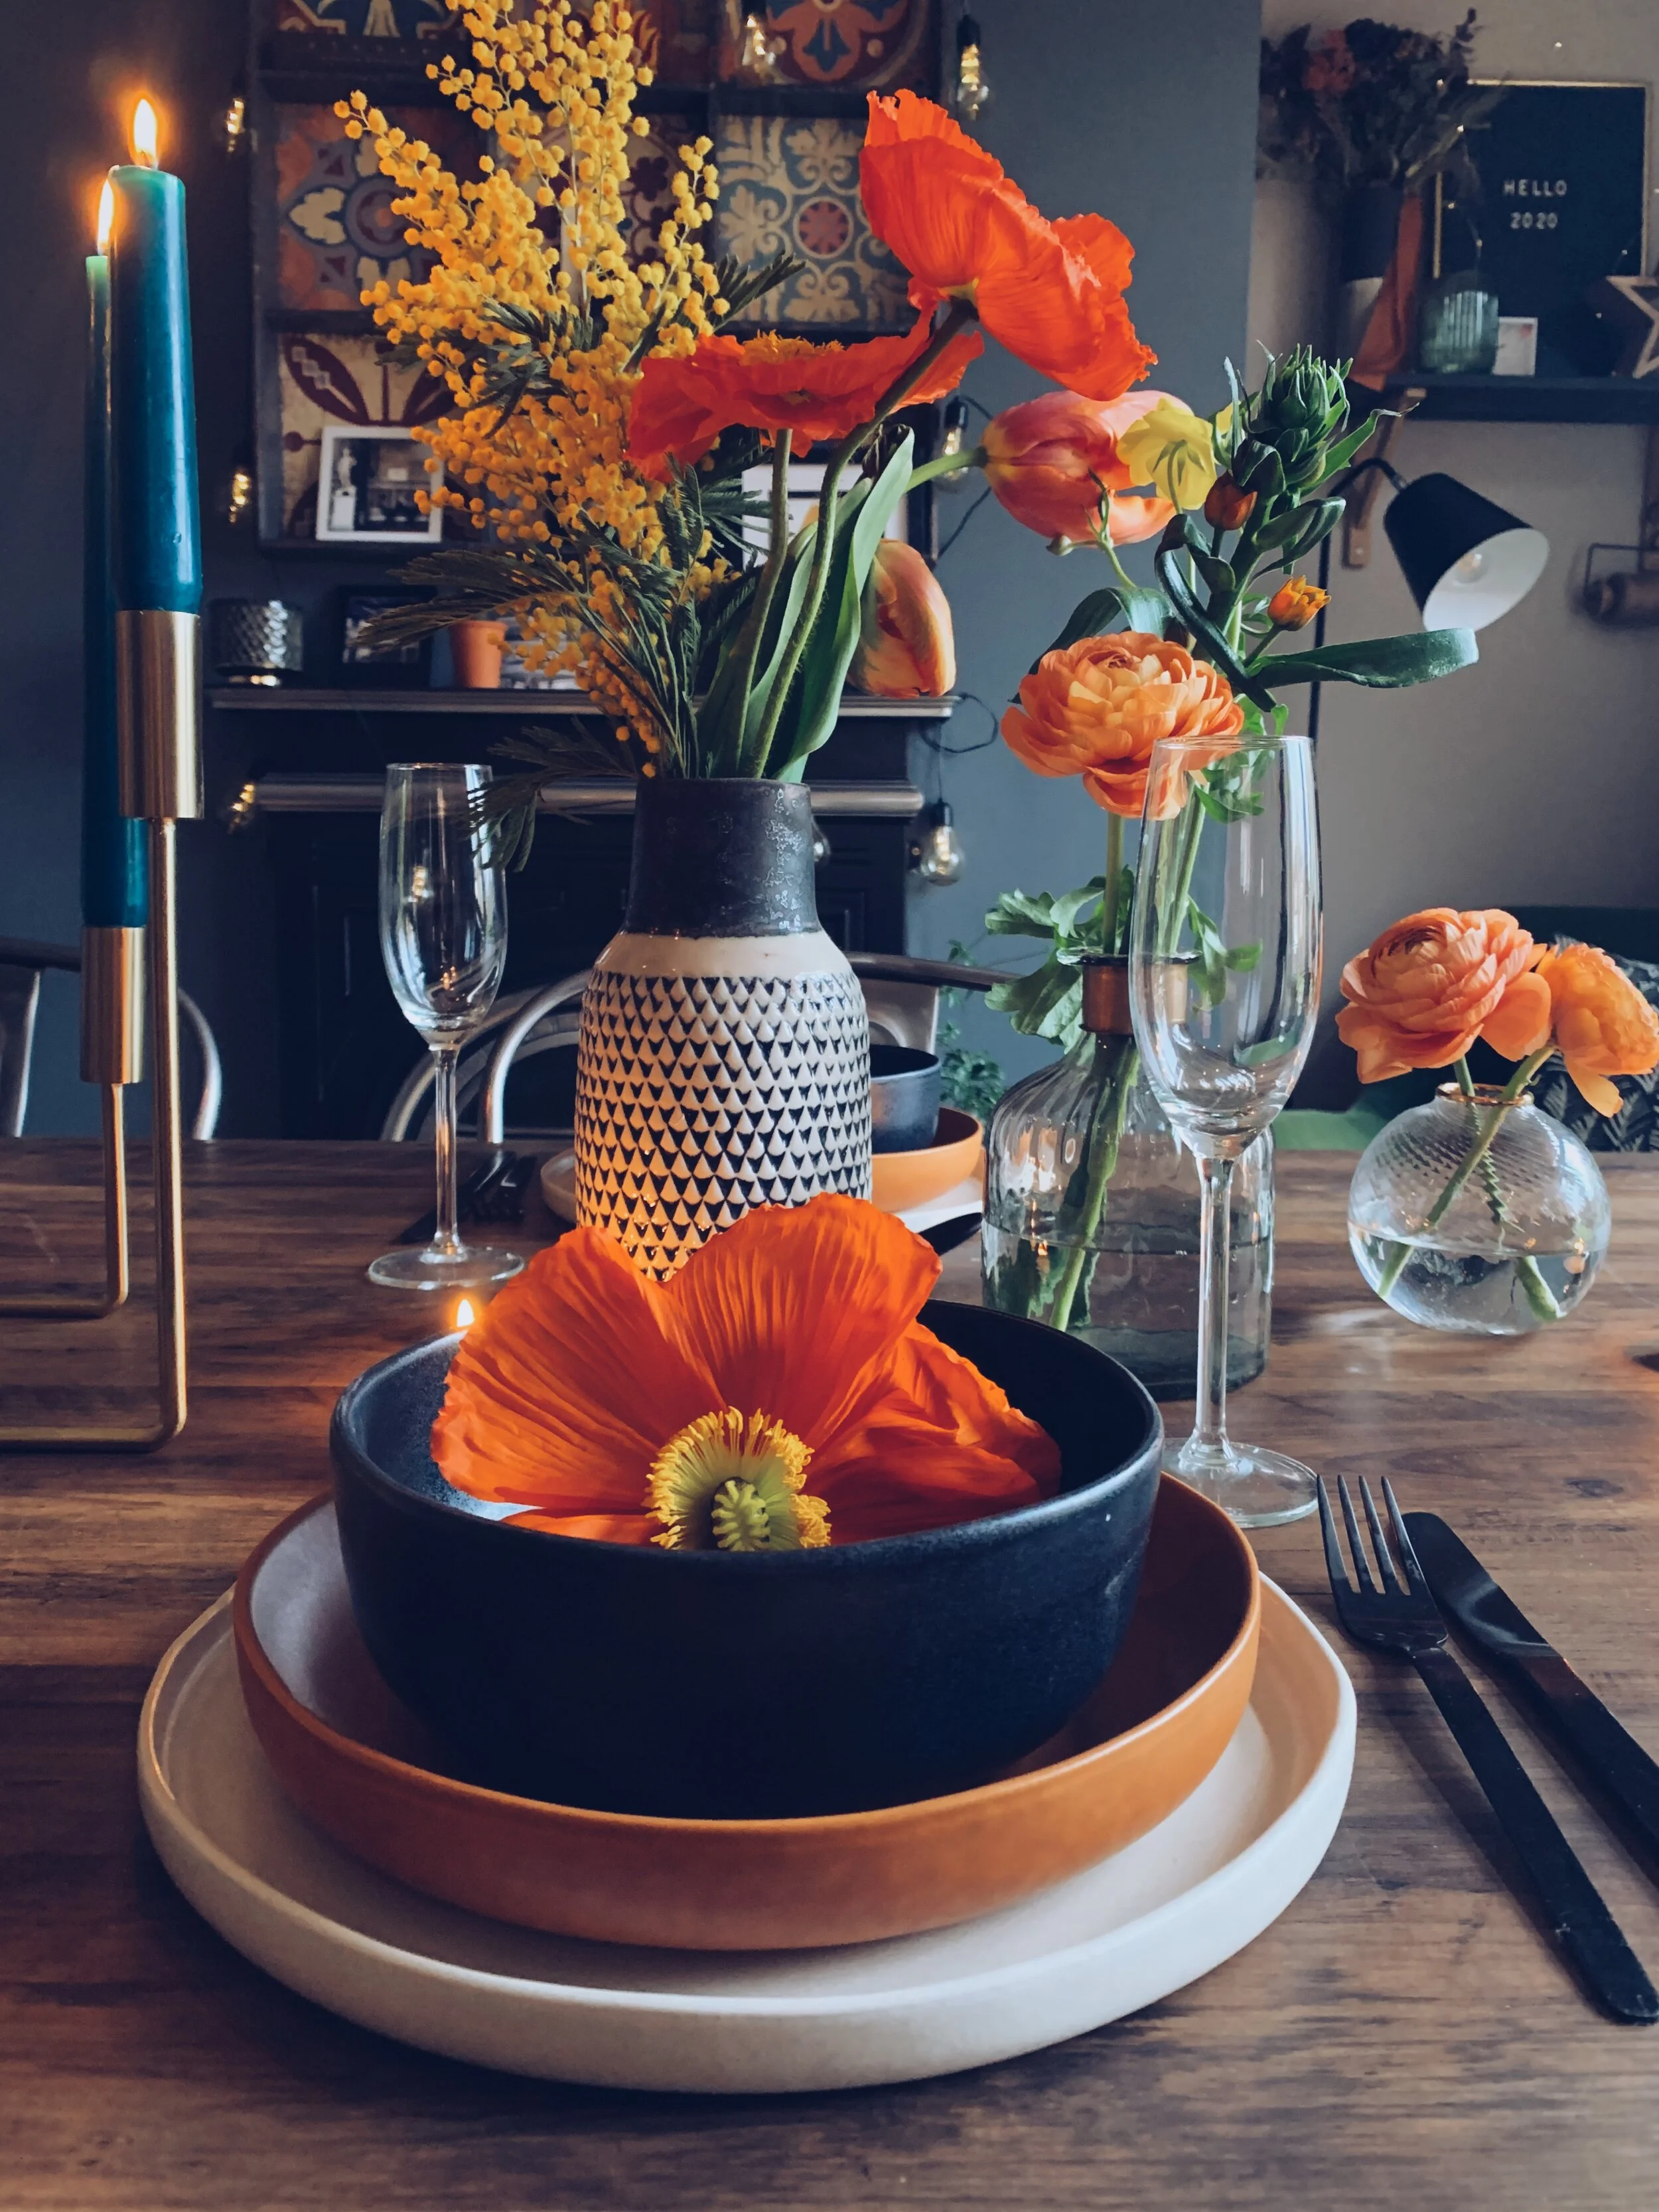
Find your centrepiece. This could be a candlestick, a bunch of flowers or a decorative ornament. Place it directly in the centre of the table. The Verona candlestick is the perfect item for me as it dictates the height of the other objects I’m going to put on the table. I have used some left over wedding candles but my next favourite place to get tapered candles is Sostrene Green. They do all different colours for whatever scheme you may be looking to achieve.

Step 2. Centrepiece.
Step 3
Add the secondary objects. In my case it’s going to be various vases from all over the home. The more random the better for my taste, but there is no right or wrong way to do it. Matching items could work just as well. Play with the positioning of the vases, creating a pyramid shape with the tallest items towards the centre and the smaller ones towards the ends of the table.


Step 4
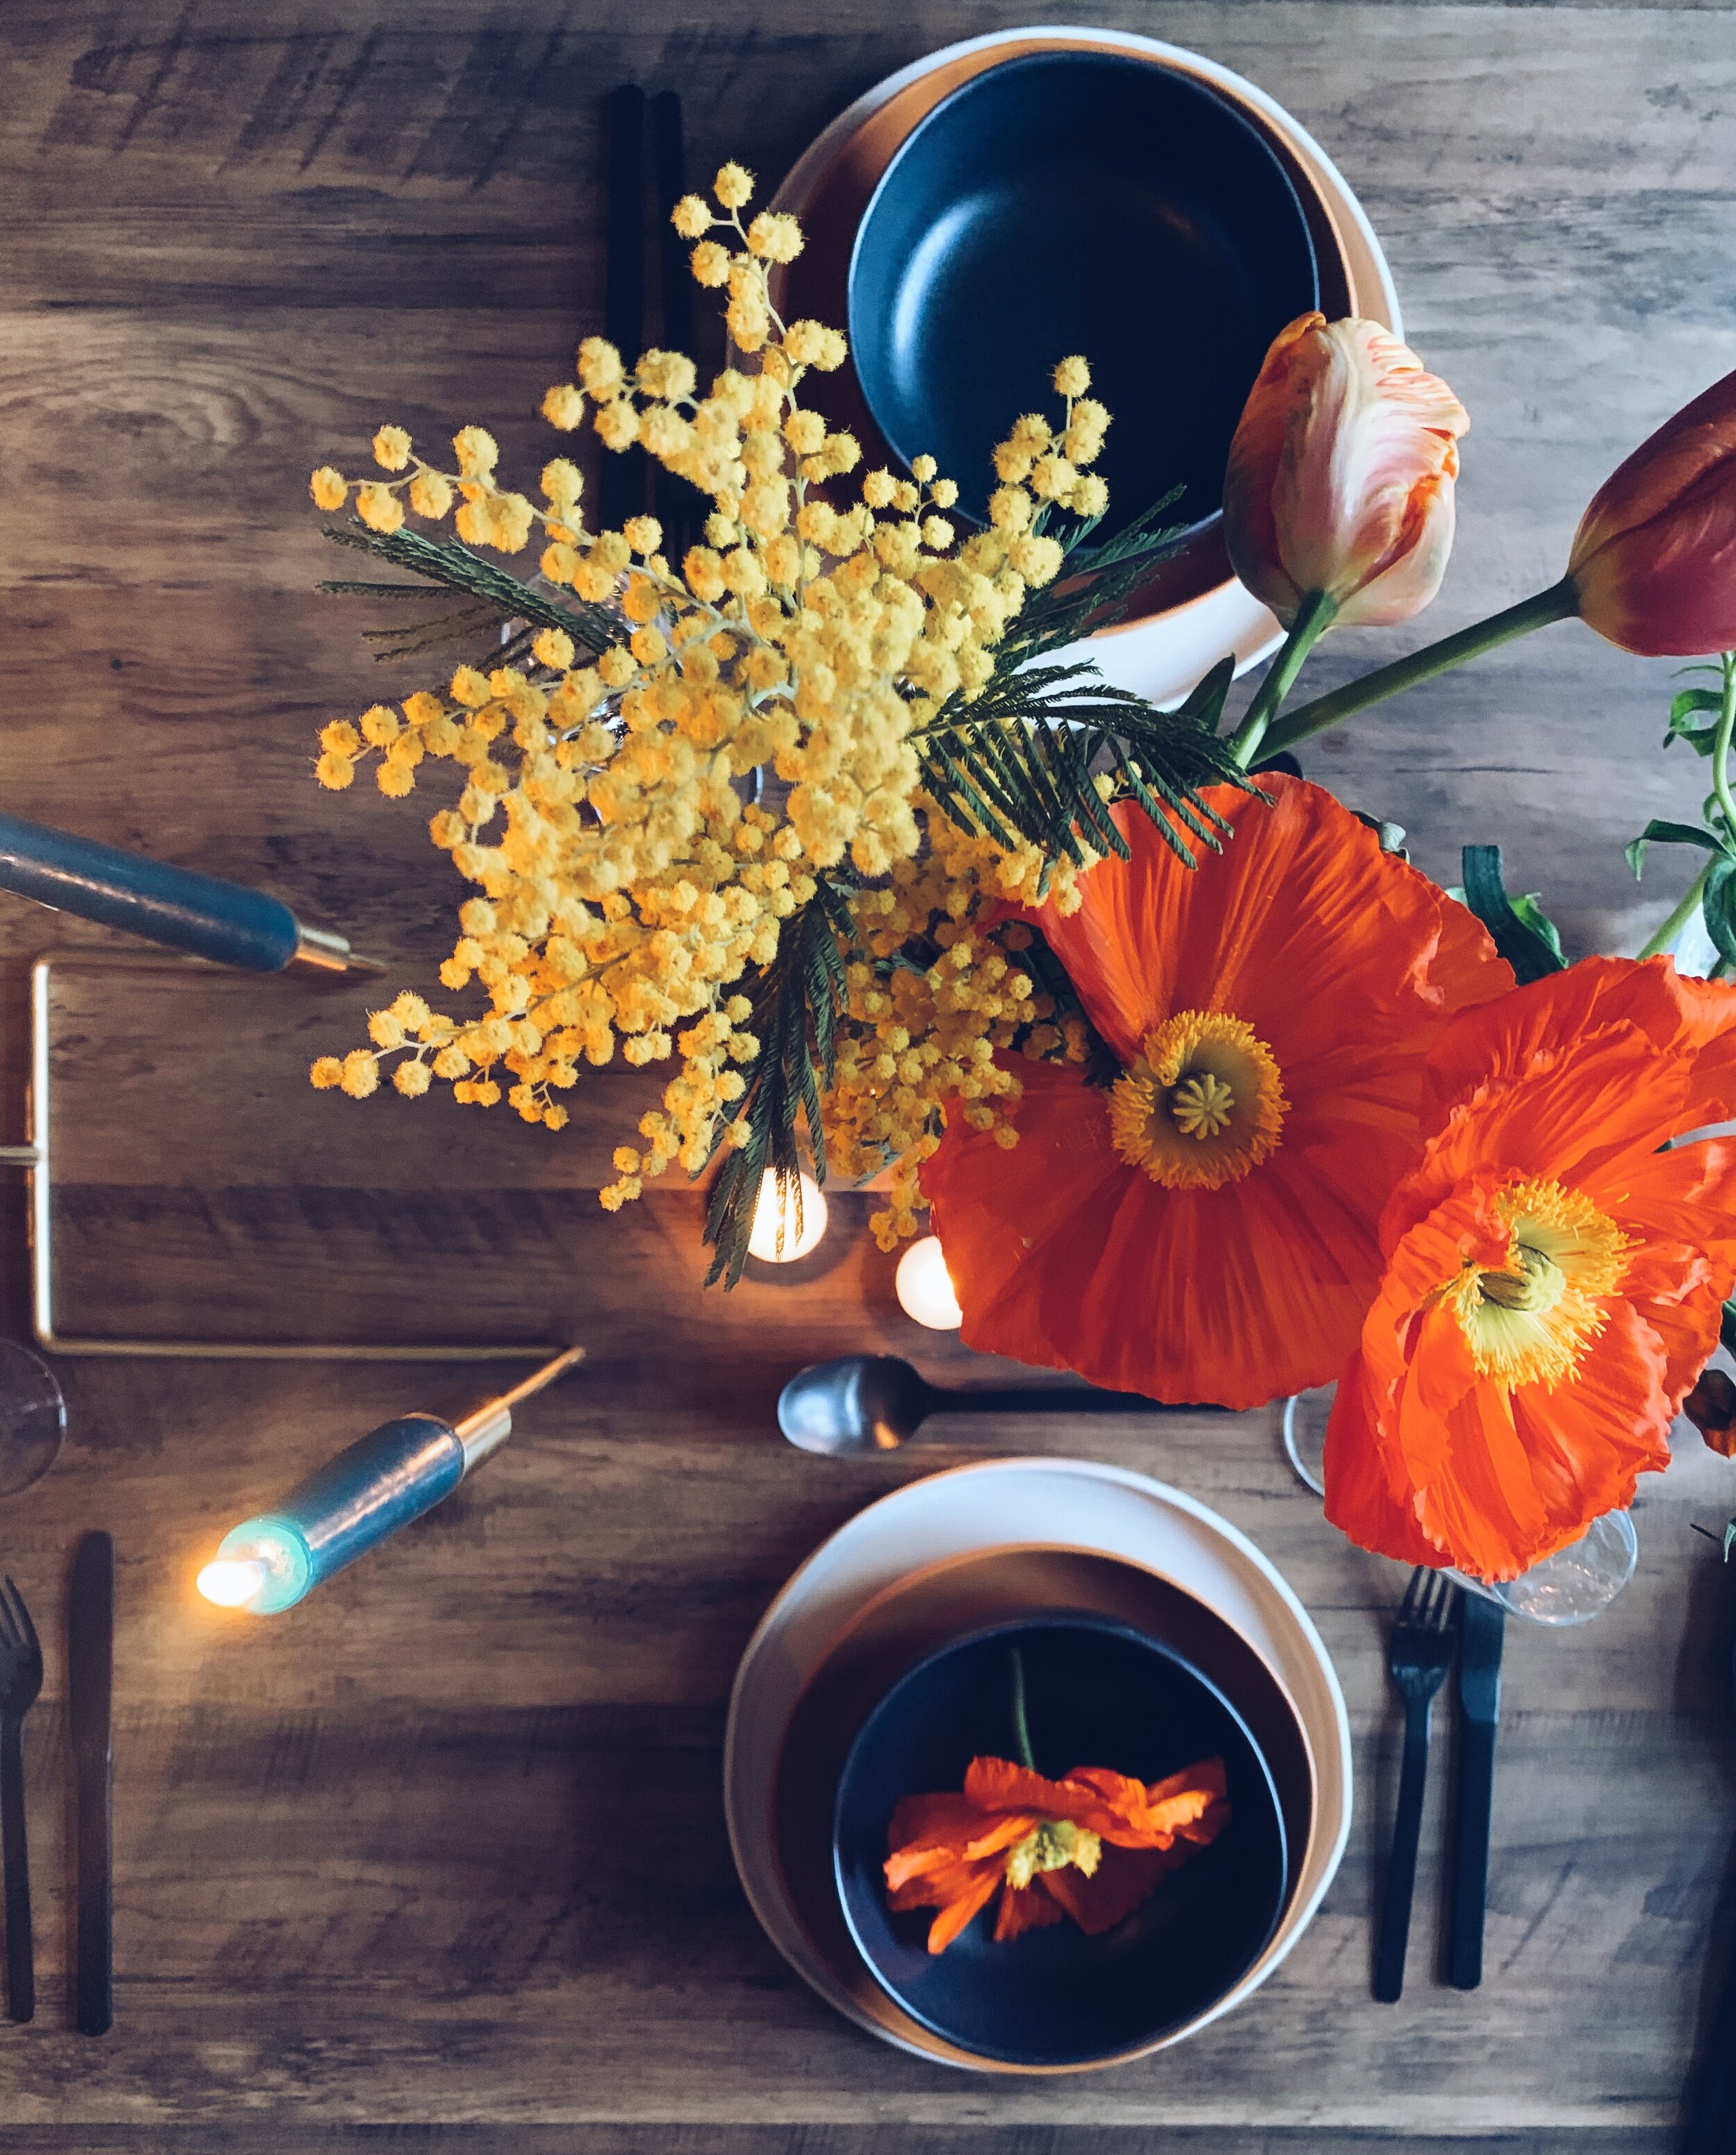
Insert Flowers. I have gone for a wild theme with lots of pops of oranges and yellows for a fresh feel. Any colour and any flower will look pretty and I love when they are spread over numerous vases - it gives a “freshly picked from the garden” feel. Shout out to Sian from The Flower Lounge in Didsbury for supplying me with the most gorgeous poppies and french tulips.

Flowers add that extra wow factor to any dining table.
Step 5
Place the tableware. Made’s gorgeous Ingram 12 piece dinner set was the inspiration for the colour scheme as you can see with the terracotta side plates. Gone are the days of matching tableware, it’s time to get adventurous. The stoneware is imperfect with different shapes making it impossible for stacking but it gives that real authentic earthy feel, which I love. Pairing with matt black Bude cutlery gives a contemporary edge.

Made x Northern Styling
Step 6
Final touches. Scatter tealights in between the vases, light all candles and if you want to add a extra wow factor - add a token favour on the plate. I used some left over poppy heads which looked lovely against the black bowls. Other ideas include styling the napkins in the bowls or gorgeous tonal fruit for a decorative touch.

Voila! Candles, flowers and gorgeous tableware help make a wow factor dining table.
Step 7
Admire your handiwork. Always take a step back in between stages to assess the table from afar. Does it look balanced? Is it symmetrical if that’s what you were going for? Don’t forget to take some snaps. Would love to be tagged to see all your creations!

Happy Styling!


The Dining Room Transformation
A little insight into our dining room transformation...

The dining room has been a gradual process over a year and half, which although considering how impatient I normally am to have something finished, has worked out perfectly. I really feel like this room has evolved over time and will continue to evolve in the future as we grow.
This was the space that sold the house to us, the open plan kitchen/dining space at the back of the building in which I immediately started imagining entertaining friends, having romantic meals and generally hanging out here. We live on a fairly busy road so this space is an escape and perfectly private. The romantic meals might be few and far between but the parties and fun are definitely not!
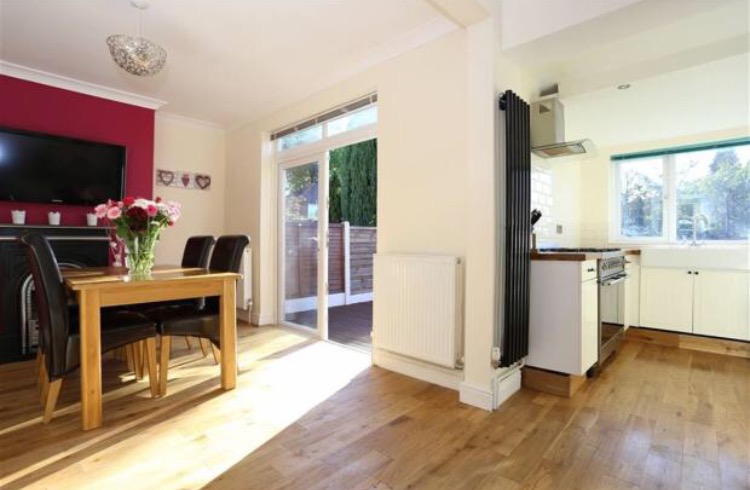

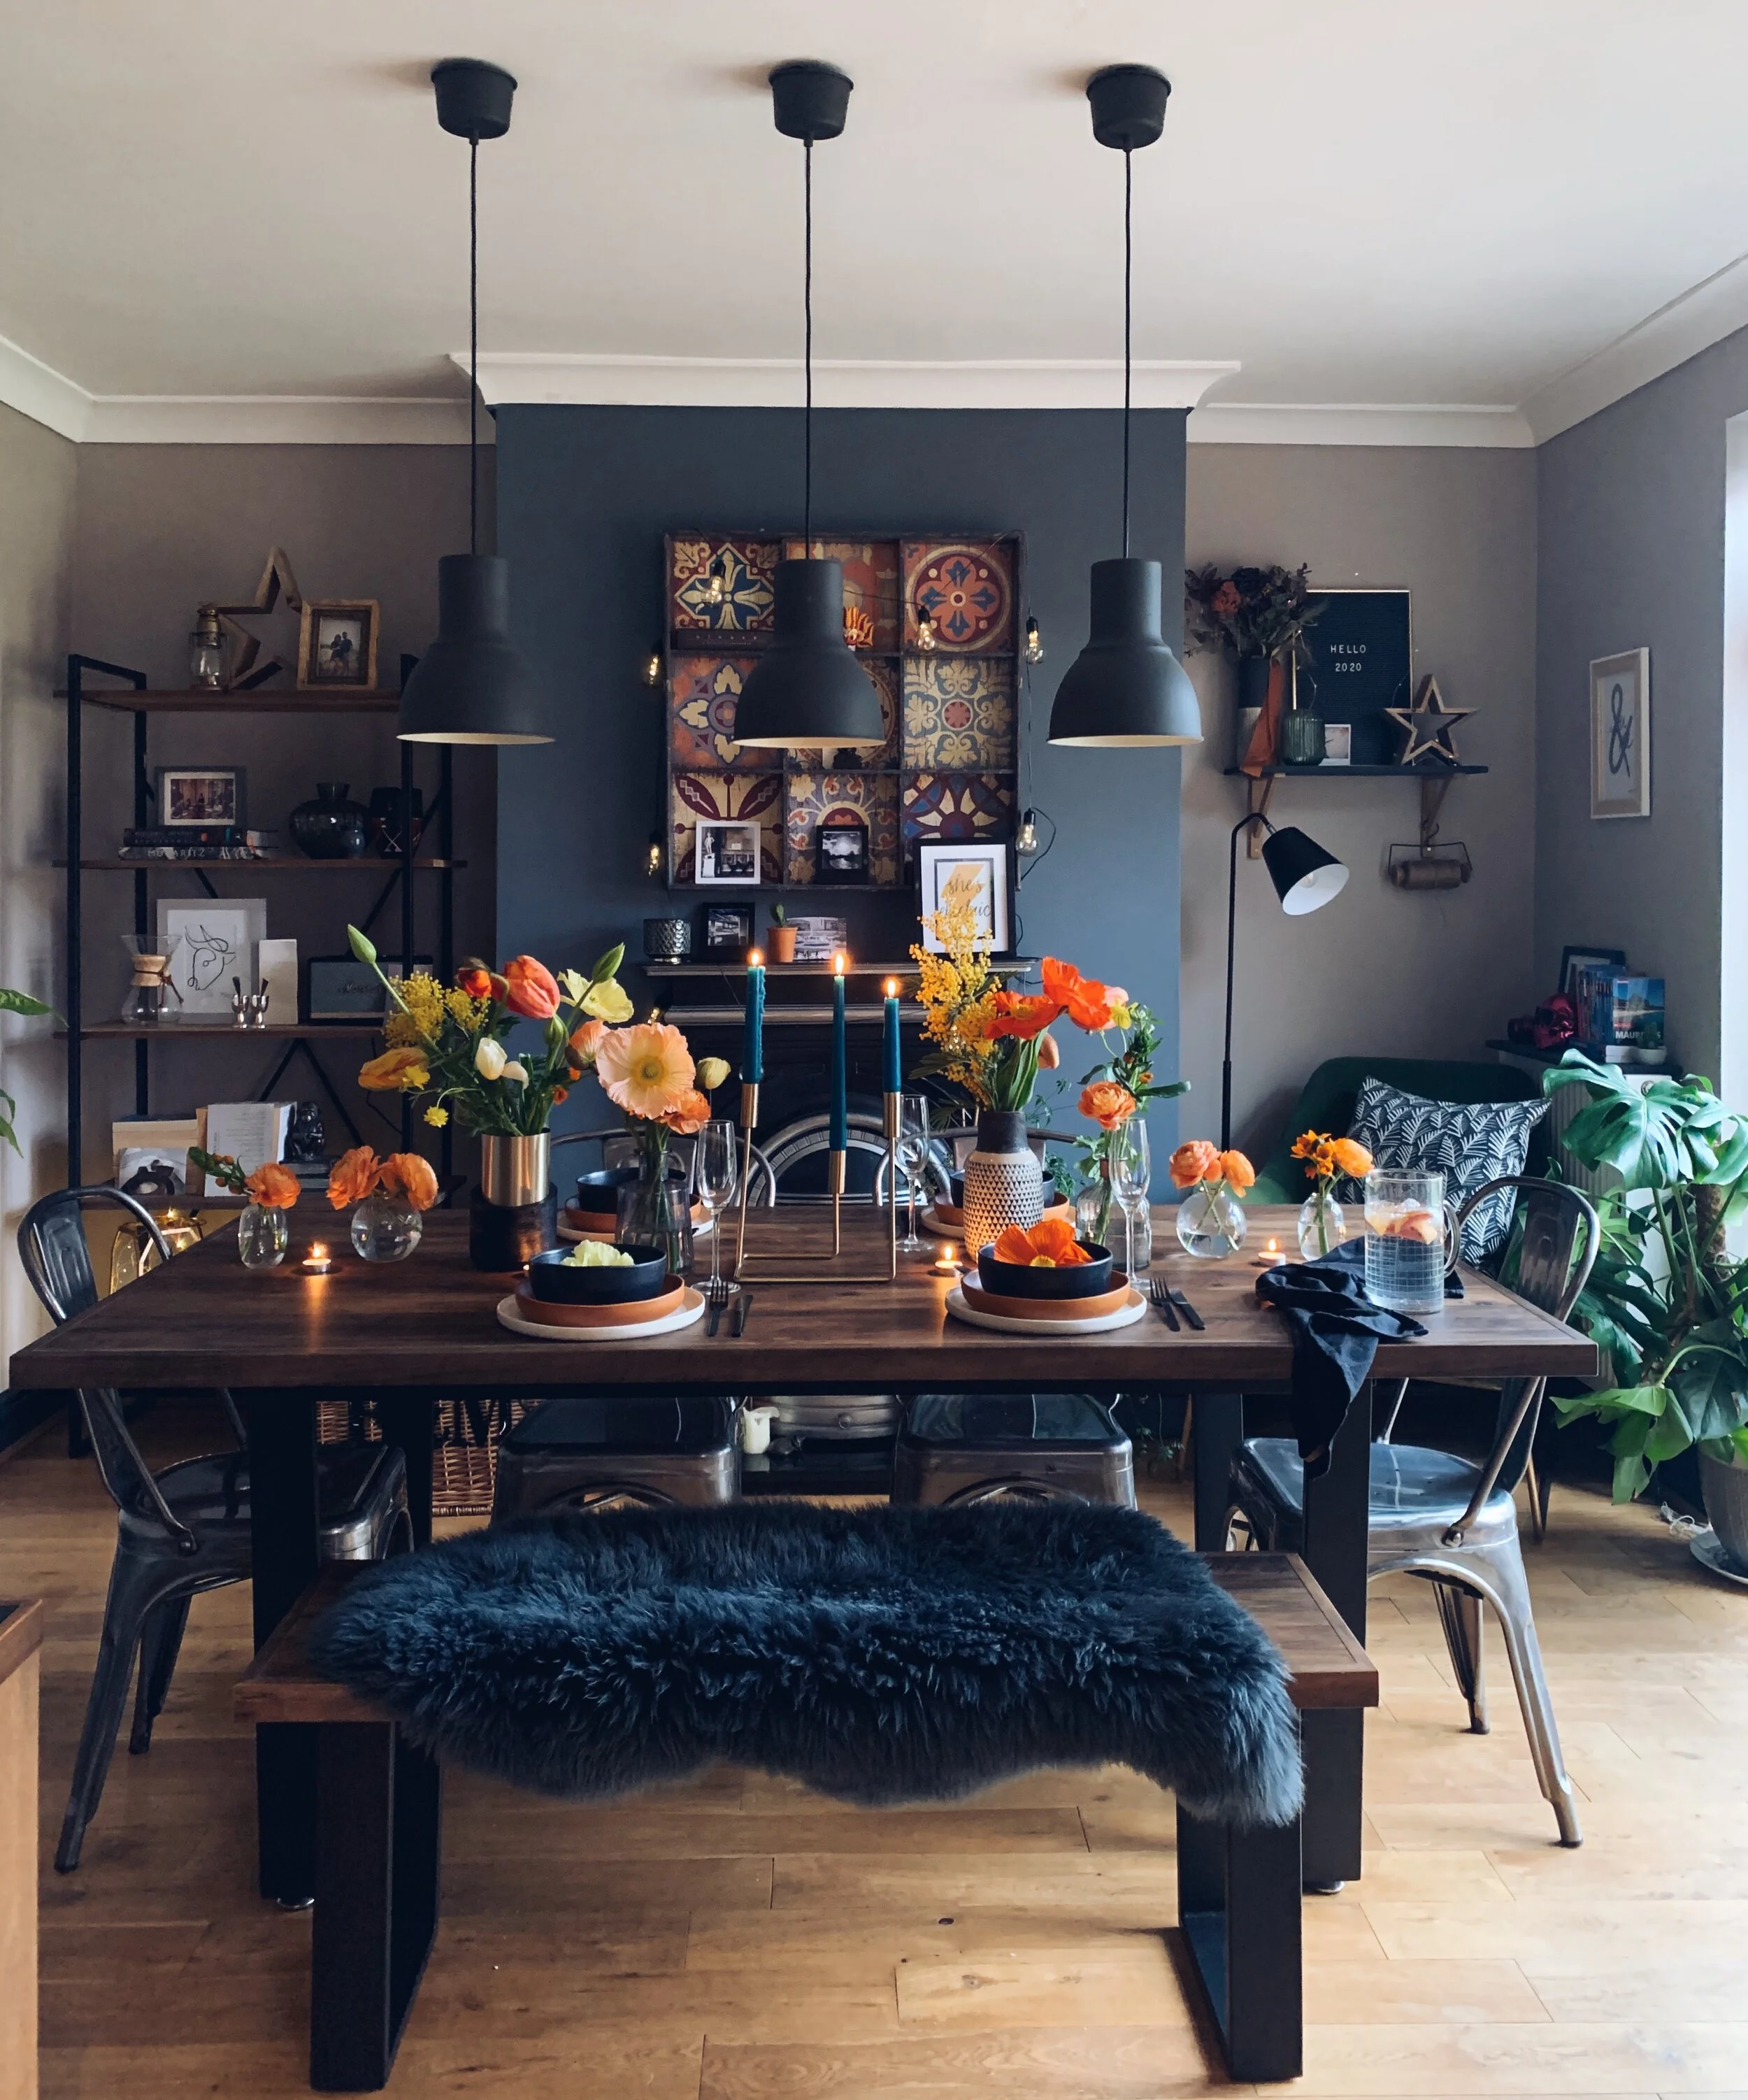
The first thing we did was get rid of the red - the previous owners had a hankering for all things red and pink. I, on the other hand, am obsessed with grey! The room and kitchen were in pretty much brand new condition so I just went with painting the chimney breast. This is something which may change over time but it was quick fix for me to paint quickly myself. It's Valspar "Bottlenose Dolphin" which I think we got inspiration from spotting a grey paint feature in an interiors mag. We spent the first 2 months in this space on camping chairs with a coffee table whilst we waited for the sofas to be delivered and for the tv connection to be installed in the living room. Very glam!

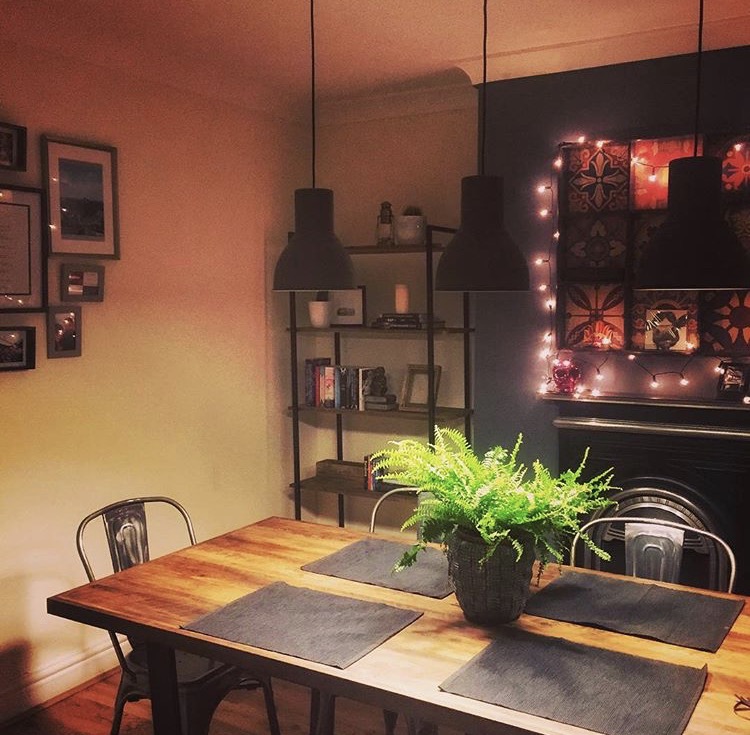
The Instagram favourite piece is the wall art above the fireplace which I bought whilst working as a Visual Merchandiser for BHS. It was such a bargain, we hadn't even found a house at this point but I couldn't resist it. The fairy lights were added for the housewarming as the OH isn't too keen on "girly things." At the time I was obsessed with an internet provider ad which showed a house party and Chaka Khan was playing, there were fairy lights everywhere, the house was filled with people and it just looked like the best party ever. That's what we tried to recreate and I maybe bias but it came pretty close! Once the lights were up, they never came down!
Our table and bench set is from Next - I had a very clear vision from the start in terms of a dining table and this fit perfectly. We ordered the chairs from eBay which I was terrified of doing but it turned out to be the most seamless transaction I've ever done! It became very apparent we were creating an industrial look without thinking too much about it, but the dark woods and the metal legs became a running theme.
The pendants are good old IKEA and we had to wait a while for an electrician to fit them but they were absolutely worth the wait.

The OH sourced the bookshelf as we struggled for ages to find something which would fit in the alcove and with our interior vision. In the end we found it on Maison Du Monde.
The next big purchase was the sideboard which is rarely seen in my Instagram posts, partly due to my struggling orange tree and partly due to it always being hidden from the camera as it's tucked behind a return wall. It's from made.com and is definitely a work in progress.

The final piece of the puzzle came from the infamous green velvet chair from made.com. After Pantone announced their colour of the year 2017 - Greenery, my day job meant I was surrounded by all things green and I wanted to inject some of this into our room. We waited the longest time I've ever waited for something - I think it took 5 months. But once it arrived, the whole area was dreamt up in a day.

All artwork and photographs are a result of my love of trawling craft fairs and makers markets and finding pieces that resonate with us and our life. I also like to think of myself as an amateur photographer so there's also loads of pictures I've taken of Manchester and the North West dotted around.

This space is still our favourite room in the house and we've managed to create exactly what we imagined when first viewing it all the way back in November 2015. It will no doubt see more changes as my day job dictates I can't stop faffing and I can't wait for more dancing on the chairs with cocktails in hand to easy 90's with all our friends.
